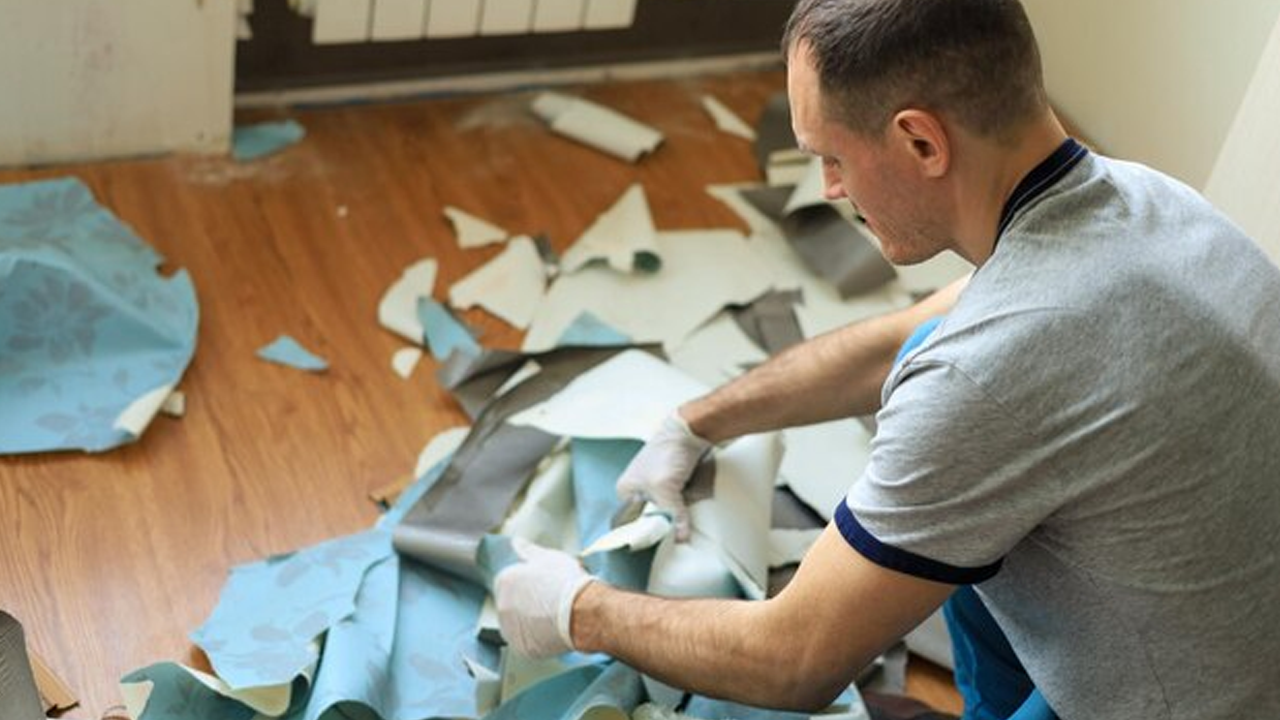
Issues |
Source |
Quick Fix |
Spray gun splitting |
Fluid supply is low, or it's empty. |
Refill the container with supplies. |
Paint pressure too low or none (motor and displacement pump working) |
1 – Low pressure setting. 2 – Clogged gun filter tip. 3 – Tip is worn out. 4 - Fluid displacement pump filter clogged (if used). 5 – Fluid hose significant pressure drop. |
1 – Needs pressure surge. 2 – Tip/filter needs cleaning. 3 – Change tip. 4 – Filter cleaning. 5 – Requires larger diameter hose. |
Wet cap paint leaks |
1 - Loose wet cap. 2 – Damaged or worn-out throat packings. 3 – Worn out piston rod. |
1 - Tighten enough for leakage stoppage. 2 – Packings replacement. 3 – change piston rod. |
Paint pump not working (motor operates) |
1 – Low pressure settings. 2 - Dry paint is blocking the displacement. |
1 – Needs pressure increase. 2 – Pump servicing. |
Displacement pump operates, but output is low (down stroke/both strokes). |
The lower check valve is not properly seated. |
Check the lower check valve ball. |
Upstroke output is low, but displacement pump operates. |
1 - Incorrect seating of the upper check valve ball. 2 - Wear or damage to lower packings. |
1 - Upper check ball valve service. 2 – Packings need changing. |
Low pressure prevents displacement pump operation. |
1 – Large tip. 2 - Power drop from long extension cords. |
1 – Small tip needed. 2 - Shorten the cord. |
Motor stoppage |
nil |
Overload switch reset. |
Prime does not occur with the displacement pump. |
1 - There is an obstruction or stuck ball. 2 - A leak in the bypass hose (bubbles are escaping.) |
1 - Check ball valves upper and lower. 2 - If equipped, inspect suction hose for holes. Check suction nut and O-ring on lower ball cage. |
No unit operation |
1 – Tripped Thermal breaker. 2 – Electric problem. |
1 – Reset needed. 2 - Get service |
There is an issue starting the machine. |
|
1 - Turn the ON-OFF toggle switch to "ON" and press the Pressure Control Knob to maximum pressure. Make sure the unit is plugged in.
|
The unit cannot be primed. |
1 - Ball valves and piston packings are dried out. 2 - Air in pump or hose or plugged inlet screen.
5 - Clogged Siphon tube. 6 - Siphon tube air leak. 7 – Tip clogged. |
1 - Check lower ball for free movement by removing siphon tube. Turn on pump and pour paint thinner over end of fluid section. 2 - Take out, clean. Run spray gun about 10 seconds to purge air.
4 - Add compatible solvent to pump. When pump is up to pressure, carefully remove it from solvent container and immerse inlet tube into heavy material. Remove nozzle tip and trigger gun until heavy material appears. You're ready to spray. Replace nozzle tip. 5 - Remove and clean. 6 - Test connection and seal. 7 - Clean, relieve pressure, remove tip. |
The unit cannot build pressure. |
1 - Unset pressure adjusting knob. 2 - Filter dirty inlet. 3 - Worn or dirty valve balls. 4 - Air in pump or hose. 5 – Packings worn out. 6 – Spray tip worn out. 7 – Internal leakage. |
1 - Adjust to increase pressure. 2 - Clean/ temporarily remove. 3 – Clean/Replace. 4 - Run spray gun with trigger open until air is purged. 5 – Replace. 6 – Replace. 7 - Allow airless gun to pump up to pressure and shut off. An internal leak indicates a fluid section rebuild if the pump starts momentarily. |
Leakage from pressure control relief hole. |
Worn "O" Rings. |
Repack/replace transducer. |
Fluid leak at upper end |
1 - Upper packings. 2 - Piston rod worn |
1 - Take up packing nuts or replace packings to relieve pressure. 2 – Replace. |
Bad spray pattern. |
1 – Very large tip size. 2 – Incorrect pressure adjustment. 3 – Not enough fluid delivery. 4 – Fluid to viscous. |
1 – Replace tip with a smaller size. 2 - Adjust pressure control knob. 3 - Filters and strainers must be clean. 4 - Follow manufacturer's instructions for adding solvent. |
Low power unit |
1 - Pressure adjustment low. 2 - Improper voltage supply. |
1 – Increase. 2 - Reconnect input voltage for 115 VAC. |
Pump fuses blown. |
1 – Too much pressure. 2 - The extension cord is too long, or the wire is too thin. |
1 - Have service centre recalibrate the pressure control. 2 - A maximum of 200 feet can be run on #12-gauge wire. Use more airless hose for additional length. |
Airless gun spray tip won't shut off. |
1 - Seat in the spray gun dirty. 2 - Needle stop nut too tight. 3 - Worn valve assembly. |
1 - Apply pressure several times to spray gun. 2 - Loosen the stop-nut. 3 - Replace valve assembly. |
No motor turns on airless pump. |
1 - No power. 2 - Thermal overload switch. 3 - Unit under pressure. 4 - Defective switch or wiring. |
3 - Set bypass valve to prime. 4 - Check wiring and replace if necessary. |
No spray from airless gun. |
1 - Trigger safety on. 2 – Clogged Inline filter. 3 - Adjustable tip blocked. |
1 - Disengage trigger stop. 2 – Clean/replace mesh filter. 3 - Turn knob counterclockwise. |
Fingering or tails on spray patterns. |
1 – Too low pressure. 2 – Too thick material. 3 – Too wide tip adjustment. 4 – Worn out spray tip. |
1 - Increase pressure at pump. 2 - Thin per manufacturer's recommendation. 3 – Pattern size reduction. 4 – New tip installation. |
Distorted pattern |
Plugged or worn tip |
Clean/replace tip. |
Paint is drawn up, but no pressure is built. |
1 - Bypass valve in "prime" position. 2 - Air in hydraulic system. 3 - Unadjusted or worn pressure valve. 4 - Inlet valve worn. 5 - Low oil level. 6 - Filled or worn bypass valve. |
1 - Turn valve to spray. 2 - Bleed air from system. 4 – Change. 5- Oil check. 6 – Clean/replace. |
Spray gun triggers pump, builds pressure, then drops. |
1 - Too wide material. 2 - The bypass valve won't close. 3 - Air in the paint. 4 - Air in hydraulics. 5 - Too big or worn orifice. 6 - Suction strainer clogged. 7 - Inlet or outlet valve worn. |
1 - Follow manufacturer's instructions. 2 – Clean/replace. 3 - Check suction hose & connections. 4 – Bleed. 5 - Adjust tip or replace strainer. 6 – clean/replace. 7 – replace. |
The spray tip clogs. |
1 – Paint contamination. 2 – Dried up paint in the spray tip. |
1 - Strain paint. Change filters or clean. 2 - Keep tip moist when not spraying. Replace tip with adjustable tip. |
Sprayer won't start. |
1- Plug problems. 2 - On-Off switch Off. 3 - Blown fuse in circuit. 4 - Low voltage at wall plug. 5 - Bad On-Off switch. 6 - An extension cord or motor cord is damaged. 7 – Motor problems. |
1 – Plug in. 2 – Flip switch On. 3 – Fuse replacement. 4 – Power supply voltage testing. 5 – Talk to an authorised service centre. 7 - Talk to an authorised service centre. |
Paint does not draw into sprayer. |
1 - The suction tube should be fully immersed in paint. 2 – Clogged suction filter. 3 - The inlet valve is loose. 4 - Inlet valve stuck. 5 - A dirty or worn-out outlet valve. 6 - Bypass knob in "Spray" position. 7 - Pressure knob in "Low" setting. 8 - Air in the hydraulic system. 9 - Bypass Valve plugged. 10 - Suction tube problem. 11 - Inlet valve damage (neck). |
1 - More paint. Dip suction tube in paint. 2 - Clean filter screen. 3 - Clean connection and tighten. 4 - Push valve with a pencil. 5 - You can remove and replace the outlet by pushing the push button valve. 6 - Turn bypass knob to "Prime". 7 - Turn pressure knob to "High". 8 - Bleed air out of the unit. 9 - Remove to clean/ replace. Take to service centre. 10 - Check for air leaks. Replace if necessary. |
No sound. |
1 – Check plugs. 2 - House circuit breaker. 3 - Thermal overload switch tripped. |
1 - Check cord & plug. Test motor switch. 2 - Check breaker. Try another electrical outlet. 3 - Handle motor. Turn "off" if hot. Before starting, let the motor cool. |
Runs, but hums. |
1 - Pump under pressure. 2 - Incorrect voltage. 3 - Extension cord. 4 – Condenser. |
1 - Set bypass valve to prime. 2 - Check house voltage. 3 - Maximum length 100' - 10 ga. 4 - Replace. See service centre. |
Vacuum, won't prime. |
1 - Filter clogged. 2 - Air leak in suction set. 3 – Not submerged suction head. 4 - Paint too thick. |
1 - Clean filter or replace. 2 - Test connections. Adjust. 3 - Check. Add more paint. 4 - Thin as recommended. |
No vacuum |
1 - Turn off "spray". 2 - Pressure knob on "low". 3 - Inlet valve stuck. 4 - Outlet valve stuck. 5 - Air in oil system. 6 - Inlet valve worn. 7 - Outlet valve worn. 8 - Oil in the paint. |
1 - Turn counterclockwise. 2 - Turn pressure knob clockwise. 3 - Drain suction hose. With finger, press inlet valve. 4 - To prime, pour liquid into inlet valve. The outlet ball can be freed by removing the plug. 5 - Check oil level & bleed system. 6 – Check/replace per manual. 7 - Check/replace per manual. 8 - Replace diaphragm per manual. |
Pressure-free primes. |
1 - Suction filter. 2 - Bypass valve on prime. 3 - Bypass vale leaking. 4 - Air in oil system. |
1 – Clean/replace filter. 2 - Click clockwise to "spray". 3 - Check for flow out o. 4 - Check oil and bleed system. |
Paint Sprayer Repair Service in Sydney
Pressure low |
1 - Gun filter clogged. 2 - Suction filter clogged. 3 - Paint too thick. 4 - Outlet valve worn. 5 - Pressure valve worn. |
1 – Clean/replace. 2 – Clean/replace. 3 - Thin as recommended. 4 – Check or change. 5 - Replacing or resetting. |
Not enough spray (pressure good). |
1 - Sprayer gun filter clogged. 2 – Clogged tip. |
1 – Clean/replace. 2 – Remove/Clean. |
Spray Gun |
||
Released trigger drips paint. |
1 - Gun valve dirty. 2 – Gun valve worn out. 3 - |
1 - Disassemble & clean. 2 - Replace as per gun manual. |
Dripping spray |
Spray tip worn. |
Change. |
Uneven spray. |
1 - Dried paint in spray tip. 2 - Spray tip worn. |
1 - Remove and clean. 2 - Replace. |
Shock while spraying |
1 – Non grounded pump. 2 - Groundless metal object being painted. |
1 - Make sure extension cords are working. 2 - Attach ground wire to object. |
Spray tip of Airless Gun does not shut off material. |
1 - Dirty spray gun ball or seat. 2 - Diffuser seat worn. 3 - Needle assembly worn. |
1 - While under pressure, trigger the gun several times. 2 - Replace Diffuser assembly. 3 – If required, change. |
No spray from airless gun. |
1 - No pressure at spray gun. 2 - Spay tip clogged. |
1 - Make sure pump is working, check filter and strainer (clogged). 2 - Compressed air and a pointed needle to clean the tip. |
Spray pattern on airless gun's tails. |
1 – Pressure too low. 2 – Too thick material. 3 - Spray tip worn. |
1 - Pump pressure up. 2 - Thin paint according to manufacturer. 3 – Replace. |
No motor turns on airless pump. |
1 - No power. 2 - Defective switch or wiring. 3 - Unit under pressure. 4 - A defective motor could be the result of the above problems. |
1 - Fuse check. 2 - If necessary, replace switch and wiring. 3 - Positive stop by turning counterclockwise. 4 - If needed, replace motor. |
Are you tired of dealing with a leaky roof? Do you have broken roof tiles that need fixing? Well, you've come to the right place! This article will show you how to repair broken tiles and get your roof back in shape.
Whether your roof tiles are cracked, chipped, or completely shattered, we’ve got you covered. We will provide step-by-step instructions on identifying when your roof tiles should be replaced, how often they should be replaced, and whether cracked roof tiles can be repaired.
Additionally, we will also share with you some tips on the best adhesives for broken roof tiles—and whether you can replace tiles from inside the roof… So, grab your tools and let’s start fixing your roof!
If you start noticing water stains on your ceiling and a musty smell in your home, it's a key indicator that you need to replace those worn-out roof tiles. Ignoring these signs can lead to severe damage, like mould growth and structural issues.
Wondering how you should go about replacing roof tiles? First, you need to identify the broken ones. Look for any cracks on the roof tiles or if there are any missing tiles.
Once you've located the damaged tiles, it's time to remove them. Use a flat bar or a roof tile lifter to carefully lift the surrounding tiles and expose the broken ones. Gently pry it out and clean any debris or old mortar from the area.
Now, you're ready to install the new tile. Apply a layer of mortar on the back and slide it into place, ensuring it aligns with the neighbouring tiles. Press it down firmly, and you're done!
Proper broken roof tile repair prevents further damage and keeps your home safe and dry.
Regular maintenance and periodic inspection are essential to ensure the longevity and reliability of your roof tiles. However, it's important to note that roof tiles are designed to last many years before needing replacement. On average, roof tiles should be replaced every 20 to 50 years, depending on various factors such as the type of material used, climate conditions, and maintenance practices.
Here are three factors that can affect the lifespan of your roof tiles:
- Weather Exposure: Constant exposure to harsh weather conditions like heavy rain, strong winds, and extreme temperatures can accelerate the wear and tear of roof tiles.
- Maintenance: Regular cleaning and removal of debris can help prevent damage and prolong the lifespan of roof tiles.
- Quality of Installation: Proper installation techniques and the use of high-quality materials are crucial in ensuring the longevity of roof tiles.
Remember, it's always best to consult with a professional roofing contractor to assess the condition of your roof tiles and determine the appropriate time for replacement.
When you notice cracks in your roof tiles, it's crucial to address them promptly to ensure structural integrity and protect your home from potential leaks. Cracked roof tiles should be replaced as soon as possible to prevent further damage.
Even tiny cracks can allow water to seep through, leading to water damage, mould growth, and compromised insulation. Ignoring cracked roof tiles can result in more extensive and costly repairs down the line. To determine if a cracked roof tile needs replacing, you can refer to the table below for guidance:
Cracked Tile Size |
Replacement Required? |
Small hairline crack (<1 inch) |
No |
Multiple hairline cracks |
Yes |
Large crack (>1 inch) |
Yes |
Cracked or missing corner |
Yes |
Severely damaged or broken tile |
Yes |
Addressing cracked roof tiles promptly will help maintain the integrity of your roof and protect your home from potential water damage.
One option for damaged roof tiles is to fix them through professional services. If you have broken roof tiles, you may wonder if they can be repaired instead of replaced—The good news is in most cases, broken roof tiles can just be repaired instead of replaced.
You can even do it with a Soudal Soudagum repair kit - https://www.paintaccess.com.au/collections/soudal-products/products/soudal-soudagum-hydro-membrane-repair-kit-grey-1kg
Professional roofers have the expertise and tools to fix cracked or damaged tiles, saving you the total replacement cost. They will assess the extent of the damage and determine the best course of action.
They can carefully mend the broken tiles using specialised adhesives and sealants, ensuring they are secure and watertight. It is essential to address damaged tiles promptly to prevent further issues and maintain the integrity of your roof.
If you want to add a touch of modern style to your home, you can easily upgrade your roof tiles to Colorbond. This durable and attractive roofing material is an excellent alternative to traditional tiles.
Here are a few reasons why you should consider replacing your roof tiles with Colorbond:
- Enhanced aesthetic appeal: Colorbond offers a wide range of colours and finishes, allowing you to choose a style that complements your home's exterior.
- Long-lasting durability: Colorbond is made from high-quality steel resistant to cracking, chipping, and warping, ensuring your roof will withstand the test of time.
- Improved energy efficiency: Colorbond roofing has excellent insulation properties, helping to keep your home cooler in summer and warmer in winter.
- Low maintenance: Unlike roof tiles that can break or become dislodged, Colorbond requires minimal maintenance, saving time and money.
Upgrade your roof to Colorbond and enjoy a stylish, durable, and hassle-free roofing solution for years!
Covering a shattered tile can provide a temporary fix to safeguard your home during turbulent weather. First, gather the necessary materials: a tarp, roofing cement, a putty knife, and roofing nails.
Carefully climb onto the roof using a sturdy ladder and locate the broken tile. Use the putty knife to remove debris or loose pieces around the area.
Next, position the tarp over the damaged tile, ensuring it covers the entire area. Secure it using roofing nails, ensuring you avoid damaging neighbouring tiles.
Apply roofing cement along the tarp's edges to create a watertight seal.
Finally, inspect the repair periodically and replace the tile immediately to prevent further damage. Remember, this is a temporary solution until you can adequately replace the broken roof tile.
If you're wondering how best to repair roof tiles, you've come to the right place! Repairing broken roof tiles is an important task, as it can prevent further damage to your home. Here’s an effective method for replacing any damaged tiles with a new one:
Remove any debris or loose pieces around the broken tile.
Carefully lift any surrounding tiles and slide the new tile into place. Ensure it aligns appropriately with the existing tiles to ensure a seamless repair.
Secure the new tile with roofing nails or adhesive.
Remember to prioritise safety and use appropriate protective gear during the repair process.
Step |
Instructions |
1 |
Remove debris and loose pieces around the broken tile. |
2 |
Carefully lift the surrounding tiles. |
3 |
Slide the new tile into place, ensuring alignment with existing tiles. |
4 |
Secure the new tile with roofing nails or adhesive. |
5 |
Prioritise safety and use appropriate protective gear during the repair process. |
Are you looking to fix your damaged roof tiles? Find out which adhesive works best for your needs and get your roof looking as good as new in no time!
When repairing broken roof tiles, choosing a suitable adhesive is crucial for a long-lasting and secure fix.
The best adhesive for broken roof tiles is a roofing sealant or adhesive specifically designed for this purpose. Look for an adhesive that is weather-resistant, waterproof, and can withstand extreme temperatures.
Additionally, opt for an adhesive that is easy to apply and dries quickly to ensure a hassle-free repair process. Remember to follow the manufacturer's instructions carefully and clean the area thoroughly before using the adhesive.
You can confidently repair your broken roof tiles with suitable adhesive and protect your home from leaks and further damage.
Can I glue broken roof tiles?
Yes, you can glue broken roof tiles. It can be a simple and effective solution to repair them. A suitable adhesive is essential for this task. Choose an adhesive specifically designed for roof tile repairs. Look for adhesives that are weather-resistant, durable, and offer a strong bond.
Here are three popular adhesives recommended for repairing broken roof tiles:
- Polyurethane adhesive: This adhesive forms a strong, flexible bond and is resistant to temperature changes and moisture.
- Silicone adhesive: Known for its excellent weather resistance, it provides a reliable and long-lasting fix for broken roof tiles.
- Epoxy adhesive: Offering a strong and permanent bond, epoxy adhesive is ideal for repairing cracks or breaks in roof tiles.
Always follow the manufacturer's instructions when using any adhesive for roof tile repairs.
Replacing tiles inside the roof can be a convenient solution for addressing missing or damaged sections. However, it is essential to note that this method is only suitable for also roofs.
If you have a pitched roof, accessing the tiles from the inside might be difficult due to the steep angle. On the other hand, if you have a flat roof, replacing the tiles from the inside may be more accessible.
First, inspect the attic or crawl space by locating the damaged tiles. Once identified, carefully remove the surrounding tiles to access the broken ones.
Next, remove the damaged tiles and replace them with new ones, ensuring they are adequately secured. Finally, reinstall the surrounding tiles and check for further damage or leaks.
Remember to follow all safety precautions and consult a professional if needed.
You can easily replace terracotta roof tiles in Australia without breaking the bank. The cost of replacing terracotta roof tiles can vary depending on factors such as the size of the area that needs to be repaired and the specific type of terracotta tiles you choose.
The average cost per square meter for replacing terracotta roof tiles in Australia ranges from $100 to $150. However, this cost can increase if you need additional services like roof cleaning or repairs to the underlying structure.
Getting a quote from a professional roofing contractor is essential for an accurate estimate of your situation. Remember, investing in repairing your roof tiles is necessary to maintain the integrity and longevity of your roof.
What are the common causes of roof tile damage?
Common causes of roof tile damage include severe weather conditions like hail or strong winds, falling debris, improper installation, and natural wear and tear over time.
Is it possible to repair roof tiles without professional help?
Yes, you can repair roof tiles without professional help. First, It must assess the damage, gather the necessary tools and materials, and carefully follow step-by-step instructions or tutorials to ensure a successful repair.
Are there any temporary solutions to cover a broken roof tile?
Yes, there are temporary solutions to cover a broken roof tile. You can use a tarp or plastic sheet to cover the area and prevent further damage until you can get professional help to repair it properly.
Can roof tile damage lead to water leaks?
Yes, roof tile damage can lead to water leaks. When roof tiles are broken, they create openings for water to seep through, causing potential damage to the underlying materials and leading to leaks inside your home.
Are all types of roof tiles easily replaceable?
Not all types of roof tiles are easily replaceable. Some types may require more time, effort, and expertise to replace. It's best to consult a professional to determine the specific needs of your roof.
In conclusion, if you notice signs of damage or cracks in your tile roof, it is essential to address the issue promptly. Whilst broken roof tiles can sometimes be repaired, replacing them is often more cost-effective.
If you’re looking to move away from roof tiles completely, Colorbond is a great replacement.
Colorbond can be used as a replacement for roof tiles, but choosing the suitable adhesive for the job is essential.
Replacing roof tiles from inside the roof is possible, but may require professional assistance.
The cost of replacing terracotta roof tiles in Australia can vary, so getting a quote from a reputable roofing company is best.
]]>We'll explore how temperature and humidity impact paint application and drying times, and offer practical tips to ensure your painting project is successful, regardless of the weather outside. Whether you're a seasoned painter or a first-time DIYer, our insights will help you navigate the challenges of painting in less-than-ideal conditions. So grab a cup of tea, settle in, and let's unravel the mysteries of indoor painting during those chilly, wet days!
When it comes to painting indoors, temperature plays a crucial role in determining the success of your project. While painting in a cool environment might seem comfortable, there is a threshold below which painting becomes ineffective and problematic. Generally, temperatures below 10°C are considered too cold for indoor painting.
At such low temperatures, the properties of paint are adversely affected. Latex and acrylic paints, which are water-based, can begin to thicken. This increased viscosity makes them harder to apply evenly, leading to streaks and an uneven finish. Furthermore, cold conditions significantly slow down the drying process. Paint that dries too slowly may not adhere properly to the surface, leading to long-term durability issues like cracking or peeling.
Oil-based paints also suffer in cold temperatures. They can become too thick to apply smoothly, and like their water-based counterparts, take much longer to dry. This extended drying time not only delays the completion of your project but can also attract dust and debris, compromising the final appearance.
Additionally, cold temperatures can affect the surfaces being painted. Cold walls, for example, can cause condensation when exposed to warmer air, leading to moisture on the surface that can interfere with paint adhesion.
Painting while it's raining can be a contentious topic among home improvement enthusiasts. On one hand, painting indoors during a rainy day can be perfectly fine, as long as the conditions inside your home are controlled. On the other hand, painting outdoors in the rain is generally not advisable.
When it comes to indoor painting, the key factor to consider is humidity. Rainy weather often brings increased humidity, which can affect how paint dries. High humidity can slow down the drying process, leading to longer waiting times between coats and the potential for a less-than-ideal finish. However, if you can manage the indoor humidity with tools like dehumidifiers and ensure good ventilation, painting indoors on a rainy day is certainly feasible. In fact, the lack of direct sunlight and extreme temperatures can actually make for a more consistent drying process.
Outdoor painting during rain, however, is a different story. Rain can wash wet paint off the surface, leading to streaking and uneven coverage. It can also prevent proper adhesion to the surface, resulting in long-term durability issues. Even if the rain is light, the increased moisture in the air can cause similar problems as high humidity indoors.
The ideal weather for painting inside strikes a balance between temperature and humidity, conditions that remarkably influence the quality and ease of your painting project. Ideally, you want a day that's not too hot or too cold, with temperatures hovering comfortably between 18°C and 23°C. This moderate temperature range ensures that the paint flows smoothly, adheres properly, and dries evenly.
Equally important is low to moderate humidity. High humidity levels can be a painter's nemesis, prolonging drying times and increasing the likelihood of drips and streaks. On the other hand, very low humidity might cause the paint to dry too rapidly, leading to an uneven finish. A relative humidity level between 40% and 50% strikes the perfect balance, allowing the paint to set properly without delay or complication.
Moreover, a day with consistent weather is preferable. Fluctuations in temperature and humidity throughout the day can affect how paint dries, potentially leading to an uneven or flawed finish. A steady weather pattern ensures consistency in drying and curing, yielding the best results.
When you've just given your home a fresh coat of paint, the last thing you want is a bout of unpredictable Aussie weather to spoil it. Understanding the impact of rain and humidity post-painting is crucial, especially in a country where weather conditions can vary dramatically.
Rain can be a real spoiler. If it pours shortly after you've painted, the water can wash away the paint, leading to streaks and uneven coverage. This is particularly true for exterior projects where the paint hasn’t had enough time to dry. In such cases, you might find yourself looking at a redo, which is not just frustrating but also adds to your expense.
Humidity plays a different but equally challenging role. High humidity slows down the drying process, as the moisture in the air prevents the paint from setting quickly. This can lead to a tacky finish or even mildew growth, especially in coastal or tropical regions of Australia where humidity tends to be higher.
To avoid these pitfalls, always check the weather forecast before starting your painting project. Aim for a dry spell with low humidity. And remember, patience is key – giving your paint ample time to dry before the heavens open up is always a wise decision
Painting indoors while it's raining outside can be a bit tricky due to the increased humidity, but with the right approach, you can achieve great results. Here are the top 5 tips:
By following these tips, you can successfully complete your indoor painting project, rain or shine. Remember, the key is to adapt to the conditions and be patient with drying times.
Painting the interior of your home during cold and rainy weather is not only possible but can also be quite successful with the right approach. The key is to understand and mitigate the challenges posed by lower temperatures and higher humidity levels. By ensuring proper room temperature, ideally between 18°C and 23°C, and employing dehumidifiers or heaters to maintain optimal humidity, you can create a conducive environment for your paint to dry evenly and adhere properly.
Remember to be patient, as drying times will be longer in these conditions. Utilising high-quality paints suitable for lower temperatures and monitoring the room’s climate can make a significant difference in the outcome. It’s also crucial to maintain good ventilation to aid in drying and to keep the air quality safe, especially when using oil-based paints.
So, don’t let a gloomy, rainy day dampen your spirits or delay your painting plans. With these tips and considerations, you can transform your space, infusing new life and colour into your home, regardless of the weather outside. Painting indoors during the colder, rainy season can be a rewarding project, turning those dreary days into an opportunity for a cosy, creative indoor makeover.
]]>An airless paint sprayer can be a valuable investment, especially if you are undertaking large-scale painting projects or desire a high-quality finish. Unlike traditional paint brushes or rollers, airless sprayers use high pressure to atomise paint, ensuring a smooth, even coat. This technique is particularly effective for covering large areas quickly, making it a time-saver for tasks like painting walls, fences, or decks.
For professional painters or those frequently involved in home renovations, the efficiency and finish quality provided by an airless sprayer justify its cost. It's also an excellent tool for applying thicker paints that are challenging to spread evenly with a brush or roller. Additionally, the ability to adjust pressure settings allows for versatility across different project types and paint viscosities.
However, for casual users or those with smaller projects, the high cost might not be justifiable. Airless paint sprayers require a significant upfront investment, and there's also the matter of maintenance and cleaning, which can be more labour-intensive than traditional painting tools. Moreover, there's a learning curve involved in achieving an even application without overspray or uneven coverage.
The primary difference between a traditional paint sprayer and an airless paint sprayer lies in their mechanisms and applications.
Traditional paint sprayers, often referred to as air sprayers, use compressed air to atomise the paint, creating a fine spray. This method is excellent for achieving a smooth and even finish, particularly useful for detailed work or surfaces that require a high-quality finish, such as furniture or cabinetry. However, air sprayers tend to produce a significant amount of overspray, meaning more paint can end up in the air rather than on your surface. This can lead to wastage and requires careful preparation to protect surrounding areas. Additionally, they are typically better suited for thinner paints.
On the other hand, airless paint sprayers do not use air to atomise the paint. Instead, they pump paint at very high pressure through a small nozzle, effectively atomising it without the use of compressed air. This method allows airless sprayers to handle thicker paints, including latex and varnish, without the need for thinning. They are highly efficient for covering large areas quickly, making them ideal for big projects like painting walls, ceilings, or exteriors. Airless sprayers also tend to have less overspray compared to air sprayers, although they still require protective measures for surrounding areas.
Airless paint sprayers, while efficient for certain tasks, come with their own set of challenges. One of the primary disadvantages is overspray. Due to the high pressure at which these sprayers operate, fine paint particles can disperse widely, often leading to wastage and necessitating extensive clean-up, especially in windy conditions or in areas with many surrounding objects. This aspect makes them less suitable for detailed or small-scale work.
Another concern is the cost. Airless sprayers are generally more expensive than traditional rollers or brushes, and even some other types of sprayers. This investment might not be justifiable for those who only occasionally undertake painting projects. Alongside the initial cost, maintenance and cleaning can also be more demanding. Thorough cleaning is essential to prevent clogging and ensure the longevity of the machine, which can be a time-consuming process.
Additionally, airless paint sprayers have a steep learning curve. Achieving a uniform, even coat without drips or uneven layers requires practice and skill. For beginners, this can be challenging and may lead to unsatisfactory results on initial attempts.
Lastly, while they are excellent for applying a range of thicker paints, they may not perform as well with thinner materials, which could limit their versatility depending on the project requirements.
Choosing the best beginner spray paint gun depends on various factors, including the type of projects you'll be undertaking, your budget, and ease of use. For beginners, it's essential to find a balance between functionality, simplicity, and cost-effectiveness.
A highly recommended option for beginners is an HVLP (High Volume Low Pressure) spray gun. HVLP guns are known for their user-friendly nature and are particularly well-suited to beginners due to their lower pressure operation. This feature reduces overspray, making it easier to control and more efficient in terms of paint usage. They are excellent for smaller, detailed projects like furniture, cabinets, or crafts, where precision is key.
One popular model for beginners is the Wagner Control Spray Max HVLP Sprayer. This model is widely appreciated for its ease of use, affordability, and versatility. It offers adjustable settings for flow control and pattern shape, which can help novices get accustomed to different spray techniques. Additionally, it’s relatively easy to clean, a crucial consideration for those new to spray painting.
The Graco Magnum X5 is another option that's well-suited for beginners. It's slightly more advanced than other options, but still manageable for those new to spray painting. This model offers adjustable pressure control, allowing users to control the paint flow for precise application. It's also compatible with a range of paint types and is easy to clean and maintain, which is crucial for beginners.
When using an airless sprayer, the general rule is that thinning paint is not usually required, which is one of the significant benefits of these types of sprayers. Airless paint sprayers are specifically designed to handle a variety of paint viscosities, including thicker paints like latex and acrylics, without the need for dilution. They achieve this by pumping paint at a high pressure through a small nozzle, effectively atomising the paint for a smooth, even application.
However, it's important to note that there are exceptions based on the type of paint and its consistency. Some paints, particularly if they are exceptionally thick or viscous, might still benefit from thinning to ensure a consistent spray pattern and to prevent clogging of the sprayer. It's always advisable to check the manufacturer's recommendations for the specific paint you're using. If thinning is required, the manufacturer will usually provide guidelines on the appropriate thinning ratio.
Additionally, the condition of the paint matters. Older or settled paint may have thickened over time and could require thinning before use in an airless sprayer.
Professional painters have a diverse toolkit when it comes to spray painting, and their choice of equipment largely depends on the nature and scale of the project at hand. Among the most commonly used tools are airless paint sprayers, HVLP (High Volume Low Pressure) sprayers, and conventional air sprayers.
Airless paint sprayers are particularly popular for large-scale projects like painting walls, ceilings, or exteriors. They work by pumping paint at high pressure, allowing for rapid coverage of large areas. This efficiency, combined with their ability to handle thicker paints without thinning, makes them a go-to choice for professional painters dealing with extensive surface areas.
HVLP sprayers, on the other hand, are favoured for their precision and efficiency in paint usage. They use a high volume of air at low pressure to atomize paint, resulting in a finer, more controllable spray. This makes them ideal for detailed work, such as cabinetry, furniture, and trim, where a smooth, high-quality finish is paramount.
Conventional air sprayers, using compressed air to atomize the paint, are also part of a professional painter's arsenal. While they can be more prone to overspray, they are still valued for certain types of projects, particularly where a very smooth, high-quality finish is required.
In addition to the type of sprayer, professionals also consider the type of paint and the specific requirements of the job, such as the desired finish, the project's scale, and environmental factors. Their expertise allows them to choose the most suitable tool, ensuring efficiency, quality, and durability of the paint job.
Getting a smooth finish with an airless sprayer requires careful attention to both preparation and technique. Firstly, the surface to be painted must be meticulously prepared – it should be clean, dry, and smooth. Any imperfections, such as cracks or holes, should be filled and sanded down. Dust and debris can ruin the finish, so it's crucial to ensure the surface is as clean as possible before starting.
Choosing the right paint and ensuring it's at the correct consistency is also important. While airless sprayers are adept at handling thicker paints, making sure the paint is not too thick or thin for the sprayer model you're using is vital. If necessary, thin the paint according to the manufacturer's recommendations.
The choice of nozzle and spray tip plays a significant role in the quality of the finish. A worn or incorrect size nozzle can cause a poor spray pattern. Ensure you're using the right size and type of tip for the paint and the kind of finish you're aiming for.
Technique is key. Hold the sprayer at a consistent distance from the surface – usually around 12 inches – and keep your hand steady. Spray in a sweeping motion, maintaining a constant speed, and overlap each stroke by about 50% to avoid missed spots or uneven layers. Avoid tilting the sprayer, as this can result in an uneven application.
Adjusting the pressure setting of the sprayer to suit the paint's viscosity and the type of job is also important. Too much pressure can lead to overspray and an uneven finish, while too little pressure can cause poor coverage.
Finally, practice is essential. If you're new to using an airless sprayer, try practising on a piece of cardboard or scrap material to get a feel for the sprayer and to refine your technique before moving on to the actual project.
Before diving into using a paint sprayer, it's crucial to arm yourself with some essential knowledge to ensure effective and safe results. Understanding the type of sprayer you're using is the first step – each kind (like HVLP, airless, or compressed air) has its own set of characteristics and suitable applications. Familiarise yourself with how your specific model works, its adjustments, and its capabilities.
Preparation is vital. This means not only preparing the surface you're going to paint – cleaning, sanding, and priming as necessary – but also setting up your workspace. Ensure that the area is well-ventilated, especially important when working indoors, and protect surrounding areas with drop cloths or plastic sheeting to guard against overspray.
Safety cannot be overemphasised. Wear appropriate protective gear, including a mask or respirator to avoid inhaling paint fumes, goggles for eye protection, and gloves. Remember, paint sprayers often use high pressure, and the paint particles can be harmful if inhaled or if they come into contact with your eyes.
Knowing your paint is also crucial. Different paints have different consistencies and may require thinning before they can be used in a sprayer. Follow the paint manufacturer's guidelines for preparation and compatibility with your type of sprayer.
Technique plays a big part in achieving a smooth, even finish. Practise your spraying technique – keeping a consistent distance from the surface, moving in smooth, even strokes – on a piece of cardboard or scrap material first.
Finally, maintenance is key to the longevity of your sprayer. Clean it thoroughly after each use to prevent clogging and wear, and store it according to the manufacturer's instructions.
By understanding these aspects – the type of sprayer, preparation, safety, paint characteristics, technique, and maintenance – you can use a paint sprayer effectively and safely, achieving professional-quality results even on your first try.
Graco is widely regarded as the best brand for airless sprayers, renowned for its quality, durability, and performance. Graco's airless sprayers are favoured by both professionals and DIY enthusiasts for their reliability, ease of use, and efficiency in a wide range of painting projects.
Graco airless sprayers stand out due to their innovative design and technology. They offer a range of models suited for different needs, from smaller, portable units for home use to more robust and powerful options for commercial applications. These sprayers are designed to handle a variety of paint types and viscosities, making them versatile for different project requirements.
One of the key strengths of Graco is their attention to user experience. Their sprayers are engineered for comfort and ease of operation, with features like adjustable pressure settings, easy-to-clean systems, and user-friendly controls. This focus on usability does not come at the expense of performance; Graco sprayers are known for their consistent and even paint application, ensuring a high-quality finish.
Additionally, Graco's commitment to durability and quality makes their products a long-term investment. They are built to withstand the rigours of frequent use, and with proper maintenance, can last for years, making them a popular choice among professionals who rely on their tools daily.
The difference between an airless paint sprayer and an HVLP (High Volume Low Pressure) sprayer lies in their operating mechanisms, the type of finish they provide, and their suitable applications.
An airless paint sprayer works by pumping paint at high pressure through a small tip, without the use of air. This method allows it to cover large areas quickly, making it ideal for big projects like walls, ceilings, and exteriors. Airless sprayers can handle thicker paints with ease and are known for their efficiency in paint usage. However, due to the high pressure, they can produce more overspray and may not be the best choice for detailed or precision work.
In contrast, HVLP sprayers use a high volume of air at low pressure to atomize the paint into fine particles. This results in a very controlled and smooth finish, which is excellent for detailed work, such as furniture, cabinets, and trim. HVLP sprayers are more efficient in reducing overspray and paint wastage compared to airless systems. They are better suited for indoor projects or where a high-quality finish is essential. However, HVLP sprayers typically work slower than airless sprayers and are not as effective for painting large, flat surfaces.
Cleaning your paint sprayer properly after each use is essential for maintaining its performance and extending its lifespan. The method of cleaning depends on whether you've used water-based or oil-based paints.
For water-based paints, such as latex, start by flushing the sprayer with warm, soapy water. This initial step helps remove most of the paint residue. Follow this with a thorough rinse using clean water to ensure all traces of soap and paint are gone. If your sprayer has a filter, it should be removed and cleaned separately. To ensure a comprehensive clean and maintain the sprayer's condition, it's often advised to run a mixture of water and a specialised paint sprayer cleaner through the system. This step helps to eliminate any lingering paint particles and conditions the pump and hose. After cleaning, drying all parts thoroughly is crucial to prevent any rust or corrosion.
For oil-based paints, like enamel, the cleaning process involves using a solvent such as mineral spirits or paint thinner. Begin by flushing the system with the solvent to dissolve and remove the paint. Disassemble the sprayer parts that have been in contact with paint and clean them individually in the solvent. A second flush with fresh solvent can ensure that all residues are removed. Finish by rinsing with a bit of solvent to eliminate any remaining cleaner, and then dry all components completely before reassembling and storing the sprayer.
There are a few key differences between piston pumps and diaphragm pumps. Though both are airless pumps
Piston pumps are generally high-pressure pumps that produce better paint atomisation and are more suited to a wider range of materials. That means you can spray both high and low viscosity liquids. Piston pumps run only as needed, which means less wear and tear, and they are generally easier to repair. A stainless steel piston pump can last for years with careful and consistent maintenance.If pump life is an important consideration for you, a piston pump might be the right choice for you.
Diaphragm pumps move a larger volume of liquid while generally being smaller units, which means they are easier to move. They also offer better pressure control and work at a lower overall pressure. That makes them more efficient and cost effective. However, diaphragm pumps run constantly, which can mean more wear and tear over time. If efficiency and volume are important to you, a diaphragm pump might be the way to go.
Choosing the right size tip for your paint sprayer is crucial for achieving the desired finish and efficient paint application. The tip size is determined by the type of paint you're using and the specifics of your project. Even in Australia, paint sprayer tips are measured in thousandths of an inch, and the size determines the width of the paint fan and the flow rate of the paint.
For thinner materials like stains and lacquers, a smaller tip is typically suitable. These materials require precision, and a smaller tip provides a finer spray pattern, which is ideal for detailed work. Tips in the range of .011 to .013 inches are often recommended for such materials.
When it comes to medium-thickness paints, such as latex or acrylics used for interior walls, a medium-sized tip is generally appropriate. These tips allow for a wider spray pattern and a higher flow rate, making them efficient for covering larger surfaces. Sizes around .015 to .019 inches are commonly used for these types of paints.
For thicker paints, such as exterior latex or oil-based paints, you'll need a larger tip. A larger tip allows the thicker paint to flow through more easily, preventing clogging and ensuring a consistent spray pattern. Tips in the range of .021 to .025 inches are often suitable for these heavier materials.
It's important to also consider the spray pattern width. Tips are often labelled with a three-digit code – the first digit, multiplied by two, indicates the width of the spray pattern when held 12 inches from the surface. The last two digits indicate the size of the opening in thousandths of an inch.
Always refer to the paint and sprayer manufacturer's recommendations for the best results, as using the wrong tip size can lead to poor coverage, excessive overspray, or damage to your sprayer.
You should consider replacing the tips of your paint sprayer when you observe a change in the spray pattern or a decline in finish quality. Signs that indicate the need for a new tip include uneven spray patterns or "tails" at the edges of the pattern. This happens because the orifice of the tip wears out and enlarges over time, allowing more paint to flow through and reducing precision. Regular inspection and comparison with the manufacturer's specifications can guide you on when to replace the tip. As a general rule, consider replacing the tip after using approximately 60 litres of paint. This ensures you maintain a consistent and high-quality finish in your painting projects.
A "whip hose" is a flexible, short hose used with airless paint sprayers, usually measuring between 1 to 2 metres in length. It connects between the main airless hose and the spray gun. This hose is designed to provide increased flexibility and manoeuvrability, allowing for easier control of the spray gun, particularly in tight spaces or when executing detailed work. The whip hose's flexibility helps reduce hand fatigue and improves the overall handling of the spray gun, making it a useful addition for both professional and DIY painting projects. It's especially helpful in reducing the strain caused by the rigidity of longer, standard airless hoses.
Yes, wearing a spray mask or respirator is crucial when using a paint sprayer. Spray painting generates a mist of paint particles that can be harmful if inhaled. These particles can contain hazardous chemicals, solvents, and additives, which pose risks to your respiratory health. A mask or respirator is essential to filter out these harmful particles and protect your lungs.
For water-based paints, a basic mask may suffice to block larger particles. However, for oil-based paints or those containing solvents, a proper respirator with cartridges designed to filter out organic vapours and fine particulates is necessary. Besides protecting your lungs, it also guards against headaches, dizziness, and other health issues associated with inhaling paint fumes.
Furthermore, in a professional setting or during prolonged use, it's not just recommended but often required by safety regulations to wear appropriate respiratory protection. Always ensure that the mask or respirator fits well and is appropriate for the type of paint and sprayer you are using. Safety should be a top priority in any spray painting project.
If you accidentally spray yourself with paint, immediate action is needed. For skin contact, swiftly remove any clothing that's been contaminated to prevent further absorption of the paint. Wash the affected area thoroughly with soap and water. If you're using oil-based paint or a solvent-based product, you may need a specialised cleaner to remove the paint effectively.
In case of eye contact, rinse your eyes with plenty of water. Keep rinsing for at least 15 minutes and seek medical attention if irritation persists. For inhalation, move to an area with fresh air immediately. If you experience difficulty breathing, dizziness, or other severe symptoms, seek medical attention.
Remember, while washing off the paint is important, your health is the priority. In any case of severe reaction or if symptoms persist, it's crucial to seek professional medical advice. Safety measures, such as wearing protective gear, are essential when using a paint sprayer to minimise these risks.
]]>Paint brush, paint roller, paint tray, bucket, paint sprayer, drop sheet... all the tools you imagine when you think of a professional painter heading off to a job. But we're here to let you in on a few trade secrets; the painting and other tools professionals use when they're on the job.
Ah-ha! We mean handy tools like extension poles and paint scrapers, right? Not quite. We're thinking a bit outside the box on this one, beyond traditional canvas drop cloths and palette knives. We're looking at the wide variety of tools you might not necessarily think of when thinking about professional painters.
Want to know a secret? These are all best-sellers and PaintAccess tradie customers buy these all the time. Let's dive in...
Lawn aeration shoes are for aerating lawn, right? Right? Those spiked shoes that go over your regular shoes? They are, and they do a great job. They are super popular with landscapers and gardeners. So why does paint and paint supplies business, PaintAccess, sell Lawn Aeration Spiked Shoes...? Because worn over work boots, lawn aeration shoes allow you to walk across any newly-painted surface without leaving marks. Paint, sealer, screed... any coating applied as a liquid can be traversed with a set of lawn aeration shoes. Expert painters have known about lawn aeration shoes for years and swear by them. We think it's a great trick, even though the original creators of lawn aeration shoes might never have guessed their dual purpose.
Ever wished you had a bottle opener and roller cleaner in one handy tool? What about a combined hammer and paint can opener? What about all four and 6 other tools, all in one? The Purdy Multifunction 10-in-1 Folding Painter's Tool is a great addition to any tool box or tool belt. The blade is made from rust resistant stainless steel and folds into an ergonomic plastic handle. This handy tool includes a caulk cleaner, cutter, bottle opener, hammer, scraper, spreader, roller cleaner, paint can opener, flat head screwdriver and pocket clip. We think they might be pulling our leg with the last one, but even 9 tools in 1 is pretty bloody good. You've never had so many handy tools so close at hand in one oddly shaped package.
Applying caulk (that rubbery, sticky, sealant) might not seem like a high-risk task, using your finger to smooth caulk can result in finger stiffness, soreness and splinters. It was a problem that was costing the industry several dollars in band-aids every year. Luckily, the folks at iQuip, Uni-Pro and Soudal (FWMM Products) have come together to create The Caulking Finger! The Caulking Finger was developed by a painter with 28 years of experience, who was tired of wearing out all his fingers caulking all day. Convinced that nothing would work as well as a finger, but keen to give his finger a rest, he created The Caulking Finger with the tagline, “Why wear out your finger? Just use mine!” Now you can have that same professional smooth finish and save your finger.
Sometimes when you're sanding or painting you wish there was a wall between you and your client's most prized possessions. Who needs Doris' collection of vintage salt and pepper shakers getting covered in paint or dust? The ZipWall Complete Seal Pack allows you to erect a wall wherever you need it, for as long as you're working on that project. The plastic sheet wall creates a barrier that divides rooms, seals rooms from other rooms, and divides rooms into sections so that you can stage your painting work. Whether you're giving part of a room a new coat of paint or painting a feature wall, the ZipWall system is a great tool.
Those responsible for wrapping Christmas and birthday gifts will be familiar with sticky tape dispensers; those handy little devices that allow you to measure out a section of tape and cut it off without frustratingly losing the loose end. And most people would be familiar with the idea of a painter using masking tape to tape off sections of window sill and window while painting. But what you might be less familiar with are the tape dispensers designed specifically for painters; tools like thePaintAccess Easy Tape Masking Applicator. Masking tape dispensers are designed to allow painters to apply masking tape to large areas quickly and easily, without losing the end of their masking tape.
It's not just the application of paint where painting tradies use alternate tools. Some essential tools are designed to avoid painting. That's certainly true for things like PaintAccess Spot Drops which are designed to drop down-lights from their spot in a ceiling so that plasterboard can be painted quickly and easily without getting paint on the light fittings themselves. If a tradie's painting project includes ceilings with down-lights, there's a good chance they'll be reaching for a bag of Spot Drops (if they don't already have one in their tool box). These handy little devices are a great way to complete your ceiling paint job without ruining your light fixtures with wet paint.
So there you have it. The best painting tools that... aren't... but have become painting tools anyway. You can expect to see some of these tradie secrets the next time you hire a professional painter, in addition to all the usual basic tools they'll bring along.
If you're thinking of tackling an interior or exterior painting job yourself, you can pick up any of these neat tools for yourself from PaintAccess. We might be a favourite among painting tradies but we're always happy to help a DIY painter with the tools they need and the expert advice they need to get the job done.
Whether you need latex paint, oil-based paint, paint accessories, or power tools PaintAccess has you covered.
]]>In this post, we'll dive into the nitty-gritty of identifying the signs of water damage, understanding its causes, and most importantly, guiding you through the step-by-step process of repairing your ceiling. From DIY fixes to when to call in the pros, we'll cover all bases to help you restore your ceiling to its former glory, ensuring your home remains safe, sound, and beautiful. Let's get started!
Before any repair work, it's crucial to find and fix the source of the water damage. This could be a leaky roof, burst pipe, or condensation issue. Ensure the problem is resolved to prevent future damage.
Examine the ceiling for damage. Small, localised damage might be a DIY fix, but extensive damage may require professional help. Look for signs like staining, peeling paint, or bulging.
Turn off the power in the area if there's any risk of electrical wiring being affected by the water. Use protective gear like gloves, goggles, and a mask.
Carefully remove any damaged plasterboard or insulation. If the ceiling is sagging, be extra cautious as it may collapse.
Use fans and dehumidifiers to thoroughly dry the area. This step is crucial to prevent mould and mildew growth.
Clean the area with a specialised mould cleaner or a solution of water and bleach to kill any mold spores. Ensure the area is well-ventilated during this process.
For small repairs, use a patching compound or plaster to fill in holes or cracks. For larger repairs, you may need to cut out and replace sections of plasterboard.
Once the repair material has dried, sand the area until smooth. This ensures a seamless finish when you repaint.
Apply a stain-blocking primer to prevent any water stains from bleeding through. Once the primer is dry, repaint the ceiling to match the rest of the room.
After the repair, inspect your roof and plumbing regularly to prevent future water damage. Consider improvements like better insulation or ventilation to address condensation issues.
The time it takes to repair a water-damaged ceiling varies depending on the extent of the damage and the repair process involved. For minor damage, such as small stains or peeling paint, repairs can be completed within a day. However, more extensive damage, like sagging or large areas of mould, or repairs to an entire ceiling may require several days to a week. This includes time for identifying and fixing the water source, removing damaged material, drying out the area, repairing or replacing the ceiling material, and finishing with painting or texturing. Professional repairs may be faster but always factor in time for drying and multiple repair stages. Delays can also occur if specialised materials or contractors are needed.
We've covered the full repair process, but here's a quick and easy guide to drying a ceiling following a roof leak or other water leak:
Prompt action is crucial to mitigate water damage and prevent long-term issues like mould and structural weakness.
Yes, a water-damaged ceiling can eventually dry out, but this depends on the extent of the damage and the source of moisture. If the water source is promptly fixed and the damage is minor, the ceiling can dry out on its own, especially in well-ventilated areas or with the aid of fans and dehumidifiers. However, it's important to note that simply drying out does not reverse the damage. The ceiling may have residual stains, weakened materials, or potential mould growth. Therefore, even if the ceiling dries out, it should be inspected for structural integrity and potential mould issues. In cases of significant water exposure, professional assessment and repair are often necessary to ensure the ceiling's safety and durability.
When does a ceiling need to be replaced after water damage?
When determining whether a ceiling needs to be replaced after water damage, several key factors come into play. Firstly, structural damage is a critical indicator. If the water has weakened the ceiling to the point where it is sagging or buckling, this is a clear sign that replacement is necessary to ensure the safety and stability of the structure.
Another major consideration is the presence of mould. Extensive mould growth, which can often occur following water damage, poses significant health risks. If the mould infestation is widespread and cannot be effectively cleaned or removed, replacing the ceiling becomes essential to maintain a healthy living environment.
The extent of material deterioration also plays a pivotal role. Ceilings made from materials like plasterboard can be severely damaged by prolonged exposure to water. If the material has degraded to a point where it can no longer be reliably repaired, replacement is the more prudent choice.
Furthermore, if the ceiling continues to experience leaks despite attempts at repair, it might indicate an underlying problem that simple repairs cannot address. In such cases, replacing the ceiling may be the only viable long-term solution.
Ultimately, the decision to replace a water-damaged ceiling often hinges on a professional assessment. Experts can offer a comprehensive evaluation of the damage and advise whether repair is feasible or if replacement is the safer and more cost-effective option. In making this determination, the priority is always to ensure the safety, functionality, and longevity of the ceiling.
Painting over a water-damaged ceiling is possible, but it's important to first address the underlying issues and prepare the surface properly. Ensure the source of the water damage is fixed to prevent further problems. The ceiling must be completely dry before you begin painting. If there's any mould, it should be treated and cleaned. Damaged or loose materials need to be removed or repaired. Next, apply a stain-blocking primer to cover any water stains and prevent them from bleeding through the new paint. Once the primer is dry, you can then paint over the ceiling with your chosen colour. This process ensures a durable and visually appealing finish, but remember, painting alone doesn't fix the root cause of water damage.
Whether your ceiling has been damaged by a leaky roof or leaky pipes, and whether you're dealing with minor damage or major damage, we hope you've learned something from our step-by-step guide. Repairing a ceiling with water damage to the point where it can be painted again is a significant task.
PaintAccess has all the tools, equipment and paint you need to complete ceiling repairs yourself and to repaint it as good as new. Visit us at either our Matraville or St Leonards stores in Sydney for expert advice, and guidance as to the best ceiling paint for your project.
Welcome to our comprehensive guide on removing paint from concrete, a task that many Australian homeowners and DIY enthusiasts face. Whether it's a splatter from a recent home renovation, an accidental spill, or the remnants of a previous owner's project, unwanted paint on concrete surfaces can be an eyesore. Not only does it affect the aesthetic appeal of your property, but it can also lead to long-term damage if not addressed promptly and effectively.
In this blog, we delve into the most effective methods to tackle this challenge, ensuring your concrete surfaces are restored to their original glory. We understand the unique Australian climate and how it can affect both the concrete and the paint, so our solutions are tailored to withstand the harsh sun and varying weather conditions. From eco-friendly options to more robust chemical treatments, we cover a range of techniques suitable for different types of paint and concrete surfaces.
Our guide is designed to be practical and accessible, offering step-by-step instructions that even beginners can follow. We also include safety tips and product recommendations, ensuring you have all the information needed to undertake this task with confidence. So, roll up your sleeves, and let's get started on rejuvenating your concrete surfaces!
Removing paint from concrete can be a challenging yet fulfilling task. The process varies depending on the type of paint (water-based or oil-based) and the age of the stain. However, common to all methods is the initial step of cleaning the area with soapy water and a stiff brush to remove dirt and debris, ensuring a clear working surface.
For water-based paints, a solution of warm water and a mild detergent usually suffices. Gently scrubbing the area with a brush can lift the paint without damaging the concrete. In case of stubborn stains, a mixture of vinegar and water can be an effective, eco-friendly alternative.
Oil-based paints require a stronger approach. Paint strippers specifically designed for concrete are highly effective. Apply the stripper as per the manufacturer's instructions, usually by brushing it on and leaving it to work for a specified time. This breaks down the paint, making it easier to scrape off. Always wear protective gloves and eye-wear when handling chemical strippers.
For those preferring a more natural method, a paste made from baking soda and water can be applied to the stain. After allowing it to sit for several hours, scrubbing the area can help lift the paint.
Pressure washing is another effective method, particularly for large outdoor areas. It's vital to use the correct pressure setting to avoid damaging the concrete.
Whichever method you choose, always test it on a small, inconspicuous area first to ensure it does not damage the concrete. Patience and elbow grease are often the key ingredients to successfully removing paint from concrete.
Yes, vinegar can be effective in removing paint stains from concrete, especially if the paint is water-based. Vinegar, a mild acid, works by breaking down the paint, making it easier to scrub away. To use vinegar for paint removal, apply a generous amount of white distilled vinegar directly onto the stained area and let it soak for several minutes. Then, scrub the area with a stiff-bristled brush. For tougher stains, you may need to repeat the process or allow the vinegar to sit longer. While vinegar is not as potent as commercial paint strippers, it is a safer and more environmentally friendly option.
Yes, you can use a pressure washer to remove dried paint from concrete. This method is particularly effective for larger areas or outdoor surfaces. Pressure washing works by using high-pressure water to blast the paint off the surface. However, it's important to use the right technique and pressure settings to avoid damaging the concrete. Start with a lower pressure and gradually increase as needed. A rotating or oscillating nozzle can be more effective for stubborn paint. Additionally, for extra tough paint stains, applying a chemical paint remover before pressure washing can improve results. Always wear protective gear and follow safety guidelines when using a pressure washer.
The best solvent for removing paint from concrete often depends on the type of paint and the condition of the concrete. However, one of the most effective and commonly used solvents is methylene chloride, found in many commercially available paint strippers. It's particularly efficient for removing stubborn, oil-based paints and multiple layers of paint. Methylene chloride penetrates quickly, breaking down the paint for easier removal. Safety is paramount when using this solvent due to its potent fumes and chemical nature; proper ventilation, protective gloves, and eye protection are essential. For a less harsh alternative, soy-based or citrus-based strippers can be effective, especially for smaller, less stubborn paint stains.
Whether you've managed to get paint on your concrete floors, concrete driveway or concrete garage floor, getting paint off concrete is usually a fairly simple process. There are some great concrete cleaning chemicals available, a range of environmentally friendly paint stripper options and pressure washing concrete is always a great back-up option for those who don't want to use a chemical paint stripper.
We recently published a great video about removing paint from concrete that included advice about paint thinner, wire brush, bristle brush and power washer options.
Remember, always take safety precautions and use things like protective eyewear or safety glasses, knee pads, and plastic sheeting.
At PaintAccess we're experts at getting paint on, but we also know a thing or two about removing paint. Visit us at St Leonards or Matraville for expert advice on the best ways to remove paint from concrete surfaces.
]]>Latex paint, also known as acrylic paint, has become increasingly popular for its versatility and ease of use. Whether you're a DIY enthusiast or a professional painter, understanding the characteristics and benefits of latex paint is essential. What is latex paint, and why would you use it over other types of paint? What about paint from particular manufacturers like Dulux, Taubmans and British Paints? Do they make latex paints for the Australian market?
We'll tackle these questions and more, including why you would choose latex paint, whether it requires a primer, and how it compares to other types of paint. So, let's dive in and demystify the world of latex paint together!
So latex paint is the same as acrylic paint in Australia?
Yes, both latex paint and acrylic paint are essentially the same thing. They are both water-based paints that use acrylic resin as their binder. This means they are easy to clean up with water and have low levels of volatile organic compounds (VOCs).
The main difference between the two is the terminology used. In North America, the term latex paint is commonly used, while in Australia and other parts of the world, acrylic paint is the preferred term. So, when someone in Australia talks about using latex paint, they are actually referring to the same type of water-based, colour-rich acrylic paint that is used worldwide.
Does Dulux make latex paints?
Dulux is an Australian paint brand that offers a wide range of paint products. While Dulux does offer a range of latex-based paints, they also offer a wide variety of other paint options, including oil-based paints.
Latex-based paints are popular due to their durability, ease of application, and quick drying time. They are also known for their low odour and easy clean-up.
In Australia in 2023, Dulux continues to be a trusted brand for both professional painters and DIY enthusiasts, providing high-quality paints that meet the needs of different projects and surfaces.
What is considered latex paint?
When choosing a new colour for your walls, it's important to know what water-based paint options are available. In Australia in 2023, latex-based paint is a popular choice for many painting projects.
Here are three reasons why latex paint is worth considering:
So, when it comes to painting your walls, latex-based paint is a reliable and convenient choice, ensuring a beautiful and durable finish for your home.
Why would you use latex paint?
If you're looking to achieve a professional-looking finish with minimal effort, opting for latex paint would be a wise choice.
Latex paint is a popular option for both DIY enthusiasts and professional painters alike due to its various advantages.
Firstly, latex paint dries quickly, allowing you to apply multiple coats in a shorter amount of time. This helps to expedite the painting process and allows you to complete your project more efficiently.
Additionally, latex paint is easy to clean up with just soap and water, making it a convenient option for those who want to avoid using harsh chemicals.
Furthermore, latex paint is known for its durability and long-lasting finish, ensuring that your painted surfaces will remain vibrant and fresh for years to come.
How can you tell if paint is latex or enamel?
One way to determine whether a paint is latex or enamel is by examining its drying time and the ease of cleaning it up.
Latex paint generally dries faster than enamel paint, usually within an hour or two. On the other hand, enamel paint takes longer to dry, often requiring several hours or even overnight.
Additionally, latex paint can be easily cleaned up with soap and water, while enamel paint typically requires harsher solvents or paint thinners for cleanup.
Another clue is the odour - latex paint usually has a mild, almost odourless smell, while enamel paint tends to have a stronger, more chemical-like odour.
By considering these factors, you can easily determine whether the paint you are using is latex or enamel.
Does latex paint need a primer?
Applying a primer before painting with latex is like laying a sturdy foundation for a beautiful, long-lasting finish. It may seem like an extra step, but it's worth it in the end. Here are three reasons why latex paint needs primer:
So, don't skip the primer step when using latex paint. It will help you achieve a professional-looking finish that will stand the test of time.
The great news is - as explained above - some latex paints include a primer which means you don’t need a separate layer of a specific primer before applying coats of paint.
What happens if you apply latex paint over oil-based paint?
When you apply latex paint over oil-based paint, it can lead to cracking and peeling, creating an unsightly and unstable finish. This is because latex paint and oil-based paint have different properties and do not adhere well to each other. The oil-based paint forms a hard and glossy surface, while latex paint has a flexible and breathable nature. As a result, when latex paint is applied over oil-based paint, it cannot properly bond and may start to peel off over time. To avoid this issue, it is recommended you properly prepare the surface by sanding and priming it before applying latex paint. This ensures better adhesion and a long-lasting finish.
Oil-Based Paint |
Latex Paint |
Hard and glossy |
Flexible and breathable |
Requires mineral turpentine for cleanup |
Cleans up with soap and water |
Longer drying time |
Quick drying |
Strong odour |
Low odour |
Suitable for exterior and interior surfaces |
Primarily used for interior surfaces |
Can I paint latex over enamel?
Enamel paint is known for its durability, but can you use latex over it? The answer is yes, you can paint latex over enamel, but there are a few important steps to follow. First, you need to prepare the surface by sanding it lightly to create a rough texture. This will help the latex paint adhere better. Next, clean the surface thoroughly to remove any dirt or grease. After that, apply a coat of primer specifically designed for use with latex paint. This will ensure proper adhesion and prevent any issues with peeling or bubbling.
Finally, you can apply your latex paint as usual. Keep in mind that latex paint may not be as durable as enamel, so you may need to take extra precautions to protect the painted surface.
Pros of using latex over enamel |
Cons of using latex over enamel |
Easy to apply |
May not be as durable as enamel |
Quick drying time |
Requires proper surface preparation |
Wide range of colour options |
Extra precautions may be needed for protection |
Conclusion
So, now you know all about latex paint and its uses. Latex paint, also known as acrylic paint in Australia, is a popular choice for its durability and ease of use.
Brands like Dulux offer latex paint options, which are considered the equivalent of latex paint.
Latex paint is best applied with a primer and can be applied over oil-based paint, although it's always recommended to prep the surface properly. Overall, latex paint is a durable and versatile option for your painting needs.
Frequently Asked Questions
Can Dulux paint be classified as latex paint?
Yes, Dulux has some types of latex paint, commonly recognised as a type of water-based paint. They offer a wide range of paint products.
Is there an equivalent type of paint to latex paint available?
Yes, there is an equivalent type of paint to latex paint available. It is called acrylic paint, which is also water-based and provides a durable, long-lasting finish.
How is latex paint defined or considered in the paint industry?
In the paint industry, latex paint is defined as a water-based paint that contains synthetic polymers. It is known for its durability, quick drying time, and ease of cleanup.
What are the advantages or reasons for using latex paint over other types of paint?
The advantages of using latex paint over other types include easy cleanup, low odour, fast drying time, and the ability to be used on various surfaces. It's a popular choice for interior painting projects.
]]>These compact, user-friendly devices have become a game-changer in home renovation and interior design. A colour sensor works by scanning the surface of your wall and accurately identifying the paint colour. This technology utilises advanced optics and algorithms to capture the colour and provide a precise match.
For Australians looking to refresh their space or touch up existing paintwork, this tool is a boon. It eliminates the guesswork and endless colour swatches, offering a quick and efficient way to find the exact paint match. Whether you're living in a classic Queensland cottage, a modern Melbourne apartment, or a beachside Sydney home, a colour sensor ensures that your colour choices resonate with your surroundings and personal style.
With this technology, Australians can embrace their creative vision, ensuring their homes reflect their unique taste and lifestyle. The colour sensor is more than a tool; it's a pathway to a harmonious and aesthetically pleasing home environment.
When you start a paint project, the first thing you need to do is to choose the colour you want to apply. Maybe you've seen the colour in a shop, in nature, or somewhere in your house? But how do you work out what colour that is so that you can buy the right paint? The simplest way is to use a colour sensor or a colour scanning app. Each option allows you to pick a colour and then select the correct colour from the range of paints available.
It's not hard to decide you don't like the current colour of your walls, but picking the perfect colour to replace it is a little more challenging.
Yes, there are several apps available for identifying paint colours. These apps, often developed by leading paint brands, use your smartphone's camera to capture a colour from any surface and match it with their paint colours. Examples include the Dulux Colour App and the Taubmans Coloursmith app. Additionally, independent devices like the Nix Mini 2 colour sensor pair with a mobile app to offer precise colour matching. These tools are incredibly useful for both DIY home renovators and professional decorators, allowing for quick, accurate identification and replication of desired colours, streamlining the paint selection process.
Using a colour sensor is a straightforward process. First, ensure the sensor is charged and connected to its corresponding smartphone app. Then, calibrate the sensor according to the manufacturer's instructions, often against a white surface. Once calibrated, place the sensor flat against the colour you wish to identify, ensuring good contact and minimal light interference. Press the scan button, either on the sensor or within the app. The sensor reads the colour and communicates with the app to display the closest paint match from its database. You can then save your colour selections, explore similar shades, or even buy paint directly through the app.
Each of the sensors and apps we'll look at in this blog can detect a wide range of colours, especially where they are produced by - or in partnership with - a well-known paint manufacturer like Dulux or Taubmans. In those instances, products are usually designed to provide an exact colour code so that you can go to a paint manufacturer, give them the paint code of your chosen colour, and get a tin of paint in exactly the colour you need.
Colour sensors, such as the Nix Mini 2 or those integrated into apps like Dulux Colour and Taubmans Coloursmith, are highly accurate in identifying paint colours. They use advanced optics and calibration techniques to capture colours precisely. However, their accuracy can be influenced by ambient lighting conditions and the texture of the surface being scanned. In optimal conditions, these sensors can closely match a scanned colour with existing paint shades. While not infallible, they significantly reduce the margin of error compared to the human eye, making them reliable tools for both professionals and DIY enthusiasts in matching and selecting paint colours.
When it comes to picking a colour sensor option, some of the biggest names in the business have developed digital tools with companion apps or standalone apps that add colour sensor functionality to your smartphone. Here are some of the best:
The Taubmans Coloursmith colour sensor is revolutionising the way Australians choose paint colours for their homes. This compact, innovative device offers a high-tech solution to finding the perfect shade for any space. It's particularly valuable in a country known for its unique light and vibrant landscapes, ensuring that the colours you select harmonise beautifully with the Australian environment.
How do you use a Taubmans Coloursmith reader?
Using advanced technology, the Coloursmith sensor accurately scans any object or surface to identify its colour. This means you can draw inspiration from anything around you – a leaf from your backyard, a cherished fabric, or even a piece of art. The sensor then translates this colour into a matching Taubmans paint shade, taking the guesswork out of your decision-making process.
How does it work with the Coloursmith app?
The Coloursmith app enhances this experience. It not only stores your scanned colours but also allows you to visualise them on your walls. This integration of technology makes colour selection both a precise and creative endeavour, aligning with the diverse tastes and lifestyles of Australians. The Taubmans Coloursmith is more than a sensor; it's a tool that opens up a world of colour possibilities, right at your fingertips.
The Nix Mini 2 colour sensor represents a leap forward in colour-matching technology, offering a practical solution for Australians eager to perfect their interior and exterior spaces. Compact and user-friendly, this device is an essential tool for both professional decorators and DIY enthusiasts.
This sensor is not just about finding the right colour; it's about capturing the essence of a space and personalising it to reflect individual styles. For Australians looking to infuse their homes with colours that resonate with their lifestyle and environment, the Nix Mini 2 is an invaluable asset.
How do you use a Nix sensor?
At the heart of its appeal is the ability to scan any colour from any surface – whether it's a wall, fabric, or even a leaf – and match it with thousands of paint colours from leading brands. This feature is particularly useful in Australia, where the unique quality of natural light can impact how paint hues appear in different settings.
Moreover, the Nix Mini 2 is designed for simplicity. Its portable size allows for easy transport, and with a simple scan, it provides accurate colour readings. The accompanying app enhances the user experience by saving favourite colours, viewing colour matches, and even suggesting coordinating colour palettes.
The Dulux Colour App is an innovative tool transforming the way Australians approach their painting projects. Designed with user-friendliness in mind, this app is a treasure trove for anyone looking to breathe new life into their spaces with colour. It's not just an app; it's a digital colour consultant in your pocket.
Additionally, the Dulux Visualiser tool allows you to virtually paint your walls, giving a realistic preview of how different colours will look in your space. This helps in making confident colour choices, reducing the risk of disappointment.
How do you use the Dulux Colour App?
One of the app's standout features is its Colour Match technology. Simply take a photo, and the app can precisely identify colours from any inspiring source, be it a cushion or a beachscape, and match them to Dulux's extensive paint range. The app gives you a colour code which allows you to quickly find the corresponding Dulux paint. That means Dulux Colour Match works from your phone without any additional tools or equipment.
This feature is especially handy for those inspired by the diverse Australian landscape or urban settings. With the Dulux Colour App, selecting paint becomes a seamless, enjoyable journey, ensuring that every Australian home can reflect its owner's personality and style with just a few taps.
Is the Dulux Visualiser free?
Yes, the Dulux Colour App with the Dulux Visualiser tool is available for free from the Dulux Group for either Android or iOS (Google Play or AppStore).
Both the Nix Mini 2 colour sensor and the Taubmans Coloursmith colour sensor are available from PaintAccess. Each of the corresponding apps and the Dulux Colour App are available online from Google Play (Android) or the AppStore (Apple iOS).
Digital colour sensors and colour sensor apps open up a wide range of colour options for your next painting projects, and allow you to unlock the power of colour in a way that enhances your home.
Get a colour sensor or colour sensor app ahead of your next project; you won't regret it.
]]>In this post, we'll explore the various factors that contribute to the formation of tails. From the technical aspects such as low pressure and worn tips to operational techniques like maintaining a consistent spraying speed, we cover all the bases. We'll also discuss the importance of using the correct tip size for your paint's viscosity, and why regular maintenance of your sprayer is not just recommended but essential.
But it's not all about identifying the problem; we also provide practical solutions. Whether you're a seasoned painter or new to the game, our tips on adjusting pressure settings, selecting the right equipment, and perfecting your spraying technique will be invaluable. We'll guide you through the nuances of airless paint sprayers, ensuring that your next project is not only successful but also enjoyable.
So, whether you're in Sydney, Perth, or somewhere in between, join us as we tackle the issue of paint sprayer tails head-on.
Tails in the spray pattern of an airless paint sprayer are typically caused by one or more of a few key factors:
It's important to understand why your airless sprayer might be creating paint tails when you paint. That way you can select the correct solution and resolve the issue quickly.
To prevent issues like tails in the spray pattern of an airless paint sprayer, you can follow these steps:
These techniques will allow you to overcome most of the routine issues that cause airless paint sprayer tails.
Overspray from an airless paint sprayer, where paint mist settles beyond the intended area, is a common challenge that can stem from a variety of factors. The most prevalent cause is operating the sprayer at a pressure that’s too high for the job.
While it’s tempting to crank your sprayer up to maximum pressure for a faster application, this often leads to excessive atomisation of paint particles, causing them to become airborne and settle where they're not wanted. The choice of spray tip plays a pivotal role too; a tip that’s too large will release more paint than necessary, increasing the likelihood of overspray.
Similarly, technique and distance matter greatly. Spraying too close to the surface can concentrate the paint in one area, but moving too far away allows more paint to disperse into the air. Environmental factors, like windy conditions, can also contribute to overspray, carrying the paint away from the target surface.
To mitigate this, it’s crucial to spray in calm weather or ensure adequate shielding if working outdoors. In enclosed spaces, proper ventilation is key to controlling air movement and reducing overspray. By understanding and adjusting these elements – pressure, tip size, technique, and environmental conditions – you can significantly reduce overspray, leading to a cleaner, more efficient painting process.
Achieving the best results with an airless paint sprayer involves a combination of proper technique, equipment setup, and maintenance. Here are some key techniques and tips:
By following these techniques and tips, you can achieve a smooth, even finish with your airless paint sprayer. Remember, practice is key – the more you use your sprayer, the more skilled you'll become in handling it efficiently.
Buying an airless paint sprayer from PaintAccess is a great option for professional painters and those DIY painters who have a big project in the works (like a house renovation). Shop online or come into one of our Sydney stores (St Leonards and Matraville) for expert advice about the best paint sprayer for you.
Alternatively, you can hire a paint sprayer. When you hire an airless paint sprayer from PaintAccess we'll make sure you have everything you need to complete your painting project, including the airless paint sprayer itself (which are always in great condition because we actively maintain airless pumps and other components), airless spray gun and gun filter and tips, and clear instructions and guidance.
Whether you're painting a whole house or just giving a room a couple of coats of paint, understanding how your airless paint sprayer works, and the best way to troubleshoot it is important. And whether you're a professional painter or a DIY house painter, an airless paint sprayer is a great idea and hopefully you've now got a good understanding of why airless paint sprayer tails happen and how best to deal with them.
At PaintAccess, our experts can help you to understand what you need and what you need to do. We know our prime tubes from our ball valves and we can help you with the paint, paint equipment and accessories you need to produce great results every time you paint.
]]>Sandpaper is a versatile tool commonly used in woodworking, painting, and various other crafts and projects. At its core, sandpaper consists of a backing material, usually paper, cloth, or film, to which an abrasive material like aluminium oxide or silicon carbide is adhered. The abrasive particles are what do the actual "sanding" work, removing material from surfaces or smoothing them out.
The grit number on sandpaper refers to the size of these abrasive particles. Lower numbers indicate larger, coarser particles, while higher numbers signify finer particles. For instance, a 40-grit sandpaper will be much coarser and remove material more aggressively than a 220-grit one, which is finer and best suited for finishing touches.
Why the name "sandpaper", you ask? Historically, crushed shells, seeds, and sand were used as abrasive materials. Over time, as technology advanced, more effective abrasive materials replaced sand, but the traditional name stuck.
Using the right grit for a specific task is vital. Coarse sandpaper can help remove old paint or smooth rough wood quickly, while finer grades are used for finishing surfaces or preparing them for paint or varnish. By selecting the appropriate sandpaper and using it correctly, craftsmen can achieve the desired finish on a range of materials, from timber to metals and beyond.
While there are many grit sizes available, the most common ones you'll typically encounter, especially for painting preparation, include:
It can help to have sandpaper in a range of grits to deal with a range of painted surfaces, rough surfaces, and specific tasks.
Using sandpaper as part of painting projects offers several benefits that can greatly enhance the final outcome and longevity of your paint job:
In conclusion, incorporating sandpaper into your wall painting preparation is a simple step that can elevate the quality, appearance, and longevity of your paint job.
Sanding before painting is a bit like preparing a canvas for an artist: you're setting the stage for your masterpiece. But how much sanding is truly necessary?
It largely hinges on the state of the surface in question. If you're dealing with brand-new plasterboard, a light sanding to smooth out joint compounds or any minor imperfections will do.
However, when you're addressing walls with old paint, particularly if it's chipping or uneven, more aggressive sanding might be in order. You're aiming to strip away peeling paint and create an even surface.
But there's no need to overdo it. Sanding is about preparation, not destruction. Be gentle, methodical, and remember: it's about creating the best possible surface for your paint. Once you feel the surface is smooth to the touch and free of noticeable imperfections, you're ready to introduce it to its new vibrant future.
Sanding between coats of paint is a step that some might consider skipping, but it's a game changer in achieving a flawless finish. Think of each coat of paint as a new chapter in a book. Sanding between these chapters ensures clarity, cohesion, and a polished narrative.
When paint dries, it can sometimes leave behind minuscule imperfections: tiny brush or roller marks, dust particles, or a slight texture from the paint itself. By lightly sanding between coats, you're doing a gentle edit, smoothing out these tiny bumps and creating an ideal surface for the next layer of paint. This not only enhances the paint's adhesion but also helps prevent visible lines and rough patches in the final coat.
But remember, this isn't about taking off layers; it's about refinement. A fine-grit sandpaper, typically around 220-grit, is perfect for this task. Gently go over the dried paint, just enough to smooth things out. Wipe away the dust, and you're ready for the next coat.
In essence, while it might seem like an extra step, sanding between coats is a small investment of time that pays off with a smoother, more professional-looking result. It's the subtle difference between a good paint job and a great one.
When deciding between wet and dry sanding between paint coats, wet sanding is often the preferred method. Wet sanding, using water or a special sanding lubricant, reduces the amount of dust produced and can prevent the sandpaper from clogging up with paint residue. This allows for a smoother, more consistent sanding experience. Additionally, wet sanding provides a finer finish, which is especially useful when aiming for a high-gloss or polished final appearance. However, it's crucial to ensure the surface is completely dry before applying the next coat of paint. On the other hand, if you're working on a project where moisture might be problematic or if you're looking for a quicker turnaround between coats, dry sanding might be more suitable.
When sanding between coats of oil-based enamel paint, it's important to use a fine-grade sandpaper to ensure you smooth the surface without causing excessive abrasion. Typically, a 220-grit to 320-grit sandpaper is ideal for this purpose. This range allows you to gently buff out imperfections and ensure proper adhesion of the subsequent coat, without risking removal of too much of the underlying layer.
If you skip sanding between paint coats, you risk a finish that's less than ideal. Without sanding, subsequent layers may not adhere as well, leading to potential peeling or chipping down the line. Additionally, any imperfections from the first coat, like brush strokes or dust, will be amplified, resulting in a rougher and less polished finish. Sanding helps to smooth out these issues, ensuring each coat is smoother and more uniform. In essence, not sanding can compromise both the appearance and durability of your paint job.
If you apply a second coat of paint too soon, before the first coat has fully dried, you can run into several issues. The wet underlayer can mix with the fresh coat, leading to streaks, colour inconsistency, or a mottled appearance. Additionally, the paint may not adhere properly, increasing the risk of peeling or chipping in the future. The drying time can also be extended since the moisture trapped between the layers takes longer to evaporate. Overall, painting too quickly can compromise the finish's look and longevity, making patience between coats crucial for optimal results.
When painting over old paint, the choice of sandpaper grit largely depends on the condition of the existing paint. If the old paint is chipped, flaking, or rough, starting with a coarser grit like 80-100 grit can be effective to smooth out major imperfections. After the initial pass, switch to a finer grit, around 120-150 grit, to further smooth the surface and prepare it for the new coat of paint. This progression ensures a well-prepped surface, promoting better adhesion and a smoother finish for the new paint layer.
For sanding a wall, a variety of tools can be employed to make the job more efficient and achieve the desired smoothness. Manual sanding blocks or pads work well for smaller areas or detailed work. For larger surfaces, pole sanders or devices for holding whole sandpaper sheets offer extended reach and efficient coverage. Electric or pneumatic orbital sanders can expedite the process, especially for sizable walls or rooms. Portable belt sanders are a great power tool option for sanding wooden door and window frames. Additionally, there are specialised dustless sanders with integrated dust collection systems that can significantly reduce the mess typically associated with sanding. Regardless of the tool, it's essential to choose the appropriate grit of sandpaper based on the wall's condition and the intended outcome.
In wrapping up, the meticulous art of preparing and painting walls is truly about the details. Sanding stands out as an integral part of this process, often distinguishing a professional, long-lasting finish from a mediocre one. Whether you're rejuvenating old paint, sanding surfaces between coats, or embarking on a fresh project, the tools and techniques you employ for sanding can make a world of difference. Understanding when and how to sand, the right grit to use, and the importance of patience between paint coats is paramount. So the next time you pick up that paintbrush or roller, ensure that sanding is an essential step in your painting adventure. The walls, and your future self, will thank you!
It's a big claim but it's one tradies have come to believe when it comes to Tricleanium. Professional painters, in particular, are great believers in the cleaning power of Tricleanium for a wide range of cleaning tasks. Tricleanium has now achieved cult status as a bit of a trade secret.
Unlike a lot of cleaning products made by large companies with brands, Tricleanium the product is made by Tricleanium the company. Established in 1954, Tricleanium has been making a range of products under the Tricleanium banner ever since, which now includes:
Family owned and operated, Tricleanium has since become the cleaning product of choice for professional cleaners and painters. Tricleanium is available from major hardware retailers like Bunnings and Mitre 10 and from specialist paint and paint equipment retailers like PaintAccess.
Tricleanium was originally developed as a kitchen cleaner, designed for cleaning ovens, over trays and racks, range hood filters, and tile grout. But professional tradies soon discovered it was also good for tackling particularly difficult cleaning jobs, a great alternative to sugar soap for use on walls before painting, and an all-purpose cleaner for tools and equipment. Professional cleaners, in particular, have added Tricleanium to their arsenal of tools and cleaning products as an effective surface cleaner and as a safe and effective all-purpose cleaner.
As an ultra-concentrated formula, Tricleanium is a great alternative to traditional cleaning products. Just 1kg of Tricleanium concentrate makes 100 litres of cleaning product, based on dilution ratios suggested on the packaging. That means hours of cleaning and hundreds of cleaning tasks before you need to order another tub of Tricleanium.
Tricleanium is great for removing kitchen grease and smoke stains from walls, cleaning ovens and oven trays, cleaning concrete walls and concrete tiles, cleaning and surface preparation for walls that need to be painted, gently cleaning laminated surfaces, and a wide range of other commercial, industrial and domestic cleaning purposes. It works well on a wide range of surfaces, from mouldy bathroom tiles to tough grease stains on concrete garage floors.
It is a particularly effective stain remover, used to tackle tough stains including pet stains and oil stains that would normally require hard work and elbow grease. Instead, a small amount of Tricleanium in hot water is enough to make previously stained surfaces sparkle.
Tricleanium's All Purpose Cleaner is sold as a white crystalline powder. Its primary ingredient is Trisodium phosphate, from which it gets its name. Tricleanium provides a clear material safety data sheet (MSDS) that outlines the composition of Tricleanium and some of the potential risks of consumption or exposure.
Tricleanium ultra concentrated cleaner is a concentrated cleaning product and users should be careful to dilute it and use it properly. Safety gear is always a good idea and ensures Tricleanium and other cleaning chemicals remain safe and effective cleaning products.
Here are a couple of customer reviews from PaintAccess customers:
"Absolutely my favourite cleaning tool; has been for years" - John, Cabramatta NSW
"Easy to use, and can be used on almost anything" - Felicity, Toorak VIC
"Bit of an old-school cleaning method, but some Tricleanium in a bucket of hot tap water and you've got an effective agent for cleaning" - Stephen, Windsor NSW
"A little bit of concentrate is a great way to clean a washing machine, and the diluted solution is awesome for cleaning exhaust fans. Definitely part of my cleaning kit now" - Beth, Fremantle WA
They are similar products, but there are a few differences. Most sugar soap variants contain an alkali substance (sodium carbonate or alkaline salts), an abrasive substance, an organic solvent, and water. They are often used for similar cleaning jobs
Yes, it's great for cleaning grout and tile surfaces which is especially good if you want to paint tiles. Here is a helpful blog post about preparing and painting tiles - How to paint tiles.
Tricleanium All Purpose Cleaner is designed to clean, not strip paint. Tricleanium Paint & Varnish Stripping Gel is designed to strip paint and customers have reported great results.
While Tricleanium is particularly good at cutting through grease and grime, it can also make light work of mould and mildew without leaving surfaces damp.
Yes. Tricleanium can be used on a wide range of surfaces including brick, concrete, tiles, stone, and marble.
]]>The perfect caravan is one that suits your needs, and one that you'll be happy to live in for extended periods of time.
Vintage caravan renovation takes the ideas in this blog post to the next level. Are you going to renovate your caravan with a classic 60s coastal vibe or a colour scheme that reflects Australia's caravanning cultural heritage?
In this post we've collected a range of handy hits and product recommendations to help you with your project; from simple renovations and minor improvement projects through to ground-up rebuilds. Of course, the team at PaintAccess is ready to help you with paint and paint accessories recommendations and advice. Let's jump in...
Caravan renovation walk-through
As you approach your caravan renovation project, it can help to have a clear understanding of the steps involved, from initial assessment to roadworthy checks before you set off on your next adventure.
When it comes to painting your caravan, the first step is to choose the right paint. Modern caravan manufacturers use high-quality automotive paints for caravan exteriors and there's no reason you shouldn't do the same for your vintage caravan or retro caravan. But there are different paints for different purposes:
Of course, choosing the right paint is only part of the challenge. You should also think about the right paint colours for your new caravan. There's no need to paint everything in the same white paint.
There are also a range of paint accessories you should consider investing in. Some of these are necessities for your caravan renovation paint work, and some will simply make your renovating easier:
Remember to follow the manufacturer's instructions for all paint and painting accessories and allow adequate drying time between coats for the best results.
Whether you're trying to add some additional storage space or rebuilding your caravan from the ground up, here are some final tips, tricks and handy hints to help you along the way:
Renovating a caravan can be a rewarding experience that opens up a wide range of holiday options without breaking the bank. Renovating a caravan can save you thousands, bringing down the average cost of your adventures for years to come.
PaintAccess has seen a significant increase in the number of customers seeking advice and guidance about the best ways to renovate a caravan and the different products that might be particularly suited to caravan renovation work. A few have even asked for a list of tips and product recommendations.
So there you go, a basic rundown to get you started on your caravan reno! Good luck, and don’t forget the good old Aussie spirit of giving it a red hot go!
]]>Is it really worth the hassle of cleaning your paint rollers, or should you just toss them and buy new ones? It's a question that many DIY enthusiasts ask themselves. Well, let me tell you, investing in a good paint roller cleaner is definitely worth it.
When you think about it, paint rollers can be quite expensive, especially if you opt for the professional ones. So why throw them away after just one use when you can easily clean them and reuse them again and again? That's where a paint roller cleaner comes in handy.
A paint roller cleaner tool or machine can save you both time and money. With just a few simple steps, your dirty paint roller will be as good as new. These automatic paint roller cleaners are designed to remove all the excess paint from the roller quickly and efficiently, leaving it ready for your next painting project.
Not only does using a paint roller cleaner extend the lifespan of your rollers, but it also ensures better performance. A clean roller will distribute the paint evenly on your walls or surface, giving you a smooth finish every time.
So don't waste any more money on buying new rollers every time you need to start a painting project. Invest in a quality automatic paint roller cleaner and enjoy hassle-free cleaning for years to come!
Professional painters have a secret method for effortlessly maintaining the quality of their rollers. They know that properly cleaning and caring for their tools is essential for achieving a smooth and professional finish on every project. When it comes to cleaning paint rollers, professionals follow a few simple steps to ensure optimal performance.
First, they remove as much excess paint from the roller as possible by scraping it against the edge of the paint tray or using a roller cleaner tool. Then, they rinse the roller under running water to remove any remaining paint residue. Some professionals also use mild soap or detergent to help break down stubborn paint particles.
To make this process even easier, many professional painters invest in automatic paint roller cleaners. These innovative devices can save time and effort by effectively removing all traces of paint from the roller in just a few seconds. Using an automatic cleaner ensures that the roller is thoroughly cleaned and ready for reuse without any hassle.
By regularly cleaning and maintaining their wall paint rollers, professional painters can extend their lifespan and achieve consistent results on each job. So if you want to achieve that flawless finish like the pros, don't forget to prioritise proper care for your rollers too!
Keep your paint roller in top shape and achieve professional results by knowing how often to give it a thorough cleaning. Regular maintenance is key when it comes to extending the lifespan of your paint roller and ensuring optimal performance. After each use, make it a habit to clean your paint roller thoroughly. This will prevent any dried-up paint from accumulating on the roller's surface, which can affect the quality of your next painting project.
If you're working on a long-term painting project or using multiple colours, it's recommended to clean your paint roller at the end of each day. This prevents the paint from drying out and clogging the fibres overnight. Additionally, if you're using oil-based paints or stains, it's crucial to clean your roller immediately after use due to their longer drying time.
For more intensive cleaning, consider soaking your paint roller in warm soapy water for a few minutes before scrubbing off any remaining residue with a brush or sponge. Rinse it thoroughly until all traces of paint are removed.
Remember that proper cleaning not only maintains the quality of your current project but also ensures that future projects are completed with ease. By following these guidelines and incorporating regular cleaning into your routine, you'll keep your paint rollers in excellent condition for many projects to come.
To easily clean your paint roller, simply slide it off the handle and give it a gentle squeeze to remove any excess paint before placing it under a steady stream of warm water. This will help loosen up the paint and make it easier to clean. Once the roller is wet, use your hands or a soft brush to gently work out any remaining paint from the fibres. You can also add a small amount of dish soap to help break down the paint even further.
After you have removed all the paint, rinse the roller thoroughly with warm water until no more paint comes off. Make sure to squeeze out any excess water from the roller by pressing it against the sink or using a towel. It's important to note that you should never wring out or twist the roller, as this can damage its fibres and affect its performance in future painting projects.
Once your roller is clean and dry, you can store it for future use or reuse it immediately for touch-ups or other painting tasks. Remember to clean your rollers after each use to ensure their longevity and optimal performance. By following these simple steps, you can easily clean your paint roller and keep it ready for your next painting project.
Explore different roller cleaner options like Rollerready, The Rocket, Rollerblaster, and RotaCota Easy Clean to find the perfect tool that will revolutionise your painting experience. These innovative automatic paint roller cleaners are designed to save you time and effort when it comes to cleaning your paint rollers. Here's a comparison of the top options:
This roller cleaner uses centrifugal force to spin out excess paint from your roller in just seconds. It is easy to use and can clean both standard and mini rollers. |
|
The Rocket |
With its powerful motor, The Rocket can clean a paint roller in under 30 seconds. It features an adjustable clamp that securely holds the roller during cleaning. |
Rollerblaster |
This roller cleaner offers a unique combination of air and water pressure to thoroughly clean even the toughest paint residues from your roller. It has a compact design and is compatible with most standard size rollers. |
This automated cleaner allows you to clean multiple rollers at once, saving you even more time. It features a rotating drum system that efficiently removes paint from the rollers. |
Choose the roller cleaner that suits your needs best and say goodbye to tedious manual cleaning methods forever!
Experience the power of Rollerready, the ultimate tool for effortlessly cleaning your paint roller in a matter of seconds. With Rollerready, you can say goodbye to the tedious and time-consuming task of manually cleaning your paint roller after each use. This innovative device is designed to remove excess paint from your roller with just a few simple steps.
Using Rollerready is incredibly easy. First, attach your dirty paint roller to the device using the built-in clamp. Then, simply turn on the water supply and watch as Rollerready spins your roller at high speed, effectively removing all traces of paint. The spinning action combined with the water flow ensures that every inch of your roller gets thoroughly cleaned.
Not only does Rollerready save you time and effort, but it also helps prolong the lifespan of your paint rollers. By removing all leftover paint residue, it prevents colour mixing and maintains the integrity of your rollers for future projects.
Cleaning up after painting has never been this quick and convenient. With Rollerready by your side, you can focus on what really matters – creating beautiful spaces with ease. Say goodbye to messy cleanups and hello to effortless maintenance with Rollerready, the best automatic paint roller cleaner on the market today.
Get ready to revolutionise your painting experience with The Rocket, a hands-free solution for effortlessly cleaning your paint roller. Say goodbye to the tedious and messy task of manually cleaning your paint roller, and say hello to a quick and efficient way of getting the job done.
Experience hassle-free cleaning with The Rocket and enjoy a cleaner painting process from start to finish. Say goodbye to traditional methods and embrace this innovative tool that will make cleaning your paint rollers a breeze!
Introducing the Roller Blaster - the game-changing solution that will revolutionise how you clean your paint roller, leaving you amazed and effortlessly eliminating any frustration. This innovative tool is designed to make your life easier when it comes to cleaning your paint rollers. No more spending hours scrubbing or using messy buckets of water. With the Roller Blaster, all you need to do is attach your dirty roller and let it do the work for you.
The Roller Blaster utilises a high-pressure water jet system that effectively removes all traces of paint from your roller in just minutes. Simply connect it to a standard garden hose, turn on the water, and watch as the powerful jets blast away any remaining paint particles. The adjustable pressure settings allow you to control the intensity of the cleaning process, ensuring that even stubborn dried-on paint can be easily removed.
Not only does the Roller Blaster save you time and effort, but it also saves water. By using a closed-loop system, this cleaner recirculates and filters the water used during cleaning, reducing waste and environmental impact.
Say goodbye to tedious manual cleaning methods and say hello to effortless paint roller maintenance with the Roller Blaster. It's time to simplify your painting projects and make cleanup a breeze!
With the Rotacota, maintaining a spotless paint roller has never been easier. This innovative tool takes the hassle out of cleaning your roller after each use. Simply attach the roller to the Rotacota and let it do all the work for you.
The Rotacota Easy Clean roller cleaner is designed with convenience in mind. It features a powerful motor that spins the roller at high speeds, effectively removing all excess paint from its surface. The spinning action also helps to fluff up the fibres of the roller, ensuring that it stays soft and ready for your next painting project.
Cleaning your roller with the Rotacota is a breeze. Once attached, all you need to do is turn on the machine and let it run for a few minutes. The rotating motion will agitate the bristles of the roller, loosening any remaining paint particles. Afterward, simply rinse off any remaining residue with water and your roller will be as good as new.
Not only does this handy tool save you time and effort, but it also extends the lifespan of your rollers. With regular use of the Rotacota Easy Clean roller cleaner, you can ensure that your rollers stay in top condition for years to come.
In conclusion, if you're looking for an efficient and effortless way to clean your paint rollers, look no further than the Rotacota Easy Clean Roller Cleaner. Its powerful motor and rotating action make quick work of removing excess paint from your rollers while keeping them soft and ready for use. Say goodbye to tedious manual cleaning - let Rotacota do all the work!
In conclusion, cleaning your paint rollers is definitely worth it if you want to save time and money. Professional painters often use automatic paint roller cleaners to make the process easier and more efficient. It is recommended to clean your paint roller after every use to maintain its quality and ensure better results in future projects. Among the top options available, Rollerready, The Rocket, Rollerblaster, and the RotaCota Easy Clean are all great choices for effectively cleaning your paint rollers. Choose the one that suits your needs best and say goodbye to messy cleanup!
Can I reuse a paint roller that has been cleaned?
Yes, you can reuse a cleaned paint roller. After properly cleaning it, allow it to dry thoroughly before using it again. Reusing a cleaned roller is an effective way to save money and reduce waste.
What are the benefits of using an automatic paint roller cleaner?
Using an automatic paint roller cleaner has several benefits. It saves you time and effort by quickly cleaning your roller, ensuring it's ready for reuse. Plus, it effectively removes excess paint, resulting in a smoother finish on your next project.
Are all automatic paint roller cleaners compatible with different roller sizes?
Yes, not all automatic paint roller cleaners are compatible with different roller sizes. It is important to check the specifications of each cleaner to ensure it can accommodate the size of your rollers effectively.
Can an automatic paint roller cleaner remove dried paint from a roller?
Yes, an automatic paint roller cleaner can remove dried paint from a roller. It uses powerful rotating brushes and water to effectively clean and loosen the dried paint, making it easier to remove.
Is it necessary to clean a paint roller after every use?
Yes, it is necessary to clean a paint roller after every use. This ensures that you can reuse the roller for future projects and prevents any dried paint from affecting the quality of your work.
Are you an Australian tradie looking for the best quoting and invoicing software for your business? Look no further! In this article, we will introduce you to the 3 top programs and systems that will revolutionise your business.
With these tools, you can streamline your quoting process and create professional invoices with ease. No more wasting time on manual calculations or struggling to keep track of your quotes. These systems will do all the hard work for you, allowing you to focus on what you do best - providing quality services to your clients.
Whether you're a painter, decorator or builder, there's software on this list that's perfect for your needs. So, get ready to take your tradie business to the next level with these game-changing software options.
Business software is a broad term that describes a range of software and systems used to manage various aspects of your business. Some help you manage your website and engagement with customers, some help you manage customer relationships, some help you manage quoting and invoicing, and others help you manage your payroll and tax returns. And some business software helps you manage a combination of these things.
Business software can help you to manage your business by streamlining administration processing, bringing all quoting and invoicing functions together in one place, and giving you a way to effectively develop and manage relationships with your clients.
There are a range of different business software options and in this article we’re having a look at 3 of them and some of the features they offer.
It’s important to understand what each business software option includes, and to make the right decision for your business. Some of the popular choices include MYOB which is an accounting system for small businesses that helps you to manage quoting, invoicing and tax returns, BorisDoes which integrates your business website with quoting and invoicing functionality, and XERO which provides accounting services that can be integrated with other software and systems.
We’ve created a quick-reference table so that you can get an idea of what each of these business software options include:
Features |
BorisDoes |
XERO |
MYOB |
Quoting |
Yes |
Yes |
Yes |
Invoicing |
Yes |
Yes |
Yes |
PAYG payroll |
No |
Yes |
Yes |
Quotes with deposit requests |
Yes |
No |
No |
Quote request directly from website |
Yes |
No |
No |
Digital signature requests on quotes |
Yes |
No |
No |
Cross-platform integration |
Yes |
Yes |
Yes |
Foreign currencies |
No |
Yes |
Yes |
Expense tracking |
No |
Yes |
Yes |
Built-in client management system |
Yes |
No |
No |
Quote and invoice status tracking |
Yes |
Yes |
Yes |
Free Trial Available |
Yes |
Yes |
Yes |
Pricing (per month) |
|||
Basic version |
$0.00 |
$14.50 |
$15.00 |
Standard version |
$80 |
$29.50 |
$27.50 |
Premium version |
$500.00 |
$55.00 |
$85.00 |
BorisDoes now includes a full-service business solution that combines business websites with quoting and invoicing tools and customer relationship management (CRM) functionality.
BorisDoes enables small business owners to coordinate all aspects of customer communication, quoting, invoicing and job management in one place. Manage your website content, communicate with customers to troubleshoot issues, customise your quotes and invoices, and process transactions all in one place.
Other features include the ability to receive quote requests directly from your website, the ability to request digital signatures from customers when they accept quotes, and tools for calculating and requesting deposits from customers before you start work. These features are all specifically designed for tradie businesses.
Can you produce quotes using BorisDoes?
Yes, BorisDoes includes a simplified system that allows you to respond quickly to a quote request from a customer with a detailed and accurate quote explaining how much their requested work will cost. That simplified request-to-quote process means you can make a great first impression and show customers you’re ready to start their work as soon as possible.
The BorisDoes quoting system allows you to add custom features and branding to your quotes including bespoke terms and conditions, your company’s logo and contact details, and a request for a digital signature upon acceptance.
The inclusion of a digital signature request tool means that you can send your quotes, have them accepted, and know they are much easier to legally enforce because your customer has formally accepted it. It means you can communicate with customers online with the same level of security as presenting a paper quote in person.
Can you produce invoices using BorisDoes?
Yes, it’s quick and easy to produce invoices using BorisDoes. Helpfully, you can convert a quote into an invoice once a customer has accepted it, transferring all relevant data from your original quote into an invoice for sending to the same customer.
Because all quotes and invoices associated with a particular customer are kept together in the same integrated chat, you only need to change your invoice manually if you have discussed the job with your client and something has changed. If everything in the quote your client accepted is accurate, you can just submit the same information as an invoice.
That functionality is further enhanced by an integrated chat tool that allows you to track quotes and invoices sent to each customer, make changes in real time, discuss any issues, and answer any questions. In-built notifications, along with email and SMS notifications, allow you to manage quoting and invoicing without missing anything along the way.
XERO offers an all-in-one solution for managing your business finances. It makes handling invoicing, payroll, and more easy and convenient. With XERO, you can streamline your quoting and invoicing process, saving time and effort.
Here are three reasons why XERO is a great choice for tradies in Australia:
With XERO, you can simplify your quoting and invoicing process. This gives you more time to focus on what you do best – delivering quality services to your clients.
Can you produce quotes using XERO?
Yes, with XERO's quote feature you can easily track and manage your quotes. With XERO, creating and sending quotes to your clients is a breeze. Simply input the details of the job, including the quantity, price, and any additional notes, and XERO will generate a professional-looking quote. You can then send the quote directly to your clients via email or print it out for a physical copy. XERO also lets you track the status of each quote, whether it's still pending, accepted, or declined. This allows you to stay organised and follow up with clients accordingly. You can use XERO's quote feature to streamline your quoting process and improve communication with your clients.
Can you produce invoices using XERO?
Yes, XERO provides invoicing functionality, making it comprehensive software for your tradie business. With XERO's invoicing feature, you can easily create and send professional looking invoices to your clients. You can customise your invoices with your business logo and personalise them with your own branding. XERO also allows you to track the status of your invoices, making it easier for you to keep on top of your payments. You can even set up automatic reminders to ensure your clients pay on time.
Plus, XERO integrates seamlessly with other accounting and payment systems, making the invoicing process even more convenient for you.
MYOB stands for Mind Your Own Business, and is designed to allow you to do exactly that - manage your own business finances. It’s a popular choice among small businesses and tradies in Australia.
MYOB offers a comprehensive range of accounting tools that cater to the specific needs of trades businesses. With MYOB, you can easily manage invoicing, quoting, and expenses, allowing you to stay organised and focused on your work.
MYOB also includes a mobile app which allows you to manage your business finances on the go. Manage quoting in the field and generate invoices in real time without needing to go back to the office.
MYOB understands the unique needs of tradies and provides an intuitive and user-friendly platform to streamline your business processes.
Can you produce quotes using MYOB?
Yes, with MYOB you can quickly and efficiently generate accurate quotes for your trades business. You can create professional quotes that showcase your services and provide clear pricing details.
The software allows you to customise your quotes by adding your logo, terms and conditions, and any additional information. You can also create templates for future use, saving you time and effort.
MYOB's quoting feature ensures that you provide your clients with accurate and professional quotes, helping you win more business.
Can you produce invoices with MYOB?
Yes, with MYOB you can easily create and send professional invoices to your clients. The software allows you to customise your invoices with your logo, payment terms, and other details. You can also track the status of your invoices and send reminders for unpaid invoices. MYOB makes it easy to keep track of your income and expenses, helping you stay organised and on top of your finances. With its user-friendly interface and powerful features, MYOB is a reliable choice for tradies in Australia.
How is MYOB different from XERO?
Compared to other business software options, MYOB and XERO have distinct features that set them apart.
MYOB offers a range of features, including invoicing, payroll management, and inventory tracking. MYOB has a user-friendly interface and provides detailed reporting and analysis tools.
On the other hand, XERO is known for its cloud-based platform, making it accessible from anywhere. It also offers robust invoicing capabilities, profit and loss tracking, and automated banking reconciliations. XERO integrates with various third-party apps and software tools, providing additional functionality.
While both MYOB and XERO are reliable options, it ultimately comes down to personal preference and the specific needs of your tradie business.
Is MYOB free to use?
MYOB offers a free trial, which means you can try it to see if it’s the right business software for your business. You can sign up for MYOB’s Essentials plan and gain access to basic features like invoicing, expenses, and bank feeds that will effortlessly streamline your business operations. After 30 days you’ll be given the option to purchase a subscription and start paying a monthly amount to continue using MYOB.
While it helps to understand the features of each business software package, it’s important to understand how much each costs, and what you get for your monthly subscription. Let’s take a look at the prices and plans offered for BorisDoes, MYOB and XERO, and discover which option fits your budget and business needs.
MYOB offers three main plans:
In the same way, XERO offers three plans:
BorisDoes offers two different plans for businesses looking for excellent quoting and invoicing functionality:
And BorisDoes offers an advanced option for businesses looking to take their online presence and service delivery to the next level.
Consider your budget and the features you require to make an informed decision.
BorisDoes, MYOB and XERO each offer a range of business software tools to help you win new customers, manage quoting and invoicing, maintain customer relationships, and establish an online presence for your business.
If you need accounting software for your small business, MYOB is a great option. It has consistently been the perfect choice for businesses with a small payroll that might or might not need to submit business activity statements (BAS).
If you have a larger business with an existing website and a more complicated payroll and tax reporting obligations, XERO is the way to go. Its robust features scale with your business and give you plenty of options for growth.
If you have a new tradie business and you need both a website and business software to manage quoting and invoicing, BorisDoes is the ideal choice. Its customisation options and unique customer engagement features are ideal for small business owners who want everything in one place.
Regardless of which option you choose, having high-quality business software in place is essential for running a successful business in Australia. Check out our other PaintAccess blog posts for more ideas, recommendations, and comparisons.
]]>
In this article, we will show you how to effectively remove efflorescence from your bricks using Drizoro products. But first, let's understand what efflorescence is and why it's important to address it early on.
Efflorescence is a white, powdery substance that forms on the surface of bricks due to various factors. If left untreated, it can lead to further damage and deterioration of your brickwork.
That's where Drizoro comes in. With their expertise in removing efflorescence and their specialised waterproofing products, they have developed products specifically designed for brick surfaces.
We will also provide you with tips on preventing future efflorescence and regular maintenance practices to keep your bricks looking their best.
Say goodbye to those pesky white stains and hello to beautifully restored brick surfaces with Drizoro!
Understanding Efflorescence
Understanding efflorescence can help you identify the underlying causes and take necessary measures to prevent its recurrence.
Efflorescence occurs when water-soluble salts in the brick or mortar dissolve and migrate to the surface, leaving a white powdery residue.
It is often caused by excessive moisture, improper curing, or the use of high-salt content materials.
By understanding efflorescence, you can effectively remove it and implement waterproofing solutions to protect your bricks from future damage.
Causes of efflorescence on brick surfaces
To identify the causes of efflorescence on your brick surfaces, you need to know why those white powdery residues appear. Efflorescence occurs when water-soluble salts migrate to the surface of the bricks and evaporate, leaving behind the salt deposits.
These salts can come from various sources, such as the mortar used during construction, the bricks themselves, or even the water used for cleaning.
Understanding the sources of these salts is crucial in effectively removing efflorescence from your brick surfaces.
Identifying efflorescence and differentiating it from other issues
If you're wondering how to distinguish efflorescence from other issues on your brick surfaces, here's a simple way to identify it.
Efflorescence appears as a white, powdery substance on the surface of your bricks. It is caused by the migration of salts through the brick pores and is often accompanied by a musty odour.
Efflorescence can be easily differentiated from mould or mildew, which usually appear as black or green spots on the brick.
Potential risks of leaving efflorescence untreated
Neglecting to address efflorescence on your brick surfaces can lead to potential long-term risks. These risks include deterioration of the brick, structural damage, and compromised aesthetic appeal.
If left untreated, efflorescence can cause the brick to weaken over time. This weakening makes the brick more susceptible to cracking or crumbling. The salt deposits from efflorescence can also seep into the brick, causing further damage and compromising its structural integrity.
Don't ignore this issue. Take the necessary steps to remove efflorescence promptly.
Importance of addressing efflorescence early on
By addressing the issue promptly, you can prevent further damage to your bricks and ensure their long-term durability.
Removing efflorescence is essential to maintaining the appearance and structural integrity of your brick surfaces.
Drizoro offers the best efflorescence removal products, specifically designed to eliminate brick salt and restore the original beauty of the bricks.
Don't delay in addressing efflorescence; act now to protect your investment and maintain the quality of your brickwork.
Introduction to Drizoro and their expertise in removing efflorescence
With their expertise in removing efflorescence, Drizoro is the go-to solution for preserving the beauty and longevity of your brickwork.
Drizoro offers a range of products, including Maxseal Flex M, which is specifically designed to combat efflorescence and provide a waterproof barrier. Maxseal Flex M is known for its durability and effectiveness, ensuring that your brickwork remains protected for years to come. And the best part? It comes at an affordable price.
Introducing the Drizoro product range
Discover how Drizoro's innovative range of products can transform your brick surfaces, giving them a long-lasting, beautiful finish. With their expertise in efflorescence removal, Drizoro offers a variety of effective solutions tailored to your specific needs. Whether it's their Efflorescence Cleaner, Efflorescence Remover, or Efflorescence Stain Remover, Drizoro has you covered.
These products are designed to safely and efficiently remove efflorescence, restoring the natural beauty of your bricks. Don't let efflorescence ruin your brick surfaces any longer; try Drizoro's reliable products today.
Product |
Description |
Benefits |
Efflorescence Cleaner |
Powerful formula that removes efflorescence deposits |
Restores the original colour and texture of bricks |
Efflorescence Remover |
Specially formulated to eliminate stubborn efflorescence |
Prevents further damage and prolongs the lifespan of bricks |
Efflorescence Stain Remover |
Effectively removes efflorescence stains without damaging the bricks |
Leaves a clean and blemish-free surface |
Highlighting the benefits of using Drizoro products for efflorescence removal and waterproofing
Experience the transformative benefits of Drizoro's innovative products for efflorescence removal and waterproofing, and say goodbye to unsightly stains and damage on your brick surfaces.
Drizoro's products are specifically designed to effectively eliminate efflorescence, offering a long-lasting solution. They not only remove the existing stains but also prevent future occurrences, providing a durable waterproofing barrier.
With Drizoro, you can trust that your brick surfaces will stay pristine and protected for years to come.
Preparation: safety measures and surface evaluation
Before diving into the process, it's important to take safety precautions and evaluate the condition of the surface you'll be working on.
Start by wearing protective gear such as gloves and safety goggles to avoid any harm.
Next, examine the brick surface for any cracks or loose bricks that may need repair before removing the efflorescence.
This will ensure a safe and effective removal process without causing any further damage to the bricks.
Cleaning the brick surface: proper techniques and tools
Now that you've taken the necessary safety measures and evaluated the surface, it's time to tackle the next step: cleaning the brick surface.
This is where you'll learn about the proper techniques and tools to effectively remove efflorescence.
From scrub brushes to pressure washers, you'll discover the most efficient ways to restore your brick's original beauty.
Let's dive in and get those bricks looking brand new again!
Application of Drizoro efflorescence remover: instructions and tips
To properly apply Drizoro efflorescence remover and achieve the best results for your brick surface, follow these instructions and helpful tips:
By following these instructions and tips, you can effectively remove efflorescence from your brick surface and restore its appearance. Remember to always read and follow the product instructions for best results.
Step-by-step guide to removing efflorescence from bricks
Start by gathering the necessary materials and prepare yourself for a satisfying DIY project: you're about to learn how to banish those pesky efflorescence stains from your brick surfaces. To effectively remove efflorescence from brick, follow these simple steps:
Step |
Instructions |
1 |
Mix a solution of 1 part white vinegar and 3 parts water. |
2 |
Scrub the affected area with a stiff brush dipped in the vinegar solution. |
3 |
Rinse the area thoroughly with clean water. |
4 |
Allow the brick surface to dry completely. |
5 |
Apply a waterproofing sealer to prevent future efflorescence. |
With these steps, you can restore the beauty of your brick surfaces and keep them looking flawless for years to come.
Best practices for achieving optimal results
To ensure you get the best results possible, follow these tips for achieving optimal outcomes when using the Drizoro efflorescence remover on your brick surface.
- First, make sure to thoroughly clean the brick surface before applying the remover. Use a scrub brush or pressure washer to remove dirt and debris.
- Next, carefully follow the instructions provided by Drizoro for the application process.
- Finally, allow sufficient time for the remover to work its magic before rinsing off with water.
Brief overview of Drizoro's waterproofing solutions
Drizoro offers a range of waterproofing solutions that are designed to protect and seal various surfaces. Their products are specifically formulated to effectively remove efflorescence from brick, ensuring optimal results.
With Drizoro's solutions, you can easily and efficiently tackle the problem of efflorescence, restoring the beauty and integrity of your brick surfaces.
Their products are trusted by professionals and homeowners alike for their effectiveness and reliability.
The importance of waterproofing after efflorescence removal
Once you've successfully eliminated efflorescence, it's crucial to waterproof the surfaces to prevent future damage and maintain the longevity of your brick structures.
Waterproofing creates a protective barrier that keeps water from seeping into the bricks and causing further deterioration.
Drizoro's waterproofing solutions are designed to effectively seal the pores of the bricks, preventing the absorption of water and the formation of efflorescence.
Don't neglect this important step in maintaining the integrity of your brickwork.
Highlighting the compatibility of Drizoro products for brick surfaces
Now that you understand the significance of waterproofing once efflorescence is eliminated, let's focus on the remarkable compatibility of Drizoro products for brick surfaces.
You'll be thrilled to know that Drizoro offers a range of solutions specifically designed to effectively remove efflorescence from brick. Their products are formulated to work seamlessly with brick surfaces, ensuring a long-lasting and reliable solution to keep your bricks looking their best.
Preventing future efflorescence and maintenance tips
To prevent future efflorescence and keep your brick surfaces looking their best, follow these maintenance tips:
- Regularly clean your brick surfaces using a mild detergent and water. Avoid harsh chemicals that can damage the brick.
- Inspect your brick for any cracks or damage and repair them promptly.
- Apply a high-quality sealer to protect the brick from moisture and prevent efflorescence from occurring again.
Recommendations for preventing efflorescence recurrence
To keep efflorescence from coming back, you'll need to take proactive measures and ensure that your brick surfaces stay clean and well-maintained. Here are some recommendations to prevent efflorescence recurrence:
Measure |
Description |
Proper drainage |
Ensure that water drains away from the brickwork to prevent moisture buildup. |
Use vapour barriers |
Install vapour barriers to block moisture from penetrating the brick. |
Regular cleaning |
Clean your brick surfaces regularly to remove dirt and debris that can contribute to efflorescence. |
Apply a protective sealant |
Apply a high-quality sealant to create a barrier that prevents moisture from reaching the brick. |
Regular maintenance practices to preserve brick surfaces
Maintaining the beauty and integrity of your brick surfaces is essential for prolonging their lifespan and protecting your investment. To preserve your brick surfaces, it's important to implement regular maintenance practices.
Firstly, regularly clean the brick with a mild detergent and water solution. This will help remove any dirt, grime, or stains that may have accumulated over time. Use a soft brush or sponge to gently scrub the brick, and then rinse it thoroughly with clean water.
Secondly, check for any cracks or damage on the brick surface. Cracks can allow water to seep into the bricks, causing further damage over time. If you notice any cracks or damage, it's important to repair them as soon as possible. You can use a brick repair mortar to fill in the cracks and ensure that the surface is smooth and even.
Lastly, consider applying a protective sealant to your brick surfaces every few years. A sealant can help protect the bricks from moisture, UV rays, and other elements that can cause damage. Be sure to choose a sealant that is specifically designed for brick surfaces and follow the manufacturer's instructions for application.
By following these simple steps, you can ensure that your brick surfaces remain in excellent condition for years to come. Regular maintenance practices will not only preserve the beauty of your bricks but also extend their lifespan, saving you money in the long run.
Conclusion
So there you have it, a complete guide on effectively removing efflorescence from brick surfaces. By using Drizoro products, you can tackle this issue head-on and restore the beauty of your bricks.
Remember, addressing efflorescence early on is crucial to prevent further damage. With the right products and regular maintenance, you can keep your brick surfaces looking pristine for years to come.
Don't let efflorescence ruin the appearance of your bricks, take action today and enjoy a beautiful, waterproofed surface.
]]>This article aims to provide guidance on troubleshooting a common issue encountered with Graco sprayers: failure to prime. When a paint sprayer fails to prime, it can impede the painting process and lead to frustration for the user. Understanding the reasons behind this problem and learning how to fix it are essential for achieving optimal performance with your Graco equipment.
We’ll explore various factors that may contribute to the failure to prime, including clogged filters, inadequate sealant lubrication, and incorrect pressure settings. Different methods for resolving the issue will be discussed, including steps to take for airless sprayers and spray guns.
By following the recommendations outlined in this article, users will be equipped with the knowledge to effectively troubleshoot and resolve the priming issue with their Graco sprayers.
Let’s start with the regular process for priming your airless paint sprayer when everything is going right. The process of priming an airless sprayer involves ensuring that paint is properly drawn from the container and delivered to the surface. Priming is essential to ensure that the sprayer functions effectively and provides a smooth and even paint application. To get an airless sprayer to prime, there are several steps that can be followed.
During the priming process, it is important to make sure that the sprayer is properly pressurised and that any air pockets are eliminated. This can be done by adjusting the prime valve and allowing the paint to flow through the sprayer until a steady stream is achieved.
Once the sprayer is properly primed, it can be used to apply paint to the desired surface.
When encountering a paint sprayer that fails to prime, it’s best to take systematic steps to identify and rectify the issue, ensuring a smooth and efficient spray application process.
Troubleshooting a Graco airless paint sprayer that is not priming, like the Graco Magnum X, can be done by following a few steps:
By systematically checking and addressing these potential issues, troubleshooters can resolve priming problems with Graco sprayers and ensure a successful paint spraying experience.
To address an airless sprayer's failure to prime, it is crucial to identify and rectify any underlying issues. When dealing with a Graco paint sprayer, such as the Graco Magnum X5 or the Graco X19, it is important to follow a systematic troubleshooting process.
One common issue that can prevent an airless sprayer from priming is a clogged or dirty inlet screen. This screen is located at the bottom of the sprayer's suction tube and can become blocked by debris or paint buildup. To fix this issue, the screen should be cleaned or replaced if necessary.
Another possible cause for a sprayer not priming is an inadequate amount of paint in the hopper or container. Ensuring that there is enough paint for the sprayer to draw from is essential.
A malfunctioning check valve or faulty pump can also prevent the sprayer from priming. In such cases, a professional repair or replacement may be required. By addressing these potential issues, users can resolve the problem of an airless sprayer not priming and ensure smooth and efficient operation.
Possible Causes |
Solutions |
Clogged or dirty inlet screen |
Clean or replace the screen |
Inadequate paint in the hopper or container |
Ensure sufficient paint is available |
Malfunctioning check valve or faulty pump |
Seek professional repair or replacement |
A potential issue that may arise with an airless sprayer is the ability to spray water without dispensing paint. This can be a frustrating problem, as it prevents the user from progressing their project even though there doesn’t seem to be anything wrong with their paint sprayer at first glance.
One possible explanation for this issue is a clogged spray tip or nozzle. When the spray tip becomes clogged, it can prevent the paint from being properly atomized and sprayed onto the surface. This can result in the sprayer spraying water instead of paint.
Another potential cause for this problem is a malfunctioning airless spray gun. If the spray gun itself is not functioning properly, it may not be able to draw the paint from the container and deliver it to the surface. This can result in the sprayer only spraying water instead of paint. To resolve this issue, it is important to thoroughly clean the spray tip or nozzle to remove any clogs. Additionally, inspecting the airless spray gun for any malfunctions and repairing or replacing any faulty parts can help to ensure that the paint is properly dispensed.
Regular maintenance and cleaning of the airless sprayer can also help to prevent this issue from occurring.
One possible reason for the paint sprayer blowing air but no paint is a clogged nozzle or filter. When paint is not being sprayed, but air is being released, it indicates that there may be an obstruction in the nozzle or filter, preventing the paint from flowing through. This can occur when the paint used is too thick or contains particles that can clog the small openings.
Additionally, if the paint sprayer is not properly cleaned after each use, dried paint residue can accumulate and block the flow of paint.
To address this issue, it is important to first turn off the sprayer and relieve any pressure in the system. Then, carefully remove the nozzle and filter from the sprayer and inspect them for any clogs or debris. If clogged, the nozzle and filter should be cleaned thoroughly using an appropriate cleaning solution or solvent. It is essential to follow the manufacturer's instructions when cleaning these components to avoid any damage.
Regular maintenance and cleaning of the paint sprayer, including proper cleaning of the nozzle and filter after each use, can help prevent clogging and ensure the optimal performance of the equipment.
The previous subtopic discussed the issue of a paint sprayer blowing air but not paint. Building on that, the current subtopic explores the problem of a spray gun not spraying paint.
When a spray gun fails to dispense paint, it can be attributed to several factors. Firstly, a clogged nozzle or improperly adjusted spray pattern can impede the paint flow. It is crucial to ensure that the nozzle is clean and free from any obstructions. Additionally, the spray pattern should be adjusted according to the desired coverage area.
Secondly, an inadequate paint supply can hinder the spraying process. This can occur if the paint container is empty or if the paint viscosity is too high. A sufficient supply of properly mixed paint is necessary for the spray gun to function effectively.
Finally, a malfunctioning or worn-out pump can also prevent the paint from being sprayed. In such cases, a professional inspection or repair may be required.
By addressing these common issues, one can troubleshoot and rectify the problem of a spray gun not spraying paint effectively.
An airless paint sprayer's failure to spray paint may be caused by a variety of factors, requiring troubleshooting and potential repairs.
One possible reason for the lack of spraying could be a clogged nozzle or tip. Paint particles or debris can accumulate in the nozzle over time, obstructing the flow of paint. This can be resolved by removing the nozzle and cleaning it thoroughly with an appropriate solvent or by replacing it if necessary.
Another potential issue could be insufficient paint pressure. This can be caused by a worn-out pump or a malfunctioning pressure control valve. Checking and adjusting the pressure control valve or replacing the pump may be necessary to restore proper paint pressure.
Additionally, inadequate paint thinning can hinder the sprayer's ability to atomize the paint particles, resulting in poor spray pattern or no spraying at all. Ensuring that the paint is properly thinned according to the manufacturer's instructions can help overcome this issue.
Overall, troubleshooting and addressing these potential causes can help resolve the problem of an airless paint sprayer not spraying paint effectively.
In conclusion, when a paint sprayer fails to prime, there are several potential causes and solutions.
It is important to troubleshoot the airless sprayer and ensure that the proper steps are taken to achieve proper priming.
Issues such as clogged filters, worn or damaged parts, incorrect settings, or inadequate pressure can all contribute to the problem.
By identifying and addressing these issues, users can successfully prime their sprayers and continue with their painting projects.
To troubleshoot a Graco sprayer that won't prime, start by checking the suction tube for blockages, ensuring the inlet valve is not stuck or damaged, and confirming that the pump is properly lubricated. Follow the manufacturer's instructions for further troubleshooting steps.
What are some common reasons for a paint sprayer to not prime?
Some common reasons for a paint sprayer not priming include a clogged or dirty intake valve, insufficient paint viscosity, air leaks in the system, or a malfunctioning pump. These issues can prevent the proper flow of paint and hinder the priming process.
Can a clogged nozzle cause a Graco sprayer to not prime?
A clogged nozzle can potentially prevent a Graco sprayer from priming. When the nozzle is obstructed, it hinders the flow of paint, which can disrupt the priming process and prevent the sprayer from functioning properly.
Is there a specific way to properly prime a Graco sprayer?
There is a specific procedure to properly prime a Graco sprayer. It involves ensuring the suction tube is fully submerged in the paint, turning on the sprayer, and slowly increasing the pressure until the paint flows smoothly.
Are there any maintenance tips to prevent a Graco sprayer from not priming?
To prevent a sprayer from not priming, regular maintenance is crucial. This may include cleaning and unclogging the nozzle, inspecting and replacing worn or damaged parts, ensuring proper lubrication, and following the manufacturer's guidelines for storage and usage.
There are a few key differences between piston pumps and diaphragm pumps. Though both are airless pumps
Piston pumps are generally high-pressure pumps that produce better paint atomisation and are more suited to a wider range of materials. That means you can spray both high and low viscosity liquids. Piston pumps run only as needed, which means less wear and tear, and they are generally easier to repair. A stainless steel piston pump can last for years with careful and consistent maintenance.If pump life is an important consideration for you, a piston pump might be the right choice for you.
Diaphragm pumps move a larger volume of liquid while generally being smaller units, which means they are easier to move. They also offer better pressure control and work at a lower overall pressure. That makes them more efficient and cost effective. However, diaphragm pumps run constantly, which can mean more wear and tear over time. If efficiency and volume are important to you, a diaphragm pump might be the way to go.
Piston pumps play a crucial role in paint sprayers, offering a wide array of advantages that significantly contribute to the efficiency and quality of painting projects. These powerful pumps provide a reliable and consistent performance, ensuring a steady paint flow and consistent spray patterns throughout the entire painting process.
One of the primary benefits of piston pumps is their ability to generate high pressure, which facilitates effective atomization of paint particles. This high-pressure output enables painters to achieve a smooth and even coat, resulting in a flawless finish. Moreover, piston pumps are remarkably versatile and can handle a wide range of paint viscosities, making them suitable for various types of paints and coatings.
When using piston pumps in paint sprayers, painters have precise control over the paint flow rate, allowing them to achieve accurate coverage and avoid overspray. The consistent pressure maintained by piston pumps further contributes to the uniform delivery of paint, ensuring an even application and eliminating any streaks or uneven patches.
Durability is another significant advantage of piston pumps. These pumps are constructed with robust materials and components, making them capable of withstanding frequent use and providing reliable performance over an extended period. Additionally, piston pumps are relatively easy to maintain, with accessible parts and straightforward cleaning procedures, ensuring optimal performance over time.
Paint sprayers equipped with piston pumps offer cost-effective solutions as well. By minimising paint wastage and reducing the need for rework, these pumps contribute to cost savings in the long run. Moreover, piston pumps facilitate efficient transfer of paint from the container to the sprayer, minimising downtime and maximising productivity during painting projects.
In terms of usability, piston pumps make painting operations seamless and time-saving. They provide painters with adjustable pressure settings, allowing them to adapt to different surface types and specific painting requirements. The fine mist created by piston pumps ensures uniform coverage and enhances the overall aesthetic appeal of the painted surface.
Piston pumps also reduce the likelihood of clogging compared to other pump types, ensuring uninterrupted paint flow and minimising downtime for maintenance. Many paint sprayers equipped with piston pumps are designed to be portable and lightweight, enhancing manoeuvrability and accessibility in different work areas.
In conclusion, the advantages of using piston pumps in paint sprayers are vast. From reliable performance and high-pressure output to precise control and efficient transfer of paint, these pumps offer a host of benefits that contribute to the success of painting projects. Their durability, cost-effectiveness, and ergonomic design further make them an indispensable tool for painters across various industries.
One of the primary advantages of diaphragm pumps is their ability to handle a wide range of paint viscosities. Whether working with thin or thick paints, diaphragm pumps can effectively transfer and atomize the paint particles, ensuring smooth and consistent spray patterns.
Diaphragm pumps are known for their exceptional versatility. They can accommodate various types of paint formulations, including latex, acrylic, enamel, and oil-based paints. This versatility allows painters to work with different paint materials and achieve desired results across a range of applications.
Another significant advantage of diaphragm pumps is their self-priming capability. These pumps can draw paint from a container and create the necessary pressure for atomization without requiring additional priming or external power sources. This feature saves time and simplifies the setup process, enhancing overall workflow efficiency.
Paint sprayers equipped with diaphragm pumps provide precise control over the paint flow rate. Painters can easily adjust the pump's pressure settings to achieve accurate coverage and maintain control over the paint output. This level of control ensures uniform application and minimises overspray, resulting in efficient paint usage and reduced wastage.
The diaphragm mechanism in these pumps also contributes to their durability and low-maintenance nature. Diaphragm pumps are designed to withstand the demands of paint spraying, with robust construction and fewer moving parts compared to other pump types. This design reduces the likelihood of breakdowns and simplifies maintenance, ensuring long-lasting performance.
Diaphragm pumps are renowned for their resistance to clogging. The diaphragm acts as a barrier between the paint and the pump mechanism, preventing debris or particles from reaching critical components. This feature reduces the risk of clogging, ensuring uninterrupted paint flow and minimising downtime during painting projects.
Additionally, diaphragm pumps are often lightweight and portable, enhancing mobility and ease of use. Painters can move freely around the worksite, reaching different areas without restrictions. This portability, combined with the pumps' efficient paint transfer and precise control, results in increased productivity and faster project completion.
In summary, diaphragm pumps offer numerous advantages for paint sprayers. Their ability to handle various paint viscosities, self-priming capability, precise control, and resistance to clogging make them an ideal choice for painters. With their durability, low maintenance requirements, and portability, diaphragm pumps are essential tools that contribute to efficient, high-quality painting projects across a wide range of applications.
We recently published a blog post to help people choose the right paint sprayer with information about different air compressor paint sprayers, spray guns, and airless, pneumatic paint sprayers, and HVLP paint sprayer types.
PaintAccess stocks all types of paint sprayers, and among the best on offer are the following:
Airless paint sprayers are great for producing a consistently smooth finish for your painting project. But whether you choose a piston pump sprayer or a diaphragm pump sprayer, to get the best results you'll need the right accessories.
Before you start your spraying project, make sure you have all the equipment and accessories you need to be efficient and maintain safety.
Now that we have explored the benefits of different airless paint sprayer pump types, you can apply this new knowledge to selecting the right paint sprayer for the work you do and the projects you have planned. It's important to consider the types of coatings you plan to apply, the spraying finish you want to achieve, and the surface coverage you need.
PaintAccess can help you find your perfect choice of airless paint sprayer. Drop by either of our Sydney stores at St Leonards or Matraville, or order online and we'll ship it to you anywhere in Australia.
]]>
To begin with, let's clarify some of the things we're talking about and some of the technical differences between various paint types. Then we'll explore some of the differences between paints and how they are used.
The solvent on which a paint is based makes it either water-based or oil-based. Solvent is the liquid component of paint, and it is the part that evaporates to allow paint to dry. Oil-based paints use mineral turpentine as a solvent, while water based paints use water as a solvent. There are other components, of course, but some paint manufacturers offer two product categories with similar products that differ only because of the solvent on which they are based.
Now that we understand that distinction, let's look at the difference between enamel paint and other types of paint.
Enamel paint is paint that air-dries to a hard, usually glossy, finish, used for coating surfaces that are outdoors or otherwise subject to hard wear or tear.That means enamel paint is great for exterior walls, door frames, and window frames.
Enamel paints, also sometimes referred to as hard-surface paints, dry slow but hard, making them perfect for hard surfaces.
Historically, enamel paints have been used to paint hardwood and other similar surfaces because enamel paints create a smooth finish with a consistent sheen level.
Yes, in many cases, enamel paint is oil-based, while acrylic paint and latex paint are water-based. But modern technology has allowed for the development of water-based enamel paints which can be thinned with water while still offering excellent resistance to water once dried.
Oil-based paints are long-lasting and enamel paints are hard-wearing, making oil-based enamel paints ideal for high-traffic areas that people are likely to come into contact with like door frames, exterior doors, and outdoor furniture.
Acrylic paints offer a broader range of colours that are less likely to fade over time, and a gloss or semi-gloss finish. They are ideal for furniture, feature walls, and decorative finishes.
Enamel paints typically harden as they dry, which makes them ideal for already-hard surfaces like hardwood timber and metal surfaces. Latex paints, on the other hand, contain higher amounts of flexible rubber in the form of latex and so are ideal for applications where you need the paint to stick, like porous surfaces or tiles.
Each of these paints offers other differences in terms of drying times, levels of UV resistance, and application methods. Discuss your options with a professional painter and choose the right paint for your project.
There are a range of benefits to using enamel paint, but there are also a number of disadvantages. Acrylic paint retains its colour, but enamel paint can fade or turn yellowish over time.
Enamel paint usually produces a glossy finish, which you can also achieve from an acrylic gloss paint, but if you want a matte finish, enamel paint probably isn't the right choice for your paint job.
Some people experience skin irritation when exposed to the mineral turpentine solvent in oil-based paint, and some people have trouble with the strong smell of oil-based paint. While skin irritation means it might be best to avoid oil-based enamel, the smell can be resolved by using a paint respirator.
Generally speaking, enamel paint takes longer to dry than other types of paint. If you need to complete a project quickly, choosing a paint with a short dry time is the way to go, which means enamel might not be the right choice.
Let's run through some of the most significant differences between enamels with a water base and enamels with an oil base.
Water-based enamel |
Oil-based enamel |
Non-flammable |
Oil-based paints can be flammable |
Lower levels of volatile organic compounds (VOC) |
Often includes higher levels of volatile organic compounds (VOC) |
Low-odour |
Can have a strong odour |
Can be cleaned up with water |
Usually needs to be cleaned up with mineral turpentine and paint thinner |
Can sometimes be applied to damp surfaces |
Generally needs to be applied to already-dry surfaces |
Touch-dry in about 1/2 an hour, ready for next coat in 2 hours |
Can take up to 8 hours to be touch-dry, and ready for next coat in 16 hours |
As you can see, the differences between water-based enamel paint and oil-based enamel paint make each type of paint a great option for different applications.
Depending on the paint project you are trying to complete and the paint finish you want to achieve, there are a range of oil and water-based enamel paints to choose from. PaintAccess has a variety of water-based enamel products and our experts can give you advice about the best ways to use those products. Then make your choice from British Paints, Taubmans, Dulux or Zinsser products. PaintAccess has all the paint and paint accessories you need to complete your project successfully!
]]>Peeling paint is a common issue that many homeowners face, particularly with ceiling painting. It's an eyesore, with unsightly patches of paint cracking on the ceiling or flaky ceiling paint creating a mess. Many people ask, "Why is my ceiling paint peeling?" and more importantly, "How to fix peeling ceiling paint?" This comprehensive paint guide will provide step-by-step advice to help you restore your ceiling to its former glory.
Several factors can contribute to bathroom ceiling peeling or peeling paint on any other ceiling in your house. Some common reasons include poor paint adhesion, moisture issues, poor surface preparation, or simply the age of the paint. When the conditions are not right, the paint doesn't bond well with the surface, leading to paint cracking on the ceiling.
Before learning how to fix peeling paint, it's vital to know how to remove paint from the ceiling correctly. The first step is to clear the room or, at least, cover the furniture with plastic sheets to protect them from falling paint particles. Wear protective gear, including gloves, safety glasses, and a dust mask.
Next, use a putty knife or a paint scraper to gently scrape off the peeling paint on the ceiling. Be careful not to damage the underlying surface. This process of removing paint from the ceiling can be labor-intensive, but it is crucial for a smooth and well-adhered paint layer.
Once you've managed to remove the ceiling paint that was peeling, the next step is to repair any imperfections on the ceiling. Use a patching compound to fill in cracks or holes, then sand the area to create a smooth surface. Remember to wipe away the dust with a damp cloth.
Next, apply a primer to the ceiling. This important step ensures better adhesion of the paint and helps prevent future instances of paint cracking on the ceiling. Primers also help to mask any stains and provide a uniform base for your topcoat.
Now that your ceiling is prepped and primed, you're ready to tackle ceiling painting. When selecting paint, opt for a high-quality product. It might be a bit more expensive, but the finish and durability are worth it. Use a roller for a smooth, even finish. Start from one corner and move across the ceiling in a straight line. Overlap the previous line slightly each time you start a new one to avoid visible lines. Apply at least two coats to ensure full coverage and a professional finish.
It's worth noting that bathroom ceiling peeling is a common issue due to high moisture levels. When painting your bathroom, consider using a paint specifically designed for high-moisture areas to prevent future paint peeling.
Arming yourself with the right tools can make the process of fixing a flaky ceiling more efficient. For removing paint from the ceiling, consider investing in a high-quality scraper that can efficiently remove peeling paint on the ceiling without damaging the surface. A telescopic pole for your paint roller can make painting the ceiling easier and less strain on your arms and back.
When it comes to ceiling painting, the type of paint you choose can significantly influence the results. Flat or matte finishes are typically preferred for ceilings as they don't reflect light directly, helping hide minor imperfections.
For bathroom ceilings, a semi-gloss or gloss paint is a better option due to its moisture-resistant properties. You could also consider a mould-resistant paint that significantly reduces the chances of mould or mildew build-up. In wet areas, mould-resistant paint is a great option that will increase the longevity of your paint job.
Bathroom ceiling peeling is especially troublesome due to the high levels of humidity and condensation in this room. In addition to the regular fixing process, you should also consider investing in a quality bathroom fan or dehumidifier to reduce moisture and thus the risk of paint peeling. It's also vital to ensure that your bathroom is well-ventilated to prevent moisture buildup.
We’ve asked our tradie painter customers about the next techniques to use when fixing flaky ceiling paint. Here’s what they suggested:
Fixing a flaky ceiling is an achievable DIY task. However, it requires time, patience, and the right techniques. Understanding why your ceiling paint is peeling and how to fix it can save you from costly professional paint jobs.
Restoring a peeling ceiling can breathe new life into your space. While it may seem like a daunting task, with this comprehensive guide, you now know how to fix a flaky ceiling. From removing the paint from the ceiling, treating the surface, selecting the right paint, to applying it correctly, each step is crucial for a successful transformation.
Remember, patience is key here. Don't rush the process, and let each layer dry properly before applying the next. Follow these steps, and you'll have a beautifully painted ceiling that enhances the look and feel of your home.
]]>Unlike paint, which is designed to cover wood, varnish allows the beauty of the wood grain and patterns to show through, enhancing the natural beauty of your project. Some varnishes include a natural tone or colour top enhance the colour of the timber it is applied to. Some clear varnishes are designed to be applied to a painted surface for additional protection.
The primary purpose of varnish is to provide a protective layer for a timber surface. It creates a hard finish that can shield wood from scratches, stains, moisture, and damage from UV light. It's widely used in both interior and exterior settings, from wooden furniture to boats and outdoor structures to indoor timber furniture and door and window trim.
Varnish is an excellent option for furniture, door frames, timber floors or painted wood. Whether you're completing a woodworking project or protecting furniture, a coat of varnish can add durability and aesthetic value.
Though many varnishes contain oils to assist in drying, varnish can be oil-based or water-based, with each type having its own advantages. Oil-based varnishes are durable, stand up well to heat and chemicals, and provide a beautiful, warm glow. They are often preferred for outdoor use due to their ability to withstand various weather conditions.
Water-based varnishes, on the other hand, are easy to clean up, dry faster, and are less likely to yellow over time. They're more environmentally friendly and emit fewer volatile organic compounds (VOCs), making them an excellent choice for indoor applications.
The choice between applying varnish with a brush, roller or sprayer depends on the type of surface and your comfort level with each tool. For small or intricate pieces, a brush allows better control and precision. Larger, flat surfaces may benefit from the use of a roller, which can provide a faster, more uniform application. Larger furniture pieces or large areas like timber decking are perfect for spraying and there are many electric airless sprayers available that can handle varnish.
When it comes to varnishing doors or furniture, the size and intricacy of the piece should guide your choice. Always remember to apply varnish in thin, even coats, regardless of the method you choose.
The right brush can make a big difference when it comes to applying varnish. You'll want to choose a high-quality, natural-bristle brush. Synthetic brushes can sometimes leave streaks or bubbles in the varnish, while natural-bristle brushes tend to provide a smoother, more even application.
The size of the brush should match the size of your project. For example, a 5-8 centimetre brush is usually ideal for furniture or door varnish application. Remember to clean your brush thoroughly after each use to maintain its quality and extend its life.
Rollers can be an efficient way to apply varnish to large, flat surfaces. They cover more area than a brush, and often do so more quickly. Rollers also tend to leave fewer visible brush strokes, resulting in a smoother finish.
When using a roller, it's important to use a small, high-density foam roller for the best results. These types of rollers will give a smooth, bubble-free finish. Load the roller with varnish and apply it in a "W" pattern for even coverage, and then smooth it out in straight, overlapping strokes. Be sure to apply thin coats and allow each to dry fully before applying the next.
Using a sprayer to apply varnish can be a quick and convenient option, especially for large or complex surfaces. Spraying allows you to achieve a thin, even coat of varnish, and can often be done more quickly than brushing or rolling.
When using a sprayer, always ensure you're working in a well-ventilated area and wear appropriate safety equipment like a mask or respirator. Hold the spray gun about 30 centimetres away from the surface, and apply the varnish in even, sweeping motions. As with brushing or rolling, apply several thin coats rather than one thick coat, allowing each one to dry thoroughly in between.
There's a variety of varnish types available, each with its unique properties and ideal use cases:
Once you've applied varnish to your wooden surfaces, it's essential to maintain them to prolong their life and preserve their appearance. Avoid placing hot items directly on the surface and - for tables - use coasters to prevent water damage. Clean the surface regularly with a damp cloth and mild soap.
For surfaces with a heavy wear, like floors or tabletops, consider re-varnishing every few years to maintain the protective layer. When scratches or dings occur, you can often repair the varnish finish without having to strip and re-varnish the whole piece. Lightly sand the area and apply a new coat of varnish.
Working with varnish requires some precautions. Always work in a well-ventilated area, as varnish fumes can be harmful if inhaled in large amounts. When sanding varnished surfaces, always wear a dust mask to avoid inhaling dust particles. If you're spraying varnish, consider using a full-face respirator to prevent varnish from getting into your eyes or mouth. Also, make sure to wear gloves to protect your skin from exposure to varnish.
Despite best efforts, you might encounter problems when varnishing. Bubbles might appear in your finish, or it might not dry properly. Here are some common issues and how to solve them:
In conclusion, using varnish is an art that requires patience and precision. It's a protective and decorative finish that enhances the natural beauty of wood. Whether you're a professional painters, woodworker or a DIY enthusiast, understanding the properties, types, applications, and troubleshooting aspects of varnish can help you achieve the best possible results. A well-varnished deck, door trim or piece of furniture is something to be proud of and can last for generations if properly cared for.
]]>This article will explore the history and evolution of Sikkens, and will take a closer look at their new range of products and how they are impacting the home renovation industry in Australia. It will also discuss why this revolutionary brand is quickly becoming a household name. From the innovative technology that goes into each product to their commitment to sustainability, we'll uncover why this iconic brand is making such an impact on Australian homes today.
Get ready to discover what makes Sikkens such an outstanding provider of home renovations products! This article will show you why it's more than just another paint company; it's an important part of Australia's history and culture. Let's dive into the world of Sikkens and explore all it has to offer!
Water-based wonders await those looking to protect their exterior wood or outdoor furniture with Sikkens. For optimum protection, these water-based products provide superior adhesion and a long lasting finish coat. The base coat is formulated with advanced technology to deliver superior resistance against UV rays, extreme weather conditions, and other environmental factors.
By using Sikkens' water-based products, you can be sure that your wood or furniture will stay looking great for many years to come. In addition, the product is easy to apply and clean up, making it an ideal choice for DIY projects or professional applications. With Sikkens' water-based products, you can trust that your outdoor living spaces will be protected in style.
Before applying Sikkens water-based products, the surface must be properly primed for a beautiful satin finish. A clear coat of primer helps maintain a consistent look and colour while also protecting the substrate from moisture, UV rays, and other environmental factors. It's important to use the right type of primer for the project.
Primers can be oil-based or water-based, so it's important to read the product label before application. Oil-based primers are great for areas that require maximum protection against moisture and mildew, such as decks and fences. Water-based primers are ideal for interior projects because they are low odour and fast drying. Additionally, they provide good adhesion while still allowing some flexibility on surfaces that may expand or contract due to temperature changes.
It is a crucial step in prepping a surface before applying Sikkens water-based products. The proper application of a quality primer will ensure an even and durable finish that will last for years.
Now that you've taken the essential step of priming, let's move on to transforming your deck: choosing between Sikkens water-based and oil-based finishes. If you're looking for a product that is easy to apply, look no further than Sikkens water-based finishes. Not only are they quick drying and easy to maintain, they also provide excellent protection against mildew and UV rays. Furthermore, water-based products are VOC compliant, meaning they meet stringent air quality standards set by environmental agencies.
On the other hand, if you want a product that won't fade or change colour over time, then an oil-based finish may be the better option. Although they take slightly longer to dry than their water-based counterparts, oil-based products are incredibly durable and will give your deck a beautiful finish that lasts for years. Not only do these finishes offer superior protection against moisture, but also against scratches and abrasions - perfect for high traffic areas!
Whether you opt for a water-based or oil-based finish from Sikkens, you can rest assured knowing that your deck will look great and be protected from the elements for many years to come. With either option, you'll have access to all of the same great benefits of Sikken's iconic products: quality ingredients backed by proven technology that offers long lasting beauty and performance.
When it comes to Sikkens products, there are two types available – oil-based and water-based. Each has its own unique characteristics that make them ideal for different applications.
Oil-based Sikkens products are characterised by their strong odour and their resistance to weathering, which makes them a great choice for outdoor projects like wood siding, decks, fences, and other exterior surfaces. They also provide excellent protection against fading and staining from dirt and ultraviolet light. However, they require more maintenance than water-based products since the oils need to be periodically reapplied over time.
Water-based Sikkens products are much easier to apply than the oil-based varieties and they dry much quicker too. They also don’t have the same strong odour associated with oil-based products, making them ideal for indoor projects like kitchen cabinetry, furniture pieces, or trim work in living rooms or bedrooms. Water-based products offer good protection against fading but may not stand up as well against the weathering effects of the outdoors as an oil- based product would.
No matter which type of Sikkens product you choose, you can rest assured that you’re getting a quality finish that will look beautiful for years to come. With proper application and maintenance techniques, your project should remain looking great no matter which type of Sikkens product you decide to use.
In Australia, Sikkens is an iconic product that has been embraced by many. Known for its high-quality and reliable performance, the paint company has been providing Australians with outstanding products for generations. It’s easy to see why Sikkens is so popular down under.
One of the reasons why Sikkens products are so well-loved in Australia is due to their ability to withstand extreme weather conditions. With a variety of different formulas, all designed to meet the demands of the Australian climate, Sikkens ensures that Australian homeowners have access to quality paint that won’t fade or peel when exposed to heavy rain or blazing heat.
The other reason why Sikkens is adored in Australia is because of its affordability and availability. As a trusted leader in the industry, there are plenty of places where Australians can purchase Sikkens products at competitive prices – from hardware stores and specialty retailers to online outlets. With its wide selection of colours and finishes, there’s something for everyone when it comes to using Sikkens paints in their homes.
Sikkens has earned a reputation as being one of the best paint companies in Australia, offering Australians high-quality results they can trust at an affordable price point. With its dedication to quality products and customer service, it's no wonder that this iconic brand continues to be so popular down under.
Finding Sikkens products in Australia is easy. With a wide range of retailers located throughout the country, shoppers can find Sikkens in stores and online. Leading hardware retailers like Bunnings and Mitre 10 stock a wide selection of Sikkens products that are perfect for any DIY project or professional finish. Home improvement specialists like Masters also have an extensive range of Sikkens products available to purchase either in-store or online.
For those who prefer to shop online, there are plenty of websites offering Sikkens products. Prime Paints is a popular choice due to their unbeatable prices, reliable delivery, and excellent customer service. Paint Place has a great selection of Sikkens products with competitive prices and free shipping options on orders over $200. Resene also offers an extensive range of Sikkens paints, stains, sealers, and more with handy advice from experienced staff available if needed.
No matter where you choose to shop for your Sikkens product needs, you can trust the quality and reliability that comes with all Sikkens products. Whether it's a DIY project or professional job, you can be sure that your results will look stunning with the help of a quality product like Sikkens.
Sikkens is one of the most recognisable brands in Australia, but it's not without its competitors. One of its main rivals is the Dutch company Hempel, which has been producing and selling paints and coatings since 1915. Hempel offers a wide range of products for both commercial and residential use, including wood stains, varnishes, primers, decorative wall paints, and more. While Sikkens is known for its superior quality and long-lasting protection against the elements, Hempel offers a more affordable option with a similarly impressive product line.
The differences between these two companies are also clear in terms of their customer service. Sikkens prides itself on providing personalised assistance to all customers across Australia while Hempel's customer service is primarily focused on providing technical support when needed. In addition, Sikkens' commitment to innovation has enabled them to stay ahead of industry trends in terms of product development and design. On the other hand, Hempel tends to focus more on cost-effectiveness rather than innovation or trend-setting.
Despite their differences in approach, both companies have achieved success in Australia by offering quality products at competitive prices. Their rivalry has helped drive innovation and competition within the paint industry as a whole, benefiting customers who can now choose from a wider variety of paint options. Ultimately, each company appeals to different kinds of buyers based on their individual needs and preferences - so regardless of whether you prefer Sikkens or Hempel products, there's sure to be an option that suits your requirements perfectly.
In conclusion, Sikkens has provided Australians with a reliable and high quality product for decades. Their water-based range of products is perfect for those looking to quickly and easily transform their deck or outdoor area. Although there are competitors in the market, Sikkens remains a popular choice for many Australians due to its convenience and ease of use. It's easy to see why this iconic brand has been so successful down under.
Sikkens products have been trusted by Australians over the years, and it's clear why they remain a go-to choice when completing a deck transformation project. Whether you choose oil-based or water-based finishes, you can rest assured that you're investing in the best of what Australia has to offer. I'm sure that with more people discovering the benefits of using Sikkens products, the company will continue to thrive in Australia for many years to come.
Ultimately, Sikkens is an icon in Australia and it's not hard to see why. With an extensive range of water-based and oil-based finishes available, it's no wonder so many Aussies have chosen them as their go-to supplier for their outdoor projects. So if you're looking for a reliable solution that won't let you down, then look no further than Sikkens!
]]>If you’re serious about getting quality results without compromising on speed or convenience, then look no further than Purdy paint brushes. These tools are designed with versatility in mind; their wide range of shapes and sizes allows them to accommodate any kind of surface effortlessly. They also come equipped with patented technology that makes them easier to use while providing unbeatable coverage. With a Purdy brush, you’ll be able to achieve a smooth finish with minimal effort - what more could you ask for?
Purdy brushes provide unparalleled performance at an affordable price. Their high-quality bristles don’t shed easily like those of other brands, making them incredibly long-lasting despite frequent usage. Furthermore, their ergonomic design ensures that even inexperienced painters can make use of them efficiently and confidently. So if you want beautiful results while saving time and money - go ahead and invest in a set of Purdy brushes today!
Purdy paint brushes are widely regarded as the best in the world. Professional painters, DIY enthusiasts and hobbyists all recognise their superior quality. They are renowned for being well constructed with durable materials that provide a smooth finish on any surface. Purdy brushes deliver high-quality results every time and make painting jobs easier than ever before.
The reason why Purdy brushes stand out from other brands is due to their commitment to excellence in craftsmanship. Every brush is crafted with precision and care, using only the finest materials available. This ensures that they will last longer and perform better than lower-grade products on the market today. As a result, these brushes can handle more difficult tasks without compromising performance or leaving behind streaks or blemishes.
No matter what type of project you're tackling, Purdy's brushes will always be there to help you get the job done right - quickly, efficiently and effortlessly! With their unmatched excellence in paintbrushes, it's no wonder why they are so popular amongst professional painters and home improvement enthusiasts alike.
Now that we've established why Purdy brushes are considered the best in the world, let's explore their extensive range of paint brushes. From round and oval to flat-edge and angled sash, they offer a variety of styles and sizes to suit any project. Each brush is carefully crafted using the finest materials available, so you know you're getting a perfect brush every time.
For professional painters, there's no better choice than Purdy brushes for achieving those flawless finishes. Here’s an overview of some popular types of Purdy brushes:
Types of brushes |
Uses |
Angled Sash |
For painting trim around windows or doors with precise accuracy |
Oval Glider |
Ideal for large surfaces such as walls or ceilings due to its smooth finish |
Round |
Delivers maximum coverage on curved areas like mouldings and bannisters |
Flat Edge |
Perfect for applying varnish, enamels, oils, lacquers, etc., over wide surfaces |
Chinex® Angle Sash |
Best suited for water-based paints since it doesn't leave behind lint fibres from natural bristles |
As you can see, there's a type of Purdy brush designed specifically for each task at hand! Whether you need something simple for touch-ups or prefer more intricate detailing work, these brushes provide superior performance every single time. With all this in mind, it's easy to understand why professionals rely on Purdy brushes to get the job done right – without fail!
Purdy paintbrushes are known for their unmatched excellence. They have a wide range of painting accessories that make them the ideal choice for any project, regardless of size or complexity. From oil-based paints to latex and other coatings, Purdy products offer superior coverage and a smooth finish every time.
One unique feature that sets Purdy apart from other brands is the high quality materials they use in all their products. The brush handles are made of lightweight aluminium which makes it easy to manoeuvre around corners and tight spaces without fatigue. Their bristles are also carefully crafted with an advanced technology that ensures even distribution of paint across the surface while providing maximum control and minimal splatter.
Lastly, Purdy offers a variety of specialty tools such as edging pads, angled sash cutters, trim rollers, pole sanders, and more that make any job easier. All these features combined make Purdy one of the best options when it comes to achieving professional results with ease. With their commitment to innovation and quality craftsmanship, you can trust your projects will be done right - every single time!
Purdy brushes have long been renowned for their unmatched excellence in painting tools. It is no secret that the superior coverage and precision of Purdy’s brush filaments make them a top choice among professionals and DIYers alike. But what exactly makes these brushes so special? To understand, we must take a closer look at the construction of each filament.
The most notable feature of Purdy bristles is their angle sash design, which helps to achieve smooth and even strokes when working on large surfaces or detailed projects. The unique shape also provides greater control over how much paint is applied to the surface. This ensures better results with less effort. Additionally, the high-quality material used in Purdy filaments eliminates any worries about wear-and-tear, even after repeated use.
When it comes to oil based paints, nothing beats Purdy's advanced synthetic fibres - designed specifically for longer lasting performance. These strands retain their original shape and stiffness far longer than other types of natural bristle materials, meaning you get more from your purchase without sacrificing quality along the way. With this combination of features, it's easy to see why Purdy has become synonymous with excellence in painting projects worldwide.
No matter your project size or timeframe, using a brush like this can help you save time while getting exceptional results every time – all thanks to its unbeatable craftsmanship and signature features!
Having discussed the superior filaments used in Purdy brushes, let's now take a look at some of the differences between their brush series:
Each of these series offers something unique, allowing painters to choose the one that best suits their needs. No matter what type of brush you go with from Purdy's collection, rest assured knowing that you're getting top-notch quality backed by years of research and development. With unmatched excellence in craftsmanship and performance, they have created products that are sure to make any painter proud.
Purdy brushes are renowned for their quality and excellence, but how exactly do they make it happen? It turns out that Purdy has a global presence with manufacturing locations in numerous countries. This allows them to source the finest materials from all over the world and use local artisans to craft each brush with skilled precision.
The first of these facilities is located in Shelbyville, Tennessee. Here, Purdy produces its signature line of paint brushes and roller covers using American-made components sourced locally as well as globally. With this combination, Purdy ensures unparalleled performance on every product they make. Additionally, the facility employs state-of-the-art technologies such as robotic arms and laser engraving machines that help speed up production times and ensure consistent results time after time.
In addition to its US-based factory, Purdy operates several other international plants across China, India, Mexico, Turkey, South Korea and Vietnam. Each location takes advantage of its own region's resources while adhering to strict standards of quality control set by Purdy’s corporate headquarters in Wisconsin. By leveraging these multiple locations around the globe, Purdy can produce high-quality products quickly and economically, ensuring customers get unbeatable value for money no matter where they shop.
No wonder why so many professionals trust their projects to Purdy brushes: unmatched excellence wherever you go!
The popularity of Purdy brushes is truly remarkable. It's no surprise that they are held in such high esteem the world over, as their quality and performance speak for themselves. The craftsmanship and attention to detail that goes into each brush make them some of the best tools available to painters. Not only do Purdy brushes provide a flawless finish with minimal effort, but they also last a long time due to their durability.
Alongside these features, Purdy has also done an excellent job marketing its products and responding quickly to customer feedback. Their commitment to excellence in product design and construction has been reflected through numerous awards, accolades, and industry recognition from experts around the world. This has helped build up a loyal fan base who trust that every new release will be just as good or better than its predecessor.
Purdy Brushes have set a standard among painting supplies which is nearly unmatched in terms of both quality and value. They have become indispensable for professional painters looking for reliable tools, as well as amateurs who want nothing less than perfect results for all of their projects. With so much positive feedback coming from users worldwide, it's easy to see why these brushes have achieved such widespread acclaim over the years.
Purdy brushes have been gaining traction in Europe with overwhelming success. The company's top-notch quality and attention to detail has made them a favourite among European painters; contractors and DIYers alike. This popularity is demonstrated through the strong sales across some of their core markets including Germany, France, Italy, Spain and the UK.
The reputation that Purdy holds amongst these countries has only continued to grow over time due to its durability and versatility when it comes to tackling any painting job. Whether you're working on interior walls or exterior siding on buildings, Purdy brushes are designed for maximum efficiency and ease of use. Additionally, they come in various sizes so that you can find the perfect brush for your project needs.
This level of excellence, combined with affordability, makes Purdy an unbeatable option for those looking to paint both professionally or recreationally. As more Europeans learn about this brand’s performance capabilities, there’s no doubt that its fan base will continue to expand throughout the continent.
Purdy brushes are renowned for their quality and craftsmanship, making them an excellent choice for any painting project. In Australia, Purdy brushes can be found in both specialised stores and major retailers. Specialised stores stock a wide variety of brush sizes and types to suit any job. Many offer free advice from experienced staff who have extensive knowledge about the brand’s products. They also often hold regular workshops on how to use Purdy brushes properly and best practices when it comes to achieving flawless results.
Major retailers such as hardware chains, paint stores, and home improvement outlets carry select models of Purdy’s most popular lines at competitive prices. Customers may not find the full range of products available but can get good deals if they shop around online or offline. For those who want access to the entire line-up without having to leave their homes, there are numerous websites where one can purchase Purdy tools directly from manufacturers or authorised dealers with delivery anywhere in Australia. All purchases come with warranties so customers can be sure they're getting only genuine products backed by reliable customer service. With its commitment to producing top-notch paintbrushes that last through many projects, Purdy is a name Australians trust for all their paint brush needs
In addition to their superb paint brushes, Purdy has an extensive range of accessories that make painting easier and more efficient. From roller frames and covers to extension poles and trim tools, each tool is designed to help painters achieve professional results in minimal time.
For those looking for a complete set-up, Purdy offers two packages: the Elite Painter’s Set and the Pro Painter’s Package. Both provide customers with everything they need to get started on their project right away, including sprayers, trays, buckets, sandpaper, rollers, edgers, sealants and more. Not only do these packages come with all the necessary accessories needed for any job but also come at discounted prices compared to buying them individually.
Purdy provides superior products that are guaranteed to last through multiple jobs. Their wide variety of products makes it easy for anyone who wants quality when they paint - whether they're professionals or DIY enthusiasts - to find what fits their needs best.
Purdy has been manufacturing paint brushes of unmatched excellence since 1925. The company is well-known for its superior products and commitment to quality. Their production locations are a key part of their success, as they employ some of the best artisans in the industry around the world.
The majority of Purdy's brush production occurs at three facilities located in Mexico, Germany and Thailand. Each facility has its own unique advantages that make it an ideal location for producing these fine tools. The Mexican plant produces small and medium sized brushes with short handle lengths to meet the needs of professional painters who use them on smaller jobs or tight spaces. In contrast, the German facility focuses on large brushes with longer handles suitable for larger painting projects like walls and ceilings. Finally, the Thai factory specialises in miniaturised versions of classic shapes such as fan and angle sash brushes, which can be used for detailed work like trimming or edging.
Each facility abides by stringent standards set out by Purdy's management team, ensuring each brush meets their high quality expectations before being shipped to customers worldwide. This attention to detail ensures that professionals will continue trusting their brand when choosing a reliable tool time after time. By combining craftsmanship with top-notch materials, Purdy brushes consistently provide unparalleled performance no matter where they're made.
In conclusion, Purdy brushes are truly the best in the world. From their unique filaments to their range of different brush types and paint accessories, they offer unmatched excellence that has earned them a devoted following both in Europe and Australia. Their production is held to rigorous standards, ensuring each brush meets the highest quality requirements.
I'm sure I speak for many when I say that using a Purdy brush is an absolute pleasure - it glides across surfaces like butter! It's no wonder why these brushes have been trusted by professionals for decades now; you simply can't go wrong with a Purdy brush.
If you're looking for a reliable paintbrush that will last you years without needing replacements, then look no further than Purdy! With an array of styles available at competitive prices, there's something here for everyone - so get painting with your new favourite tool today!
]]>In this blog post we’ll investigate how paint sprayers became the go-to option for professional painters and painting tradies, and we’ll look at some of the alternatives to buying a paint sprayer like using other equipment and renting. Ultimately, investing in a paint sprayer is a great option if you want to produce a smooth finish every time and you want to do so quickly. But let’s get into the ins and outs of paint sprayer purchases…
In the 50s, 60s and 70s, paint spray guns were used almost exclusively by commercial and industrial painters, and by painters in the automotive industry. The need for heavy air compressors, sensitive paint spray guns, specialist paint (much of it lead-based) and self-contained spray booths meant that paint sprayers just weren’t a practical option for tradie house painters or DIY enthusiasts.
As new air compressor models became available - including smaller and lighter units - professional painters in other industries started to take notice. By the 80s and 90s, compressed air sprayers (HVLP paint sprayers) had become a more common site around new house builds. Air compressors were also being used by carpenters with compressed air nail guns and impact drivers so using them to spray paint made sense.
In recent years, manufacturers like Graco have improved upon the design of airless paint sprayers and now make a range of professional contractor grade sprayers that are relatively lightweight, portable, and exceptionally high quality. Professional painters can now produce consistently high-quality finishes with airless paint sprayers and now more and more DIY painters are investing in entry-level airless paint sprayers.
Ironically, paint sprayers predate paint rollers by about 20 years. The earliest sprayer units were developed in the late 1800s as a device for delivering medicines. Later, the technology was improved upon as a way of applying lubricants during the construction (or servicing) of motor vehicle engines. It didn’t take long for someone to work out that they were a great way of applying motor vehicle paint, and the paint sprayer quickly replaced paint brushes in the automotive industry.
By comparison, Richard Adams filed the first paint roller patent in 1940, while working for Sherwin-Williams Paint Company. They replaced paint brushes for large-area work across most non-industrial sectors. Paint rollers have been improved consistently since the 40s and modern paint rollers made from synthetic materials or (especially in Australia) lambswool, produce fantastic results. Nonetheless, paint rollers are still significantly slower than a paint spray gun results vary depending on the type of paint used and the surface being painted.
Though there is a significant price difference between the two, replacing rollers for every job may still represent a significant investment and for many professional painters, consistency is a key consideration.
Paint brushes have both rollers and paint sprayers beaten when it comes to history, having been invented around 2.5 million years ago; as early as the Paleolithic era. And while paint brush technology has certainly evolved since then, it remains the most… primitive… option of the three. Brushes just can’t compete with rollers or sprayers for speed, and in most instances don’t produce the same quality of finish. But they have their place as tools for cutting in and for painting hard-to-reach places.
It probably won’t surprise you to learn that professional painters use all three - brushes, rollers and paint sprayers. Even with the popularity of paint sprayers, brushes and rollers have their place in a painter’s tool box.
But paint sprayers - especially airless paint sprayers - are quickly becoming the industry standard in Australia, as tradies learn from the experience of their American and European counterparts.
In Europe and the United States, application of what is known as a “Level 5 Finish” has become the benchmark for many, and Customers now expect that quality of finish almost by default. The only way to produce those sorts of results is by using a paint spray gun and so that has become the industry standard.
Australian tradies are following suit and raising their game. Understanding of the “Level 5 Finish” standard is growing in Australia and investment in paint sprayers is growing with it. We’re confident we’ll see more and more painting tradies moving toward airless paint sprayer in the future.
While compressed air paint sprayers are still available, airless sprayers are the future. And airless spray gun provides a smooth and consistent finish, whether you're applying a single layer of paint or multiple layers.
There are a couple of very popular brands when it comes to airless paint sprayer guns, and different manufacturers made different types of paint sprayers for different applications.
Picking the right brand and model will come down to your budget and the sort of finish you want to achieve. Professional contractor models provide a professional finish and are what you should be looking at if you're a professional painter who will use their paint sprayer every day.
We recently published a blog post about the pros and cons of renting or buying an airless paint sprayer. Many of the ideas discussed there are relevant to the decision to buy a paint sprayer for your home or business. The blog is available here.
Renting a paint sprayer has a range of benefits, including the opportunity to get exactly what you need when you need it. That means that if you have a small paint job around the house or for a Customer, you can rent a small, handheld airless paint sprayer to complete the job. If you’re painting a roof you’ll need a heavy-duty paint sprayer that can accommodate thicker paint and roof membrane and hiring equipment means you can choose exactly what you need.
Renting also means that you don’t have to make a significant up-front investment, and you don’t have to spend money on maintenance. When you’re finished with the paint sprayer you hired you can just return it and get your deposit back.
Though paint sprayers are getting better and better, and that means smaller and smaller, size is still a factor if you need to store it when you aren’t using it. If you’re not going to use it regularly, it’s just another piece of hardware sitting in your garage or storage shed waiting for your next painting project. If you just don’t have the space to store a paint sprayer, renting might be the way to go.
Is it better to paint a house by hand or with a sprayer?
A sprayer is a great option if you plan to paint a whole house. Whether you've build a new home or you're renovating, a sprayer is a great option. In most instances, a professional painting tradie will do the same. So if you're going to DIY, consider whether there's a paint sprayer in your price range.
Paint sprayers are an ideal choice for ceilings and are the best way to avoid application of excess paint and drips. Paint sprayers are also ideal for textured surfaces and "popcorn ceilings". You can still cut-in your ceiling perimeter with a brush or roller but spraying the remainder is usually the way to go.
Generally yes, though it depends on the type of sprayer you have. Most paint sprayers have no problems with regular household paint. Some entry-level models can struggle with thicker paint like oil-based paint. You'll need a more heavy-duty paint sprayer if you plan to paint a roof with specialised roof membrane.
How messy are paint sprayers?
Paint sprayers are only as messy as the user. Most modern paint is water-based and can be cleaned with soapy water. That means even if you make a mistake, it's easy enough to rectify. Over-spray is one of the drawbacks of paint sprayers and it can be worth practicing on a different surface or a piece of cardboard first.
There is a certain 'art' to painting, regardless of the tools you are using. Paint sprayers generally require the lowest skill level as the complex part is in the setup and the actually painting is a matter of point and shoot. It's easy to learn to use a paint sprayer and there are plenty of instructional videos online, including from most major manufacturers.
It depends entirely on your painting job, the type of paint you use, and the type of surface you are painting. Concrete and porous bricks will absorb paint and you'll likely need multiple coats. But plasterboard or Gyprock walls often only need a primer and then a top coat.
It depends how many coats you are applying and the type of paint you are using. Generally you use less paint because you draw straight from the bucket and you don't need to pour paint into a separate container or roller tray. In simple terms, there's less waste and excess paint used.
The tedious process of painting your house with traditional painting tools like brushes and rollers can leave you feeling drained and demotivated. Enter the revolutionary invention of paint sprayers!
By simply squeezing the trigger this remarkable device can distribute an even coat of paint in no time at all.
In basic terms—a paint sprayer is a tool that applies an even layer of fine paint mist across surfaces through its spray nozzle. Though it may not be common in your homes today, it could soon be your new best friend for any future professional painting and DIY paint projects.
What’s more, a paint spray gun effectively covers uneven surfaces with ease.
A paint sprayer can use paints that are applicable for spraying. Wooden furniture and cars as well as vinyl or aluminium house siding and walls can all be painted.
It's possible to use every paint type in a paint sprayer as long as you've got the right paint spray gun. Latex and water-based paints are among the most used paints in any paint sprayer. Other paints used include acrylic, primers, vinyl, alkyd, lacquer, enamel, high-heat paints, oil-based paints epoxy and rust-preventive paints.
Although there are numerous types available — from pneumatic to airless to HVLP (high volume low pressure)—deciding which one caters best for your needs may initially seem overwhelming at first but Paint Access has you covered with the best selection in Australia!
Airless paint sprayers
In airless paint sprayers, an electric pump is used for the painting instead of an air compressor. This type puts out the most paint at one time because the paint never mixes with the air. Airless paint sprayers are a perfect choice if you want to paint your fences or home exteriors.
Professional painting companies in Australia favour airless paint sprayers because of their quick coverage of large spaces. Cleaning airless paint sprayers is typically straightforward.
Check out our blog for helpful tips on selecting the right paint sprayer and how many multiple coats of paint you should apply. We'll make sure you get the best results with minimal effort.
Pneumatic paint sprayers
Pneumatic paint sprayers use compressed air to spray the paint. Mixing air and paint in a high-pressure stream makes these sprayers typically the easiest type for beginners to use. Nevertheless, they may cost more than other sprayer varieties.
A fairly even coat can be achieved with little practice when applying the paint. Ensure you comprehend how the sprayer works by testing it out on scrap pieces regularly.
Smaller projects like furniture or cabinets can benefit from using these sprayers.
High velocity/low pressure (HVLP) paint sprayers
Another cost-effective option for airless systems is HVLP paint sprayers for homeowners seeking alternatives.
Mixing air with your paint like pneumatic systems do is how these sprayers atomise and spray the paint. These alternatives utilise lower pressure levels making them less risky and more hygienic to operate compared to pneumatics.
For small to medium interior projects, HVLP sprayers are an incredibly versatile option.
According to painting professionals in Australia, excellent airless painting results are achieved using acrylic and latex paints.
Paint spraying via an air-assisted machine involves spraying paint through compressed air, allowing for quicker drying. This also assists in diminishing overspray. The nozzle could clog quite often if the paint is not properly diluted which is a disadvantage.
Airless paint spraying produces great results but is inherently wasteful due to atomising the paint into tiny droplets, many of which drift away.
Additionally, any paint remaining in the hose must be cleared out of the system and cannot be reused. A gallon of paint will generally cover between 150 to 200 square feet of wall space, so it's advisable to overestimate for an optimal outcome when painting with a paint sprayer.
Airless painting spray guns offer an incredible production rate and are ideal for spray-coating high-viscosity substances. For enhanced control, however, they require slight adjustments to achieve a finer finish.
Airless paint sprayers, possess exceptional quality in fast application of heavy-bodied coatings.
To accomplish a more improved look, despite being primarily intended for higher production and less fine atomisation, airless sprayers can still achieve a fine finish.
You just need to modify your airless paint sprayer to apply fine finishes properly.
1 – Changing the Airless Tip – As the first adjustment, you can change the spray tip in an airless paint sprayer to achieve a smoother finish. Standard airless tips are not meant for achieving fine break up, but fine finish airless tips are used instead.
2 – Modifying your airless to an air-assist airless - Airless and Air Assist Airless Paint Sprayers handle coating atomisation differently. Air Assist Airless offers a finish similar to what you would get with HVLP spraying, while regular airless sprayers cannot achieve the same level of atomisation. If you have an airless sprayer pump and are looking for more effective atomisation, you may want to consider converting it into an air assist airless system.
3 – A combination of fine finish tip and air assist airless - If you want to improve your paint finish even more, a combination of fine finish tip with an air assist airless spray gun can do the trick in providing a finish that will be as fine of quality as is provided with airless spray guns.
If you are painting with traditional painting tools such as a paint brush or a paint roller, two paint coats are an absolute necessary to build up the correct mil thickness.
However, with an airless paint sprayer, you see results with just one paint coat spray. This is because the airless paint sprayer creates droplets of paint which then ‘splash’ out on your wall.
Moreover, one slow horizontal paint sprayer pass at 10 -12 inches is equal to swiping 3 – 4 passes with a paint brush or a roller.
In simple terms, meaning you are saving around 15-30 seconds on each pass you make with a paint sprayer, when compared with a paint brush or roller swipe.1 - Stains, water sealers and lacquers – 0.0009 – 0.013
2 - Enamel paint – 0.013 – 0.15
3 - Oil or latex paints – 0.15 and up.
Lastly, be mindful of your surroundings when painting outdoors.
The wind can easily carry tiny paint droplets great distances causing unwanted splatters on other surfaces.
Don't neglect cleaning up immediately after spraying; dried paint is a formidable foe in any paint job.
With PaintAccess, you can be sure that your walls will look their best in no time!
Unfamiliar with renting or buying a paint sprayer?
PaintAccess has got you covered with more details in the link below:
https://www.paintaccess.com.au/blogs/company-news/airless-paint-sprayer-buy-or-rent
According to professional painting experts, leaving paint in your airless sprayer for a day and/or even overnight if you are using it the following day is fine.
However, if you are finished spraying, clean it well and prepare it for storage.
The experts at PaintAccess want you to keep in mind a few things if you are considering leaving paint in your sprayer.
But don’t do this for prolonged periods as you could damage your machine and warranty. But overnight or a few hours will be fine.
Paint Access’s PRO tips for paint thinning for spray guns
1 – Can I use Dulux Weathershield in a spray gun?
Yes! You can use Dulux Weathershield in all our top selections of spray guns.
2 - How do I get a smooth finish with an airless sprayer?
You can include a fine finish tip with an air-assist airless spray gun which provides a finish that will be just as fine of quality as is provided with air spray guns.
3 - Can my paint be too thick for an airless sprayer?
If your paint is too thick, add an additional 1/8 cup of water (30 ml) per gallon (3.8 litres) of water and mix.
4 - Can I use Dulux paints in my airless paint sprayer?
Dulux makes ‘satinwood’ paints. These paints would spray through our HVLP spray paint guns but again would require thinning. You would need to thin the paint to a single cream consistency, and you may need a number of coats to get good coverage.
Another factor to take into account when deciding between buy vs rent is convenience. If you don't have access to a rental shop nearby or want greater flexibility in terms of how often and where you use your equipment, purchasing an airless paint sprayer may be the way to go. Ultimately, no matter what route you choose – buying or renting – having access to modern paint sprayer technology is sure to make any painting job easier and faster than ever before!
Investing in a paint sprayer is a great idea for anyone who plans to take on painting projects. A paint spray gun can provide a more even coat of paint, and it's much faster than traditional brushes and rollers. Plus, you won't have to worry about drips or runs with an airless spray gun. Hiring an airless paint sprayer gives professionals the ability to tackle larger jobs quickly, efficiently, and with better results.
Using an airless paint spray gun makes it easier to get into tight spaces and achieve a smoother finish than what could be accomplished using traditional tools like rollers and brushes. It also saves time because there’s no need to tape off surfaces or worry about brush strokes – just aim and spray! Some spray guns - like airless spray guns - often require less thinning of the material being sprayed which leads to fewer coats needed overall, saving you money in the long run too.
When investing in a quality paint sprayer, many factors should be taken into consideration such as price range, features offered, and the size of the job or jobs you plan to complete. Having all this information ready will help make decision-making easier when it comes time to buy or rent one. Taking these steps now can ensure that your next painting project is a success from start to finish - and beyond! Now let's look at the pros and cons of purchasing an airless paint sprayer versus renting one.
When it comes to deciding between buying or renting a paint sprayer, there are several pros to investing in the equipment. First and foremost is the convenience of having your own airless spray gun at home. With no need to go out and rent one every time you want to use it, you can always have access to the tool when needed. Additionally, owning a paint sprayer means that you will not be limited in terms of usage, as some rental companies may require that only certain types of paints be used.
Another benefit of buying a spray gun over renting one is that you can get more specific with the type of job you need to do. If you buy multiple different types of guns such as HVLP (high volume low pressure) and LVLP (low volume low pressure), then you’ll be able to choose which works best for each project. Furthermore, having your own tools also allows for greater control and accuracy than what could possibly be achieved with manual brushes, rollers or rented equipment.
Finally, purchasing an airless paint sprayer makes financial sense if you plan on painting regularly since the cost per job is significantly lower compared to using traditional methods like paint brushes or rollers. This way, any savings can be put toward investment into higher quality materials or even additional equipment like sanders and saws.
For those considering buying a paint sprayer, the cons can be significant. Buying a paint sprayer upfront is usually more expensive than renting one. If you don’t use your device regularly or need specific features that are only available with certain models then you may end up spending more than necessary. Furthermore, purchasing parts and supplies can become quite pricey due to the limited availability of compatible components for certain brands.
Finally, even when using high-quality equipment there's always a chance something could go wrong during operation, requiring additional maintenance and repair costs. This means it's important to factor-in potential extra expenses into your budget before committing to buy any type of spray gun or related tools since unexpected issues could arise at any time.
All things considered, while buying an airless paint sprayer has its advantages – such as having access to better technology and greater control over projects – there are many risks associated with ownership that must be taken into account prior to making a decision. Next, we'll look at how renting might provide an alternative option with fewer drawbacks attached.
Renting a paint sprayer has its advantages. The primary benefit is that it eliminates the expense of purchasing one outright, which can be quite costly. Renting instead allows you to get the job done without investing in a piece of equipment that you may only need once or twice. It also means there are no maintenance costs associated with ownership since all maintenance and repairs are handled by the rental company.
Another advantage of renting a paint sprayer is that it gives you access to professional-grade tools at an affordable price. Professional models have features such as adjustable pressure settings, large tanks for larger projects, and anti-clog technology for uninterrupted use throughout your project. These features make them ideal for large painting jobs that require precision and accuracy.
Finally, if you do decide to rent a paint sprayer, there are plenty of options available online or from local hardware stores so you don't have to travel far to find what you need. You'll also benefit from customer service and support when needed and can often secure discounts for multiple rentals or longer rental periods. This makes renting cost-effective and convenient, whether you're tackling small projects around the house or taking on something more ambitious like repainting an entire room.
With these benefits in mind, it's easy to see why many people opt for renting over buying when needing a paint sprayer for their project. Transitioning into the next section about ‘renting a paint sprayer: the cons’ will help provide further insight into making this important decision.
Despite the advantages of renting a paint sprayer, there are also some drawbacks to consider. Firstly, it can be expensive to rent one, as you will need to pay for the rental fee and any additional charges such as insurance or a bond. This could mean that in certain cases, it may be more cost-effective to buy your own airless paint sprayer instead.
Another disadvantage is that if you damage the machine during use, then you’re responsible for the repair costs which can add up quickly. While the result would be the same if you owned the equipment yourself, you may not have the option of getting it repaired in your own time.
Also, depending on how long you plan to hire it for, it can take time to get used to operating a rented unit correctly and safely – this might not be ideal if you’re working under tight deadlines.
Finally, many people who opt to rent a paint sprayer find they have limited options when it comes to choosing different models or features. With so much variety on the market today, this could put a limit on what kind of job quality you’re able to achieve with your project. So before making a decision about whether renting is best for you or not, weigh up all these pros and cons carefully.
If you're looking to hire a spray gun for your renovation project or new home build, PaintAccess is an excellent option to consider. We offer a wide range of spray guns for hire, including the popular Graco Ultra 390 PC electric airless paint sprayer and the Graco Ultra Max II 695 electric airless paint sprayer, among others. With affordable prices and flexible hire periods, PaintAccess makes it easy to choose the duration that suits your project and saves you money in the process.
When you choose to hire a spray gun from PaintAccess, you'll benefit from our high-quality equipment, comprehensive training, and free delivery to most locations in Australia. This means you can focus on your project without worrying about transportation or complicated set-up processes.
It's important to consider any additional costs when hiring a spray gun, such as hiring ladders, scaffolding, and purchasing paint or primer as it's not typically included in the hire cost.
When it comes to DIY projects or new home builds, hiring a spray gun can be a cost-effective way to achieve a professional-looking finish. By choosing PaintAccess for your hire needs, you can be confident that you're getting high-quality equipment at a competitive price, and our free delivery service ensures a hassle-free experience.
Spray Gun Model |
Hire Cost Per Day |
3 Day Hire Cost |
7 Day Hire Cost |
Savings with 3 Day Hire |
Savings with 7 Day Hire |
Graco Ultra 390 PC electric airless paint sprayer |
$250 |
$499 |
$1050 |
$251 |
$700 |
Graco Ultra Max II 695 electric airless paint sprayer |
$399 |
$800 |
$1650 |
$397 |
$1143 |
The longevity of a paint sprayer is an important factor to consider when deciding whether to buy or rent one. How long will a paint sprayer last? It's hard to pinpoint precisely, but with proper maintenance and care, it can be used for many years.
There are several variables that affect the lifespan of a paint sprayer. One key component is the quality of materials and parts used in its construction; higher-end models tend to have more robust components that stand up over time better than cheaper versions. Other factors include how often the device is used, as well as how carefully it’s maintained and stored.
Regular cleaning after each use not only helps keep your airless paint sprayer operating smoothly but also helps prevent corrosion from forming on internal parts which could shorten its lifespan. In addition, regular inspection for worn down seals and gaskets should help you identify any potential problems before they become too serious, allowing you to take corrective action sooner rather than later. Taking these steps will ensure your tool lasts longer and serves you well for years to come.
Making sure you invest in a high quality product and taking good care of it is essential if you want your airless paint sprayer to last as long as possible. With diligent effort and some thoughtful measures taken along the way, you'll be able to enjoy the benefits of this handy tool for many projects ahead!
Maintaining a paint sprayer can be like taking care of a beloved pet. Just as with any mechanical device, if it is properly cared for, it will provide years of use and enjoyment. That being said, there are some important steps to take in order to keep your paint sprayer running smoothly.
First off, regular cleaning is key to maintaining the effectiveness of a paint sprayer. After each use, you should thoroughly clean out all parts of the machine using warm water and an appropriate detergent or cleaner designed specifically for airless paint sprayers. Additionally, replace worn-out nozzle tips regularly to ensure that you get consistent application results when painting surfaces.
Finally, performing periodic inspections on the pump itself is also important to make sure its components such as seals and hoses are functioning properly. It's recommended that you check these parts every few months (or after completing major projects) and replace them if necessary—a relatively easy task that doesn't require much time or effort but could save you from bigger problems down the road. Like oiling machinery before storing it for winter, having routine maintenance done on your paint sprayer helps protect its performance over time.
Overall, proper maintenance requires just a bit of attention and knowledge; however, it pays off in spades by extending the life of your paint sprayer while ensuring optimal performance whenever you need it most.
Using a paint sprayer can be an intimidating task when first starting out, but with the right knowledge, it is not as difficult as one might think. Paint spraying requires some level of skill and practice to get the desired result, but with proper techniques, anyone should be able to use it without too much trouble.
When using a paint sprayer, there are certain steps to take in order to ensure that the job is done properly. First, you'll need to prepare the surface by cleaning off any dirt or debris and making sure it's smooth before beginning your project. You also need to mix up the correct ratio of paint and thinner for the best results. Once everything is prepped, you're ready to start painting. It is important to keep your gun moving at all times while spraying so that you don't apply too much pressure on one spot which could cause dripping or uneven coverage.
The most important thing about using a paint sprayer is safety. Make sure you wear protective gear such as goggles and breathing masks when working with volatile chemicals like paint thinners and solvents. Additionally, you should always clean your equipment after each use so that it does not become contaminated with other substances which can lead to problems down the line. With these simple tips in mind, anyone can easily use a paint sprayer with great success!
When it comes to painting, using a paint sprayer can be an absolute game-changer. It's not only faster than traditional brushing and rolling – it's also much more fun! But if you're planning on buying or renting one of these magical devices, there is something even more important to consider: what type of paint should you use?
The choice here is almost overwhelming; with so many different types of paints out there, how do you know which one will work best for your project? The answer really depends on the kind of finish that you want. For example, if you need a smooth, glossy finish then a high-quality acrylic or oil-based paint will usually provide excellent results. On the other hand, if your goal is simply to get some colour onto the walls quickly then an all-purpose latex paint could be just as effective.
It's worth experimenting with different kinds until you find a combination that works best for your particular needs. And remember: no matter which type of paint sprayer you choose in the end (whether it’s bought or rented), taking the time to select the perfect type of paint can make all the difference between success and failure when tackling any DIY project!
So, is renting a paint sprayer worth it?
Renting is a great way to get specialist equipment like an airless paint sprayer without investing in one that you might not use again. That means if you're painting something small, looking to complete a small project, or finishing the last few components of a renovation, renting a paint sprayer can be a great option. Buying a paint sprayer means making a significant investment, so it's really only worthwhile if you have a large job, or multiple jobs, to complete.
Graco describes the Ultra QuickShot as, “the fastest way to complete all small jobs” and the, “ultimate hands-free portability with a perfect airless finish”. Our team at PaintAccess agrees and we’re just 1 month away from the QuickShot being available in store and online.
Ahead of its arrival in Australia, we had the privilege of a demonstration from Graco’s rep Grant who showed us just how easy the QuickShot is to use. The Ultra QuickShot fills a gap in Graco’s product range between the hand-held Ultra Max and the “entry level” GX19 range. The QuickShot doesn’t pretend to be either of those, though, and has a range of unique features.
It feels familiar and you’ll know you’re using a Graco paint sprayer, but some of the key components might not be where you expect them to be. The pressure dial at the back of the unit, for example, and the gravity-fed pour-n-go cup reservoir with built-in filter. It also boasts the lightest trigger-pull of any airless paint sprayer. Impressive! The airless spray control means you'll be able to achieve a quality finish every time.
The Ultra QuickShot is a fantastic little machine and one we think will be a game-changer for the painting industry. That’s because it’s a great value-add for professional painters who don’t want the hassle of preparing and priming a large airless paint sprayer just to complete a small task or a task in a hard-to-reach area. It’s also a must-have for DIY painters who want the convenience and professional results of an airless paint sprayer without the price tag.
Let’s cover some of the basic questions that tradies and DIY painters might have about the Graco Ultra QuickShot. To help you, we’ve published a video right here.
Without overdoing it, the simple answer is: everyone. No, seriously. It’s a great unit for professional painting tradies who have one or more larger Graco units and want a fantastic, smaller airless paint sprayer for those finishing touches, forgotten corners, thin spots, and small jobs. It will save you having to prepare and prime a larger unit and you can just fill the pour-n-go cup with paint and get started.
It’s a great choice for general tradies and handymen who want an airless paint sprayer for small jobs without committing to a much larger and more expensive unit. It’s also a great entry-level for handymen who do some painting and would like to step up their painting game before getting a painting licence.
Finally, it’s a great unit for DIY painters. It will handle most amateur and home painting jobs with ease and then can be packed away for the next job. If you’re not using a paint sprayer every day but you paint often enough that you have developed some skills, the QuickShot is undoubtedly your best option. Not too small, not too big… it’s just right.
Pros |
Cons |
Small enough to be carried around, which means access to a wider range of areas, including tight spaces. |
Might be too small for some larger jobs. |
Cheaper than most other professional-grade airless paint sprayers on the market. |
Not designed to be used all day, everyday by a professional painting tradie. |
Universally Graco parts and components you’re already familiar with and trust. |
Some unique design elements that might take some getting used to for experienced Graco aficionados. |
Quick-loading, 1.2 litre pour-n-go cup reservoir holds the paint you need for most small jobs. |
Cannot be connected with a larger reservoir or bucket of paint so is limited to small jobs requiring a small amount of paint. |
Comes with 2 x 18w DeWalt batteries which have a strong track record and are trusted by professional tradies around the world. |
Battery operated only which means you need to wait for 1 of your 2 batteries to be charged before you can start. |
The lightweight portability of the Graco Ultra QuickShot means it’s a great little unit for completing a wide range of small jobs; in short, it does what it says on the box. It has been designed with portability in mind, which means it can be moved around from job to job with ease. Whether you’re painting inside or outside, the Graco Ultra QuickShot is the tool you need. Here are just some of the small painting jobs that are perfect for the QuickShot:
Using an airless paint sprayer can be a great way to quickly and efficiently paint a wide range of surfaces. However, it's important to take proper precautions to ensure your safety and achieve a professional-looking finish. Here are some tips to keep in mind before using an airless paint sprayer:
By following these tips, you can achieve a professional-looking finish with an airless paint sprayer while staying safe and protecting your health.
In the United States, where the Graco Ultra QuickShot has been available for a few months, contractors and tradies are already raving about it:
The great news is that this amazing little unit is available to pre-order right now at PaintAccess. Along with stocking a full range of Graco genuine parts and accessories, PaintAccess will be one of the first paint equipment retailers to get Graco Ultra QuickShot stock. That means you can get one before anyone else, and get the edge over your competitors.
The Ultra QuickShot can be pre-ordered from PaintAccess now ahead of its Australian release in June. If you want to get your pre-order in, contact the PaintAccess team, get yours as soon as they go on sale, and be the envy of every painting tradie in your area.
PaintAccess has the widest range of Graco airless paint sprayers and has everything painting professionals need to get the job done. We have a wide variety of specialist items, including electric airless paint sprayers, corded sprayers, cordless airless paint sprayers, and handheld sprayers. We also service paint sprayers, perform pump swaps, and stock a range of high quality products and accessories for paint sprayers.
]]>Before diving into the colour selection, it's crucial to consider your home's architectural style. Classic Australian styles like Federation, Victorian, and Queenslander homes each have unique features that can be accentuated with the right colours. For example, a traditional Federation home might feature deep reds or greens, while a Queenslander may opt for lighter shades like white or pastel colours. Knowing your home's style can provide a solid starting point for your exterior colour scheme journey.
When selecting exterior colours for your Australian home, it's essential to factor in your surroundings. Assess the natural landscape, nearby homes, and even the local climate. If you live near the coast, consider coastal-inspired hues like sandy beige, soft blues, or crisp whites to complement the ocean backdrop. Alternatively, if your home is in a lush, forested area, earthy tones like olive green or warm browns may be a better fit. The goal is to harmoniously blend your home with its environment.
A well-balanced colour scheme includes a mix of bold and neutral colours. Bold colours can highlight architectural details, while neutral tones can tie the overall look together. For instance, you may want to paint your weatherboards or exterior walls in a neutral colour and then use a bold hue for the doors, window frames, and other details. This can create visual interest and add depth to your home's exterior.
There are some general guidelines when picking exterior paint colours. Warmer tones work well with neutral shades if your garden includes plenty of blue tones and greenery. A strong feature colour can help pick up bright colours throughout your garden or pops of colour from particular flowers and features. A dark colour works well if you have a sparsely planted front yard. Balancing colours can be the key to finding your perfect palette, but there are other things to consider too.
Your roof is a significant part of your home's exterior, and its colour should be considered when selecting your colour scheme. In Australia, Colorbond roofing is a popular choice, offering a wide range of colours to match your home's aesthetic. When choosing a roof colour, think about how it will coordinate with your exterior walls, trims, and other features. It's essential to strike the right balance between your roof and the rest of your exterior.
If you are repainting your home's exterior, consider whether roof restoration is a good first step before painting your roof to match your exterior house colours. Roof restoration is a great idea if your roof has chipped or cracked concrete tiles because it usually includes tile replacement, pressure cleaning, repointing, resealing and then painting. BorisDoes can help you find a roof restoration professional who can help you prepare your roof for painting and help you to put the finishing touches on your exterior painting project.
As you embark on your journey to choose the perfect exterior colour scheme for your Aussie home, it's essential to familiarise yourself with some of the popular colours available. These hues have stood the test of time, becoming go-to choices for many Australian homeowners.
Incorporating these popular colours into your exterior colour scheme can create a visually appealing and timeless look for your Australian home. Remember to consider your home's architectural style, surroundings, and personal preferences when making your final decision.
Consulting with a professional when choosing your home's exterior colour scheme can make the process much smoother and help you achieve the desired look. Professionals like colour consultants, experienced painters, and even architects can provide valuable guidance and expertise to ensure your colour choices create a cohesive and visually appealing exterior.
In addition to their expert advice, professionals can often recommend quality paint brands and products that will deliver the best results for your home's exterior. They may also have contacts in the industry who can help you source materials or complete the painting job. Investing in professional guidance when selecting an exterior colour scheme can save you time, money, and potential disappointment. With their expertise, you can feel confident that your home's exterior will look beautiful and stand the test of time.
Once you've narrowed down your colour choices, it's time to test them out. Collect colour swatches or purchase sample pots of your chosen colours and paint small sections of your exterior. Observe how the colours look at different times of the day, in varying weather conditions, and under different lighting. It's crucial to ensure that your chosen colours work well together and create the desired effect.
Consider any advice you got from professionals and decide whether their advice has produced the look you were after. It may be that you need to pick a colour a few shades lighter or darker than recommended once you have an idea of what it looks like in the context of your house exterior.
In conclusion, selecting the perfect exterior colour scheme for your Aussie home involves considering factors such as your home's architectural style, its surroundings, and striking the right balance between bold and neutral colours. By taking the time to carefully assess these factors and testing your chosen colours, you'll be well on your way to creating an exterior that enhances your home's curb appeal and sets it apart from the rest.
BorisDoes has a great range of painters, colour consultants, and designers ready to help you find the perfect colour combination for the exterior of your home. Simply choose a service subcategory, read some reviews from previous Customers, and pick the right Tasker or Business for your exterior paint job.
]]>When it comes to painting a surface, using the right products is crucial to ensure the final result looks great and lasts a long time. This is where sealer, undercoat, and primer come in. These products provide a base layer for the paint to adhere to, improve durability and longevity, and prevent imperfections and bleeding. Some of the most popular brands that offer these products include Rust-Oleum, Zinsser, and Haymes.
In this article we’ll describe the differences between sealer, primer and undercoat and explain how each one is used.
Primer and undercoat are both used as a base layer for paint, but they have different purposes and applications. Primer is used to create a smooth and consistent base for the paint to adhere to, as well as to improve the durability and longevity of the topcoat. It can be used on a variety of surfaces, including metal, wood, and plaster. Undercoat, on the other hand, is primarily used on surfaces that have been previously painted. Its purpose is to cover any imperfections, such as scratches or small dents, and create a smooth surface for the topcoat to adhere to. Undercoat can also help to prevent the previous paint from bleeding through the new topcoat.
While both primer and undercoat are used as a base layer, they have some differences. For example, primer is usually applied to new surfaces, while undercoat is used on previously painted surfaces. Additionally, primer requires fewer coats than undercoat and can be used on a wider range of surfaces.
A sealer is a type of coating that is used to seal a surface before the application of the topcoat. Sealers are typically used on porous surfaces, such as concrete or brick, to prevent the topcoat from being absorbed into the surface. They can also be used on surfaces that have been stained or painted previously to prevent the colour from bleeding through the new topcoat.
Compared to primer and undercoat, sealer is different in that its primary purpose is to seal the surface, rather than to create a base for the paint. Sealer is typically used on surfaces that are more prone to bleeding or absorption, and it is often used in conjunction with primer or undercoat.
It is not recommended to use one product in place of another, as they serve different purposes. For example, while paint sealer can be used to seal a surface, it is not recommended to use it as a primer or undercoat. Similarly, while an undercoat can be used as a primer, it may not provide the same level of adhesion and durability as a dedicated primer product.
The number of coats of primer, undercoat, and sealer needed will depend on the surface and the type of product being used. As a general rule, one or two coats of primer are sufficient for new surfaces, while two or more coats of undercoat may be needed for previously painted surfaces. Sealers typically require one coat, but multiple coats may be needed for very porous surfaces.
It is not always necessary to sand primer before sealing, but it may improve adhesion and durability. The time between applying primer and sealer will depend on the specific product being used, so it is important to read and follow the manufacturer's instructions.
When choosing a primer, undercoat, or sealer, it is important to consider the surface being painted. Different products are designed for different surfaces, such as wood, metal, or concrete. It is important to choose a product that is compatible with the surface to be painted to ensure maximum adhesion and durability.
In addition to the type of surface, it is also important to consider the type of paint being used. For example, if you are using an oil-based paint, you will need a primer that is compatible with oil-based paints. The same goes for water-based paints.
While primer, sealer, and undercoat are often used interchangeably, they are different products with different purposes. Primer is used to create a base for the paint, improve adhesion, and prevent stains and bleeding. Sealer, on the other hand, is used to seal the surface and prevent the topcoat from being absorbed or bleeding through. Undercoat is used to cover imperfections and create a smooth surface for the topcoat to adhere to.
Choosing the right product for the job will depend on the surface and the type of paint being used. For example, if you are painting a new surface, a primer will likely be sufficient. However, if you are painting over a previously painted surface, you may need an undercoat to cover imperfections and ensure a smooth surface for the topcoat. If the surface is porous, such as concrete or brick, a sealer may be necessary to prevent bleeding or absorption.
For further clarity and an in-depth understanding of the differences between sealer, undercoat, and primer, we invite you to watch our detailed video.
When it comes to painting a surface, using the right products is crucial to ensure the final result looks great and lasts a long time. Sealer, undercoat, and primer are important base layers that improve durability, prevent imperfections and bleeding, and create a smooth surface for the topcoat to adhere to. While they are often used interchangeably, they have different purposes and applications. It is important to choose the right product for the surface and type of paint being used to ensure maximum adhesion and durability.
When choosing a primer, undercoat, or sealer, it is important to consider the surface being painted and the type of paint being used. Using the wrong product can lead to poor adhesion and durability, and can cause the paint to peel or flake off. To ensure the best results, it is important to follow the manufacturer's instructions and choose a quality product from a trusted brand.
In addition to choosing the right product, it is also important to apply the product correctly. This includes using the appropriate number of coats, allowing each coat to dry completely before applying the next, and ensuring the surface is clean and free of debris before applying the product.
By using the right products and applying them correctly, you can ensure the best results when painting a surface. Whether you are a professional painter or a DIYer, choosing a quality primer, undercoat, or sealer from a trusted brand like Rust-Oleum, Zinsser, Haymes can help you achieve a smooth, durable finish that will last for years to come.
In conclusion, sealer, undercoat, and primer are essential products for achieving a smooth, durable finish when painting a surface. While they all serve as a base layer for paint, they have different purposes and are designed for different surfaces and types of paint.
Primer is used to create a smooth and consistent base for the paint to adhere to, as well as to improve the durability and longevity of the topcoat. The undercoat is primarily used on previously painted surfaces to cover imperfections and create a smooth surface for the topcoat to adhere to. Sealer is used to seal porous surfaces and prevent the topcoat from being absorbed into the surface or previous paint from bleeding through.
By choosing a quality product and following the manufacturer's instructions, you can achieve a smooth, durable finish that will last for years to come. Whether you are a professional painter or a DIYer, sealer, undercoat, and primer are essential tools to help you achieve the best results when painting a surface.
]]>
If you're a DIY painter in Australia, you know that choosing the right type of paint is essential for the success of your painting project. In this post, we'll compare oil-based and water-based paint, highlighting their advantages and disadvantages to help you make an informed decision. Whether you're painting a whole room, a single wall, or a piece of furniture, understanding the differences between these two popular paint types is crucial.
The uninitiated will tell you that the big difference between water-based paint and oil-based paint is the smell. While that might be true in some instances, water-based acrylic paint can have a strong odour, while some natural-oil paints aren't particularly on the nose.
So what are the technical differences? In this post we'll describe some of the differences in detail and give you some tips about the type of paint you should choose for your paint job.
Oil-based paint, also known as solvent-based or alkyd paint, has long been the go-to option for painters looking for a durable, high-gloss finish. Here are some of the key advantages and disadvantages of oil-based paint:
Water-based paint, commonly known as acrylic paint or latex paint, has become increasingly popular among Aussie painters due to its eco-friendliness and ease of use. Here's a breakdown of the advantages and disadvantages of water-based paint:
The choice between oil-based and water-based paint ultimately depends on your project's specific requirements and your personal preferences. Here are some general guidelines for Australian painters:
Remember to consider local Australian regulations regarding paint disposal and VOC emissions before making your decision. Many states and territories have implemented guidelines or restrictions on the use of high-VOC paint products.
Both water-based and oil-based paints can include chemicals and additives that cause skin irritation and breathing difficulty for some people. Be conscious of any allergies you might have and get a sample of the paint you plan to use before committing to enough paint for your whole paint project.
Both types of paint come in a range of colours and there are different paints for interior and exterior applications in both categories.
Regardless of which paint type you choose, following some best practices will ensure a successful painting project:
PaintAccess can help you find the right paint, and can supply all the tools and painting accessories you need to ensure you get the sort of long-term performance from your painted surfaces that you want. Whether you're painting a ceiling inside or rendered exterior walls, PaintAccess has the best range and prices for professional and amateur painters.
In conclusion, understanding the key differences between oil-based and water-based paint is essential for Australian painters to make the right choice for their painting projects. By considering factors such as durability, environmental impact, drying time, and ease of use, you can select the ideal paint type for your specific needs and preferences. And by following the tips mentioned above, you'll be well on your way to a successful painting project with a beautiful, long-lasting finish.
Come and see Dan and the team - or shop online - to get the paint and painting accessories you need to start your painting project today.
]]>