
Learning how to paint a wall properly will save you a lot of headaches. Worn down walls are an eyesore and affect our moods, a fresh coat of paint is a relatively simple DIY task that you can do like a pro with the right paint, equipment and guidance.
Before You Begin
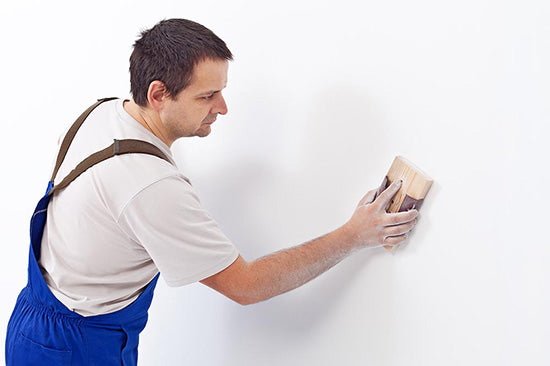
The first step before reviving your walls with fresh paint is preparation. Prep work doesn’t take much extra time at all and proper preparation will give you a much better result in the end. Our Paint preparation guide will take steps involved in proper painting preparation. Also remember, that you should be painting from the ceiling down, so plan ahead for this.
Usually prep - Using the right sandpaper used with a pole sander and light filler to fill small holes.
You’ll want to decide on what paint you want to use, with paint being available in many sheens as well as water based or oil based, you may feel a little unsure of what to pick. The most commonly used paint is water based, it’s highly durable and easier to clean up, it also breathes better than oil and doesn’t fade as much. For interior walls, water based paint is generally the go.
The choice of sheen and colour for your walls is such a personal preference and is going to vary person to person, we have a great guide to choosing paint that will help you make the best choice. In most cases low sheen is most suitable.
Get All The Essential Tools and Materials
Before beginning to paint, you should make sure you have everything you need, that will save you from having to make any further delays after you have begun prepping.
We stock everything you could possibly need, and here is a shopping list of things you will need for painting your walls.
| Tools & Equipment | Materials |
|---|---|
| Roller | Wall Paint |
| Roller Tray | Ceiling paint |
| Paint brush | Masking tape |
| Sandpaper | Primer |
| Goggles | Filler |
| Drop Sheet |
Painting Corners (cutting in) for feature walls
When painting corners, you need either masking tape or a steady hand. You can experiment with both and see which works better for you.
If you opt in for painting with masking tape, go for a high quality green or blue masking tape.
- With a dry cloth, wipe down the surface you are planning to apply the masking tape to, apply the tape to the edge, making sure it’s applied in a straight line and hasn’t been stretched out.
- Once the masking tape is properly in place you can start painting, allow the paint to dry for around 20-30 minutes before attempting to remove the painter’s tape, if you let it dry for too long you may rip some paint when removing the tape.
- A great way of ensuring a straight and clean edge is to score along the paint line using a quality utility knife such as an olfa knife, then carefully and slowly pull the tape off. Angle the tape at 45 degrees while pulling, so it comes off more cleanly.
The other option of ‘cutting-in’ or freehand painting requires no tape. For this method you need a high quality trim brush with a width of around 2 - 2.5 inches wide. You only need to dip an inch of the brush into the paint, too much will make it harder to control. When cutting in, you will generally have more control when you are pulling the brush towards yourself rather than pushing it out.

Rolling Paint on Ceilings & Walls
Once you have prepped the walls and ceiling, you can get ready to paint. It’s a good idea to dilute the paint using water or paint thinner by 2-3%, this will help in reducing the orange peel effect often left by rollers.
- Using a medium sized paint roller, with telescopic pole, which will hold enough paint to cover large areas at one time.
- Pour enough paint into the paint tray, but not so much paint that it will come up over the paint distributor part of the roller tray. You’ll want to only dip half of the roller into the tray, then roll it back and forth to evenly distribute the paint on the roller. To remove excess paint on the sides, tap the sides of the roller against the tray.
- Using your telescopic roller, start painting the ceiling, making W shapes. You want to start the roller from the edge of the wall and work towards the middle of the ceiling and towards the skirting.
- Once you have coated the half the ceiling, using just the roller without adding paint, go over the painted areas. This will help in removing excess paint and evening everything out for a better finish.
- Repeat this process until the whole ceiling is complete.
- Let the paint dry and make sure to wait two hours before applying the second coat of paint.
You always want to work from the ceiling down… So once you have finished painting the ceiling, you can move onto painting the walls.
You will want to select the correct roller for the job. For gloss and semi-gloss applications, 6-8mm nap covers are the best choice. 10-12mm nap covers are best for flat paints and low sheens. For painting on rough surfaces, 20-23mm nap covers are generally the most suitable.
- Before you begin painting, wash the roller sleeves in order to de-fuzz them.
- Pour the paint into the roller trays reservoir, be careful not to overfill.
- Lightly dip the roller into the paint, being conscious not to cover too much of the roller with paint. Paint should only cover around half the roller. Roll the roller up and down on the trays ramp, evenly distributing the paint on the roller.
- Start painting the wall, rolling in zig zag “W” patterns, then fill in the remaining spaces.
- After you have covered the wall with paint and before the paint begins to dry, level the finish with long straight strokes.
- Once you have finished painting make sure to clean your roller completely.